This article was co-authored by wikiHow Staff. Our trained team of editors and researchers validate articles for accuracy and comprehensiveness. wikiHow's Content Management Team carefully monitors the work from our editorial staff to ensure that each article is backed by trusted research and meets our high quality standards.
There are 14 references cited in this article, which can be found at the bottom of the page.
This article has been viewed 25,167 times.
Learn more...
Cedar is a beautiful wood, and it can be kept that way when stained properly. To stain cedar, you must understand your needs, how to prepare the wood for the process, the staining technique, the best brushes to use, and the cleanup process. Giving your cedar siding a nice tint will add beauty, durability and value to your home. From choosing the right stain to checking the health of the wood, we’ll walk you through the best ways to apply exterior wood stain to restore and protect the cedar siding on your house.
Steps
Choosing a Stain for Your Cedar
-
1Use a transparent stain to show off the wood’s natural grain. Transparent stains have few pigments, so they do not change the appearance on cedar siding. Overtime the wood will still turn gray.[1]
- Some transparent stains have ultraviolet inhibitors and wood preservatives, but many do not. You will need to refinish your cedar siding annually if you use a transparent stain.[2]
-
2Apply a semi-transparent stain to show off your cedar’s best assets. Semi-transparent stains allow some of the wood grain to show through. Semi-transparent stains are not as weather resistant as solid stains, and they need to be refinished every two years.[3]Advertisement
-
3Choose a solid stain for cedar if seeing the grain isn’t important to you. Also called opaque stains, they are made in a variety of colors and look like paint. Solid finishes also build up a film over time, especially after several coats. This leads to chipping and peeling. [4]
-
4Examine the current stain on your cedar. Is it coated with anything currently, or is it bare? If it’s bare, you can use whichever stain you want. But if it already has a film finish, reapply the same finish that’s already on your cedar.[5]
- Don’t use an oil-based stain to cover a water-based stain, because it won’t cover it. However, water-based stains will cover oil-based ones.[6]
-
5Apply any penetrating stain to cedar, because it’s a soft wood. Other woods, such as mahogany and ipe are harder, so they need different kinds of staining. [7]


Preparing the Siding for Staining
-
1Examine the surface for defects. Look for problems such as rot, mildew, dust, dirt, cedar bleed and chalkiness. Clean all such contaminants from the surface of the wood. Each of these issues has its own solution, and for staining to work properly, you must clean these contaminants off your wood.[8]
- To remove mildew, dirt, soot and other pollutants use a cleaning solution that contains sodium hypochlorite, an active ingredient in household bleach; sodium metasilicate, a non-ammoniated detergent/wetting agent; and calcium hypochlorite, a strong oxidizing agent.[9]
-
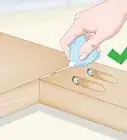
2Test for chalkiness. Rub your hand or a clean cloth over the wood’s surface. If there is flaking on your hand or cloth, that means the former stain application is breaking down and causing the chalkiness. If chalkiness is left on the wood, it will cause an uneven texture when the stain is applied. [10]
- To remove chalkiness, clean it using a detergent that contains the active ingredient sodium metasilicate.[11]
-
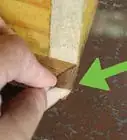
3Test for cedar bleed with a ferrous sulfate solution. Also known as tannic acid, this is a reddish-brown discoloration that makes an old stain application look splotchy and uneven.[12]
- Apply a ferrous sulfate solution to the discolored surface. If the solution turns blue-black, that means you have cedar bleed.[13]
-
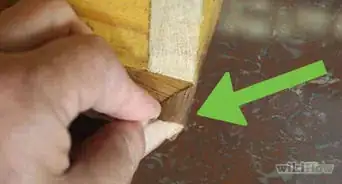
4Remove cedar bleed with an oxalic acid solution. If discoloration is left on wood, the stain will appear blotchy and uneven. Oxalic acid works to remove cedar bleed and nail and rust stains.[14]
-
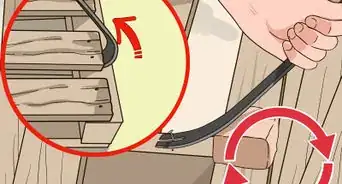
5Protect your cedar from the elements. New cedar is vulnerable to the elements, and has not yet been weathered. It should be protected from the weather before, during and after using it for construction.[15]
- Check the cedar’s moisture content even if it has been protected from the weather. It shouldn’t need extensive surface examination if it was well sheltered, but it never hurts to look for moisture before staining. The moisture content should not reach above 20%. Any contaminants must be removed in the event that the cedar was affected.[16]
- You may want to do some surface preparation with smooth-planed, flat-grained cedar. A flat-grained wood surface should be scuffed-sanded with 50-60 grit sandpaper in order to increase the coating’s performance while still maintaining a smooth appearance.[17]
- Clean-textured cedar does not require surface preparation. [18]
-
6Remove sawdust by wiping with a sticky cloth. When wood is new, it still has a layer of sawdust on it. Wiping away sawdust is important to the staining process, because clean wood ensures an even stain. Remove sawdust by using a sticky cloth to wipe it away.[19]
- For larger projects, use a power washer to clean the surface, but give the wood a full day to dry before staining it.[20]


Staining the Cedar
-
1Protect surrounding areas from dripping stains. Use a drop cloth to cover the ground, patio furniture, the yard, your porch and anywhere else you don’t want stain to spill.[21]
-
2Plan to stain your cedar in the shade on a hot day. Wood and staining can be affected by weather conditions such as humidity, rain, sun and heat. If you’re applying the finish in direct sunlight, the stain will be more prone to flaking. If the wood is out in the humidity it will trap too much moisture. Moisture in the wood could make the staining less affective.
- Limit sun exposure and work in the shade when you’re staining your cedar. The sun heats up the surface of the wood and dries the stain too quickly. This means that the stains won’t penetrate the wood, and it will form a film on the surface and then peel. Always stain in the shade.[25]
- The best time of day is the morning or late in the day.[26]
-
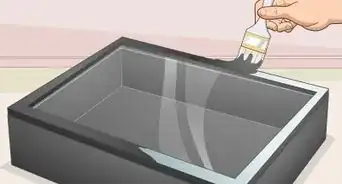
3Use a brush for smooth application of the stain. The back-and-forth motion of the brush forces the staining into the wood’s fibers. You may choose to spray or use a roller to apply the stain, but use a brush after to work the stain into the wood.[27]
- A brush is most affective for getting the stain into corners of the wood.[28]
- Paint and stain brushes are made with acrylic or natural bristles. Use a wide brush for covering larger areas at once, but it won’t allow for as much control as a smaller brush does.[29]
- Choose a brush based on the type of stain you’re using. Natural brushes work best for oil-based stains, and acrylic bristles work well with latex stains and paint.[30]
-
4Stain the cedar siding before hanging it, if possible. This will allow you to coat all sides and edges with no obstacles before hammering up the siding to your home.[31]
- Apply the stain front to back, top to bottom and on all the edges, because any areas of wood left exposed will be susceptible to water damage and chemical bleeding.
-
5Let your cedar rest after staining it. The wood should rest 24 to 48 hours while it dries, but some stains require you to allow the wood to rest for different lengths of time. The weather, local climate and humidity can affect the length of resting time, also.[32]
-
6Clean the surrounding area of any splatter. Rinse brushes and roller covers with warm water and soap if you used an acrylic or latex stain. Wash brushes with a mineral spirit if you used an alkyl or oil-based finish.[33]


Warnings


References
- ↑ https://www.consumerreports.org/cro/wood-stains/buying-guide/index.htm
- ↑ https://www.consumerreports.org/cro/wood-stains/buying-guide/index.htm
- ↑ https://www.consumerreports.org/cro/wood-stains/buying-guide/index.htm
- ↑ https://www.consumerreports.org/cro/wood-stains/buying-guide/index.htm
- ↑ https://www.thisoldhouse.com/ideas/all-about-exterior-stain
- ↑ https://www.thisoldhouse.com/ideas/all-about-exterior-stain
- ↑ https://www.thisoldhouse.com/ideas/all-about-exterior-stain
- ↑ https://www.naturalhandyman.com/iip/infpai/infsidingprep.html
- ↑ https://www.naturalhandyman.com/iip/infpai/infsidingprep.html
- ↑ https://www.naturalhandyman.com/iip/infpai/infsidingprep.html
- ↑ https://www.naturalhandyman.com/iip/infpai/infsidingprep.html
- ↑ https://www.naturalhandyman.com/iip/infpai/infsidingprep.html
- ↑ https://www.naturalhandyman.com/iip/infpai/infsidingprep.html
- ↑ https://www.naturalhandyman.com/iip/infpai/infsidingprep.html
- ↑ https://www.realcedar.com/siding/finishing/
- ↑ https://www.realcedar.com/siding/finishing/
- ↑ https://www.realcedar.com/siding/finishing/
- ↑ https://www.realcedar.com/siding/finishing/
- ↑ https://www.stormsystem.com/staining-resources/wood-staining-tips/
- ↑ https://www.stormsystem.com/staining-resources/wood-staining-tips/
- ↑ http://www.curtislumber.com/application-methods.asp
- ↑ http://www.curtislumber.com/application-methods.asp
- ↑ http://www.curtislumber.com/application-methods.asp
- ↑ http://www.curtislumber.com/application-methods.asp
- ↑ http://www.defywoodstain.com/why-deck-stains-peel/
- ↑ http://www.defywoodstain.com/why-deck-stains-peel/
- ↑ http://www.defywoodstain.com/why-deck-stains-peel/
- ↑ https://www.popularwoodworking.com/article/wipe-dont-brush-stain
- ↑ http://www.curtislumber.com/application-methods.asp
- ↑ http://www.curtislumber.com/application-methods.asp
- ↑ https://www.bhg.com/home-improvement/exteriors/siding/how-to-finish-cedar-shingles-and-siding/
- ↑ https://www.olympic.com/inspiration/articles/deck-ideas/wood-staining-guide
- ↑ http://www.curtislumber.com/application-methods.asp
- ↑ http://www.curtislumber.com/application-methods.asp
- ↑ http://www.curtislumber.com/application-methods.asp
- ↑ https://www.opwdecks.com/how-to-stain-a-cedar-house.htm
- ↑ https://www.opwdecks.com/how-to-stain-a-cedar-house.htm
- ↑ http://www.defywoodstain.com/why-deck-stains-peel/
- ↑ http://www.bearcreeklumber.com/general_info/pdffiles/wrc/GuidetoFinishingWrc.pdf
About This Article