This article was co-authored by wikiHow Staff. Our trained team of editors and researchers validate articles for accuracy and comprehensiveness. wikiHow's Content Management Team carefully monitors the work from our editorial staff to ensure that each article is backed by trusted research and meets our high quality standards.
There are 23 references cited in this article, which can be found at the bottom of the page.
This article has been viewed 25,201 times.
Learn more...
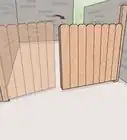
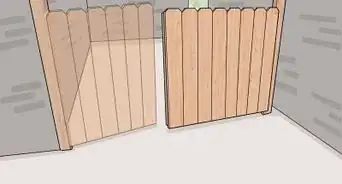
Fences frame gardens, provide wind protection and keep prying eyes out. After taking the time to build a wooden fence around your property, you’ll want to protect it from the elements and make sure it lasts. Staining a new cedar fence will keep it looking good, and add value and street appeal to your home.
Steps
Getting Ready to Stain the Fence
-
1Choose a high quality stain made for outdoor use. When selecting a stain for your fence, think about how much of the natural wood gain you want to show, and how the whole fence will look once it is painted. A good quality stain will enhance the appearance of the wood, protect the fence from moisture and cracking and retain its colour for longer.[1]
- Cedar wood stains come in a variety of solid/opaque, semi-transparent or clear finishes. Choose an oil or acrylic/oil blend that is suitable for exterior applications.[2]
- Before committing to a stain, and to be sure it’s the finish and colour you want, spot test a small amount by letting it dry.
-
2Work out how much stain you’ll need by measuring your fence. Measure the height of the fence x the width x the depth, for its total area. Write these numbers down and take them with you when you go to the hardware store to purchase the stain. Take into account how many coats of stain you need to apply and whether you’ll be staining the back of the fence as well.[3]
- Read the label on the can to determine how much surface area the product will cover.
- If you plan on using a spraying machine to stain the cedar fence, you will use more stain in the spraying process. Allow for this additional wastage.
- Always round up your calculations – it’s better to buy too much, than not enough!
Advertisement -
3Wear protective gear to avoid ruining your own clothes. When staining a fence, it’s inevitable that some of the stain will end up on you, your clothing and shoes. For this reason wear long-sleeved, old clothes under a pair of coveralls, work boots, and rubber gloves to avoid dirty, stained hands. A pair of safety glasses will protect your eyes from any stain or water spray.[4]
- Wear a dust mask if you’ll be applying stain with a spray machine.[5]
- You’ll be working outdoors for a long period of time, so make sure you also wear a hat and sunscreen to avoid getting sunburnt.
-
4Protect your garden plants and bushes with a drop cloth. Shield prized trees, larger plants and shrubbery from wet stain and any overspray with a light coloured sheet. Use cardboard boxes to cover your smaller shrubs and delicate plants, and create space between your fence, trees and bushes by covering them in sheets and using rope and stakes to hold them away from the fence line.[6]
- Don’t use black plastic sheets to cover your plants because heat from the sun will kill any plants under it.
- Make sure you water your plants before covering them so they don’t dehydrate.
- Place drop cloths underneath the fence to keep stain off your lawn.
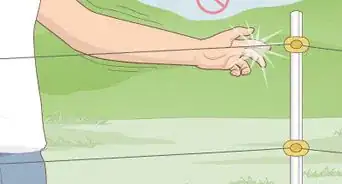
- Trim back any grass, trees or plants that touch the fence and will interfere with the staining process.


Preparing the Fence
-
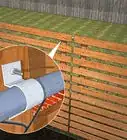
1Wash and clean down your fence to remove any dirt and grime. Your stain will apply much better to a well prepared, clean fence. Use a scrubbing brush, bucket of water and soap to clean off any visible dirt and marks. Take care of any mildew with a little bit of bleach in water.
- Rent a pressure washer down at your local hardware store to make cleaning your fence easier and much faster.[7]
-
2Make sure your fence is completely dry before staining it. Stain that is applied to a damp, moist surface won't adhere well, and will crack or peel. Depending on the weather, you may have to wait a few days after cleaning your fence for the wood to dry.
- Use a moisture meter to determine how dry your fence is before applying any stain. Moisture content of wood should be less than 12%.[8]
-
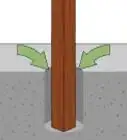
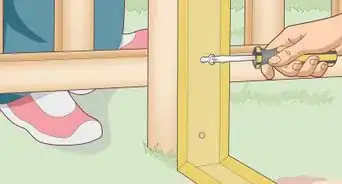
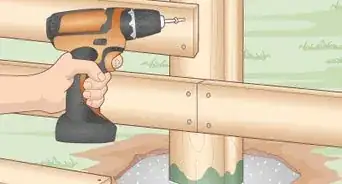
3Look for any visible surface problems and construction defects in your fence. A well-built, new cedar fence will have fewer surface problems than an old, existing one. Never stain cedar wood that is warped, dirty, stained or rotten. Remove it and replace it with new wood.[9]
- Clean or sand down any cedar that is dirty, stained or contaminated with mildew.
- Sand down any rough areas that might give you a problem when you apply the stain.


Applying the Stain
-
1Pour all of the stain carefully into a large bucket. This will make it easier to stir without spilling it. Don’t shake the can of stain first as this will only add bubbles. Colour pigment may have settled at the bottom of the can of stain and you’ll want to evenly disperse this throughout the liquid before starting.[10]
-
2Stir your stain with a clean stick or coat hanger. If the stain has separated, and you skip this step, it won’t produce an even coat. Stir your stain thoroughly for several minutes before applying it, and regularly during application.
- Stir the emulsion in a smooth figure eight motion until any, and all settlement is evenly dispersed.
-
3Use a natural bristle brush to apply fence stain. For a good result start with a good quality brush made with natural bristles. Apply stain to the fence working your way from the top to the bottom, left to right. Follow the grain of the wood and back brush as you go to ensure an even application.
- Use a 3-4 inch flat brush to stain wide, flat panels of timber and a smaller 2 inch angled brush for narrow spaces between planks of wood.
- Select a brush that is easy to control and feels good in your hand.[11]
-
4Fill a tray and use a roller to apply an even coat of stain to your fence. Using a roller is one of the best ways to stain a fence. Roll stain on with a roller, covering as much of the fence in one go as you can, then go behind the roller with a brush to fill in and cover any spots the roller missed.[12]
-
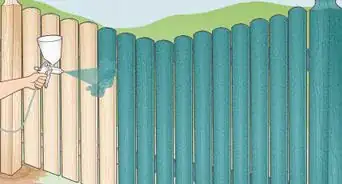
5Stain the cedar fence with a spraying machine. Using a sprayer to stain a fence is a lot faster than staining it with a brush or roller. Start spraying at the top of your fence and work your way down, moving the sprayer vertically to apply stain along the wood grain. Try to keep the same distance from the surface of the cedar fence – about 10-12 inches – and overlap each pass in a smooth spraying motion.[13]
-
6Allow the stained cedar fence to rest and dry between coats. How much drying time your fence needs will depend on the type of stain you are using and how you apply the stain. Other factors such as how long your fence is, the air temperature, and how much humidity is in the air, will also affect drying times.[16]
- Read the label on your can of stain for its recommended drying times.
- Check the stain is touch dry before you apply another coat.
- Store brushes in a sealed plastic bag and wrap rollers in plastic to avoid having to clean them between coats.[17]


Cleaning Up
-
1Remove any excess stain from your brushes and rollers. Place a plastic bag over your hand and squeeze any remaining stain out of your brush and back into the bucket, or can of stain. Remove as much from the roller as you can, by rolling and pressing it hard against the tray.[18]
-
2Clean your brushes and rollers with methylated spirits. To avoid stiff bristles and a useless brush or roller, clean rollers and brushes straight after you’ve finished using them. Rinse them several times in a tray or empty container filled with alcohol, methylated or mineral spirits.[19]
- Use an old toothbrush to clean your spray machine nozzle and any other attachments.
-
3Mop up any drips or spills with old rags or newspaper. Keep a bag of clean rags and a pile of old newspapers in your garage for cleaning, and just in case of an accidental spillage.[20]
-
4Dispose of any empty cans and store your leftover stain. Pour any stain left in your painting bucket back into its original can, or into a resealable container. Label the container so you’ll know what’s inside. Put lids back on any open cans of wood stain and wipe down any drips with an old rag.
- Store leftover cans of stain in a cool, dark place in your garage, basement or garden shed.[21]
- Take old and empty stain cans to your local rubbish tip for safe disposal.


Warnings
- Cedar wood is a yellow toned wood that will eventually turn silver-gray if not stained and regularly maintained.[24]⧼thumbs_response⧽


References
- ↑ https://ozcobp.com/choose-stain-color-fence-pick-fence-stain-shade-wont-regret/
- ↑ https://www.consumerreports.org/cro/wood-stains/buying-guide/index.htm
- ↑ https://www.house-painting-info.com/articles/estimating-paint-or-stain/
- ↑ www.cccfence.com/how-to-care-for-a-wood-fence/
- ↑ https://medicine.yale.edu/intmed/prep/worker/protection/respiratory.aspx
- ↑ https://www.thriftyfun.com/Protecting-Plants-When-Painting-Your-Home.html
- ↑ https://www.angieslist.com/articles/how-clean-your-cedar-fence.htm
- ↑ https://www.readyseal.com/step-step-properly-stain-fence/
- ↑ https://www.naturalhandyman.com/iip/infpai/infsidingprep.html
- ↑ http://www.resene.co.nz/archspec/cpd_earn_points/pdfs/CPD_understandingpaintwhatcangowrong.pdf
- ↑ https://www.consumerreports.org/painting/how-to-pick-a-paintbrush
- ↑ https://www.todayshomeowner.com/video/how-to-stain-a-wooden-fence-in-your-yard/
- ↑ https://www.thisoldhouse.com/how-to/how-to-stain-wood-fence
- ↑ https://www.diydoctor.org.uk/projects/stain-fence.htm
- ↑ https://www.wagnerspraytech.com/projects/fence-staining/
- ↑ www.penofin.com/product-support/applying-exterior-wood-stain
- ↑ https://www.uglyducklinghouse.com/how-to-keep-a-paint-brush-from-drying-out-and-save/
- ↑ www.resene.co.nz/homeown/how_to_diy/paint-cleanup-and-disposal.htm
- ↑ http://www.woodworkersjournal.com/cleaning-oil-stain-finish-brushes/
- ↑ http://www.resene.co.nz/homeown/how_to_diy/paint-cleanup-and-disposal.htm
- ↑ https://www.lowes.com/projects/paint-stain-and-wallpaper/store-dispose-paint-properly/project
- ↑ https://www.diydoctor.org.uk/projects/stain-fence.htm
- ↑ https://www.landscapingnetwork.com/fencing/height.html
- ↑ https://www.timbertown.com/redwood-vs-cedar/
About This Article