This article was co-authored by wikiHow Staff. Our trained team of editors and researchers validate articles for accuracy and comprehensiveness. wikiHow's Content Management Team carefully monitors the work from our editorial staff to ensure that each article is backed by trusted research and meets our high quality standards.
This article has been viewed 57,956 times.
Learn more...
Home furnaces are often turned off during the warm months to save electricity and fuel. Prep your furnace for startup when the cold months come by restoring the power supply to it and removing its front access panel. Adjust your furnace pilot light with a screwdriver, if necessary, or light the pilot by purging gas before igniting it. Activate your furnace by replacing panels and covers carefully and setting your thermostat. Troubleshoot common issues that arise, like dirty filters and blown fuses.
Steps
Prepping for Startup
-
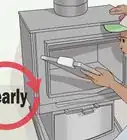
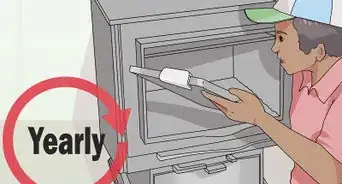
1Review the furnace instructions. Basic furnace operation and pilot lighting instructions are generally listed on a sticker attached to the front access panel. Improper usage or maintenance of your furnace could result in the furnace not functioning, fires, explosions, property damage, personal injury, or death.[1]
- Some furnaces may no longer have attached instructions or these may be difficult to read due to label dirtiness or deterioration. Your furnace user manual should include a copy of all instructions.
- If you’ve misplaced your manual, look it up online with a keyword search for the furnace make and model number.
- Because there are many different furnace designs, a diagram can be useful when locating various parts. Furnace diagrams are generally found in the user manual.
-
2Inspect the area around your furnace for gas and water. Smell the area around your furnace, including low to the floor. Some gas may be heavier than air and sink to the floor, escaping immediate notice. There should be no leaks or water on or around the furnace. Water can cause dangerous shorts in your furnace electrical components.
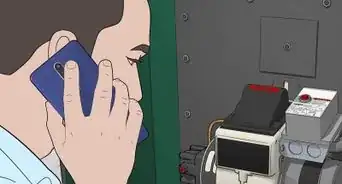
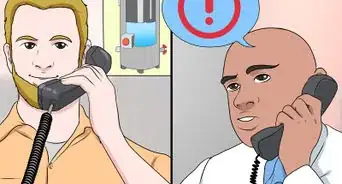
- If you detect gas, do not turn on any appliances, light switches, or phones. Evacuate the building completely and contact your gas company from outside or next door for further instruction.
- If there are leaks, turn off electricity to your furnace. Repair leaking pipes and dry the area completely before returning power to the furnace.
- If any furnace electrical components were submerged in water, do not turn the furnace on. Call a furnace technician to inspect your furnace and replace ruined parts.
Advertisement -
3Supply power to the furnace, if necessary. If your furnace has been off for the warm months, you may need to restore power to the furnace at your home electrical panel or fuse box. These are usually found in your basement, utility room, or garage. The furnace fuse or breaker should be in the “On” position.[2]
-
4Remove the front furnace access panel. The front access panel is often held in place with screws. Unfasten these, if necessary, with a screwdriver or suitable tool. Set the panel off to the side. Keep the screws in a location they won’t be lost, like in a plastic baggie.
- Taking off the access panel should give you an improved view of the pilot light. Additionally, some controls, like the gas supply, may be located behind this panel.


Adjusting and Lighting the Pilot
-
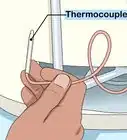
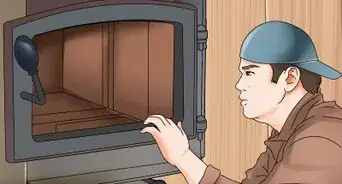
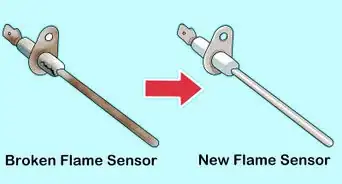
1Evaluate the flame of your pilot if it is lit. A description of the ideal flame for your pilot should included in your manual. Generally, the flame should not be excessively yellow, it should not be split into two or more flames, and it should not flicker or waver.
-
2Adjust the pilot light if necessary. Most pilot lights can be adjusted by turning a screw on the body of the pilot valve. Reach into the access panel and insert a suitable screwdriver into the slot of the pilot screw. Turn it counterclockwise to intensify the flame and clockwise to diminish it.
- Verify the pilot adjustment screw in the furnace manual before adjusting it. Turning the incorrect screw could dangerously impact the performance of your pilot.
- Depending on your furnace, the ideal pilot light may differ slightly. Most home models will have a full and steady flame that is between 1½ and 2 in (3.8 and 5 cm) tall.[3]
- After adjusting your pilot light, if its condition remains questionable, you be able to resolve the problem by turning off power and gas to the furnace and relighting the pilot.
-
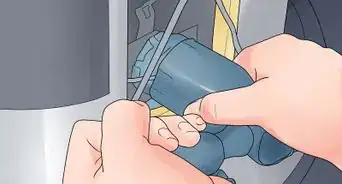
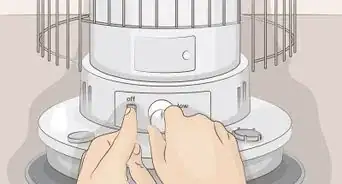
3Purge gas in the furnace for unlit pilots. Turn the power switch of the furnace to “Off.” The gas supply can usually be found along the furnace bottom, on its control panel, or inside the access panel. Turn the gas supply to “Off” and wait at least five minutes.
- Failing to wait at least five minutes could result in the gas not fully dissipating, which can cause fires when relighting the pilot.
- While waiting for gas to dissipate, locate the “Reset” button for your furnace. This is usually found near the gas supply controls.[4]
-
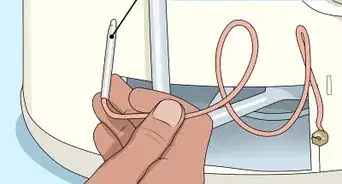
4Light non-auto igniter pilots with a long stem lighter. Hold a long stem lighter in your hand. With your free hand, set your gas supply to “Pilot.” Light the lighter. Press in and hold the “Reset” button. Bring the flame of the lighter to the opening of the pilot light. When lit, remove the lighter and release the “Reset” button. Turn the gas supply to “On.”
- Substitute long stem lighter for a long stem match. In a pinch, roll paper into a thin tube and light one end on fire. Use this as you would a match.
- In some cases, you may need to repeat the pilot lighting procedure more than once. The flame should be thick and steady, with a height of roughly 1½ to 2 in (3.8 to 5 cm).[5]
- If your pilot does not stay lit after 3 tries or does not burn as intended, turn off power and gas to the furnace and consult a furnace technician.[6]
-
5Wait for furnace activation to start pilots with an auto igniter. If your furnace instructions indicate it has an auto igniter, do not attempt to light the pilot by hand. Different models of auto ignition furnace may have different procedures for lighting. For this reason, follow the manual instructions to use this feature.
- Generally, furnaces with auto igniters must be turned off and purged of gas as usual. Access panels are then replaced and power restored to the furnace before a special thermostat setting or button, like one labeled "Call for Heat," is used to start the pilot.


Activating the Furnace
-
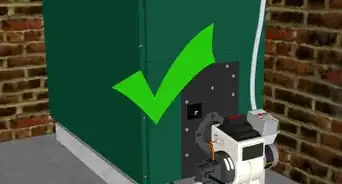
1Reattach the access panel. Fit the panel back in place on the furnace. Use your screwdriver or a suitable tool to refasten the panel in place. Access panels and door covers that aren’t properly reattached may prevent your furnace from starting.
-
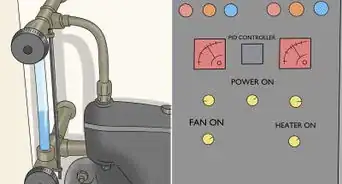
2Switch on the furnace. The “On” switch for most furnaces is usually placed at eye level or a little higher. This switch is frequently installed around the bottom of basement stairs, but it may also be found the furnace room. Set this switch to the “On” position.[7]
-
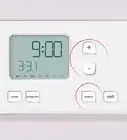
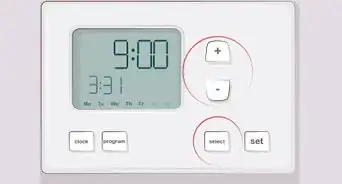
3Set the thermostat. The thermostat of your furnace should now have power. Select the “Heat” setting on the thermostat, then set the temperature to your preference. When the temperature drops below the thermostat setting, the furnace will turn on and heat your home.
- If you have a furnace with an auto ignition feature, usually this is the point you would trigger the igniter with a special thermostat setting or button, sometimes labeled "Call for Heat." Once lit, set your furnace to "Heat."


Troubleshooting Your Furnace
-
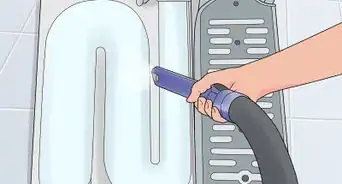
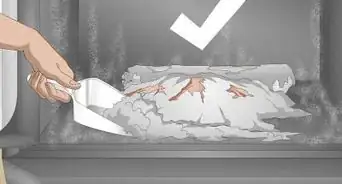
1Replace dirty furnace filters. Dirty filters are a common problem that often prevent your furnace from starting. Buy a new filter at your local hardware store. Turn off the furnace and remove the filter service panel. Pull out the used filter from its slot and replace it with the new filter. Turn on the furnace.
- Some furnaces may have a special procedure for replacing filters. Always follow your furnace instructions for the best results.
- Most basic filters, like those made of fiberglass or paper, should be changed every month or two. Electrostatic and HEPA filters only need to be changed every two to four months.
- If you have pets, you may need to replace your filter more frequently for it to operate most efficiently.[8]
-
2Check the thermostat settings. Make sure the thermostat is working by adjusting its temperature setting by 5° increments until the furnace turns on. Double check that the “Heat” setting is selected on the thermostat.[9]
- If your thermostat is not working, consult your manual for troubleshooting or replacement options.
-
3Investigate doors, covers, and registers. Many furnaces will not start if access doors or covers are not correctly reattached. Too many closed heat registers can also create problems. At most, only 20% of your registers should be closed.
- In a home with 10 heat registers, for example, you should only close 2 registers at most. Closing registers in unused rooms can cut down heating costs.
-
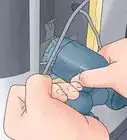
4Verify the condition of fuses or circuit breakers. If your furnace does not turn on even when power is supplied to it from the electrical panel or fuse box, you may have a blown fuse. Check the main electrical panel or fuse box of your home and any furnace fuses. Reset or replace blown fuses.
- The layout of your furnace will vary depending on your make and model. To quickly locate fuses for your furnace, consult the manual instructions.
- Furnace fuses are often found behind an electrical panel close to the main access panel. These fuses may also be positioned inside or on top of the unit.
- Blown furnace fuses are a somewhat rare occurrence. Replacement furnace fuses can be purchased at your local hardware store.


Warnings
- Always follow your furnace directions. Improper usage or maintenance may result in fires, explosions, personal harm, or death.⧼thumbs_response⧽
Things You’ll Need
- Flashlight (optional; recommended)
- Long stem lighter (for non-auto igniter furnaces)
- Screwdriver
-Step-34.webp)
References
- ↑ http://www.centralhtg.com/blog/how-to-light-a-furnace
- ↑ https://www.bobvila.com/articles/furnace-troubleshooting-2/#.WPp2XNIrLIU
- ↑ https://www.hometips.com/repair-fix/furnace-problems.html
- ↑ http://www.centralhtg.com/blog/how-to-light-a-furnace
- ↑ https://www.hometips.com/repair-fix/furnace-problems.html
- ↑ http://www.centralhtg.com/blog/how-to-light-a-furnace
- ↑ https://www.bobvila.com/articles/furnace-troubleshooting-2/#.WPp2XNIrLIU
- ↑ https://www.bobvila.com/articles/change-a-furnace-filter/#.WPpycNIrLIU
- ↑ https://www.bobvila.com/articles/furnace-troubleshooting-2/#.WPp2XNIrLIU
About This Article