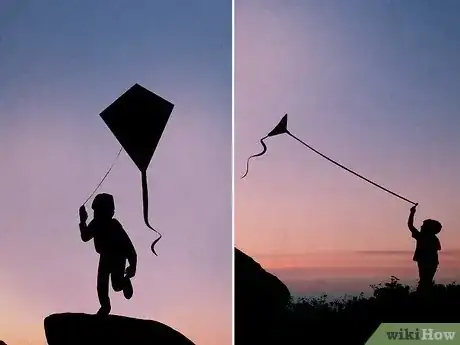
Learn the tricks and techniques to taking great silhouette photos with any camera

Silhouette photographs can be beautiful works of art. The concept behind them is surprisingly simple: take an everyday subject, like a tree, person, or animal, and photograph it in front of a light source so that it appears as a shadow. Applying this technique to flowers in a windowsill or a person running in front of a sunset turns a familiar scene into something mesmerizing. Ever wanted to try it for yourself? You should! This guide will teach you the basics of taking silhouette photos, from picking the right things to photograph to getting the best performance from your camera—whether it’s a smartphone or DSLR.

Things You Should Know

  • Start with a camera you’re familiar with, like a smartphone. You can also use a DSLR if you have access to one.
  • Choose an interesting subject and photograph it in front of a light source, like a sunset, spotlight, or backlit window.
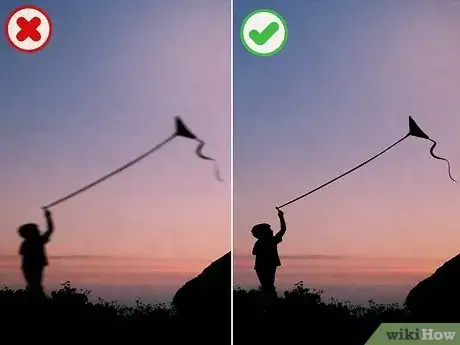
  • Set your camera to “manual” mode so that your subject looks dark in front of a bright background. Post-processing can make your silhouettes look even better.
  • Experiment with different subjects, camera angles, background scenery, moving vs. still objects, and indoor vs. outdoor spaces.
1

Choose a camera you’re familiar with.

  1. Smartphones and DSLRs are both perfect for capturing silhouettes. Most smartphones have fantastic cameras with tons of features, so you don’t need to buy an expensive camera to take great photos. Of course, you can use a high-end camera like a DSLR if you already have one. The important thing is that you choose a camera that you’re comfortable using.
    • Many photographers use DSLR cameras (short for “Digital Single-Lens Reflex” camera) since they offer superior image quality and give users more control over how their photos look.
    • While they’re more expensive and tricky to use, a DSLR could be a great investment if you want to take your photography to the next level.
  2. Advertisement
3

Place your subject in front of a light source.

4

Set your camera to “manual” mode.

  1. This lets you control your camera’s settings to ensure a good silhouette. Each smartphone and DSLR has its own quirks and submenus, so you’ll need to find the “manual” setting for your specific device.[2]
    • iPhones: Open your camera app. Point your camera at an object, then press and hold on the brightest part of the image until “AE/AF LOCK” appears on the top of the screen. This stands for “Auto-exposure/Auto-focus” lock. Make sure to select the brightest part of the image so that the objects in the foreground appear dark.[3]
    • Android: Open your camera app and scroll left or right and select “manual” (or “professional” in some Android versions). A set of icons will appear on the bottom of your screen. Select the one on the far left shaped like a small rectangle. This lets you adjust your “metering,” a.k.a. the amount of light your camera takes in. 3 rectangular icons for different metering options will pop up. Select the one on the far right with a dot in the center. Then, point your camera at your subject and tap the brightest part of your image. This will make everything darker, ensuring that objects in front of a light source will appear silhouetted.[4]
    • Pixel Phones have great cameras, but they don’t come with the same features as iPhones and Androids. Instead, download a third-party app or adjust your photos in post-processing to get perfect silhouettes.[5]
5

Try both indoor and outdoor spaces.

  1. Try shooting in parks, deserts, sidewalks, garages, basements, and so on. When it comes to a light source, a fireworks display can work just as well as a candle in a dark room. Don’t be afraid to experiment with different settings and scenery.
    • For dark spaces, like a room lit with a single candle, you’ll probably need to set your smartphone’s camera exposure settings to “max.” If you have a DSLR, you can also adjust your camera’s lens and shutter speed for the low-light environment.
    • For sunset and sunrise photos, make sure to pick a spot where you can see the horizon—like a beach.
  2. Advertisement
6

Try photographing your subject from different angles.

  1. Position your camera below, above, or even to the side of your subject. Photographing objects from unique angles can give your photos a more artistic look. It also lets you experiment with different subjects, since certain things, like valleys or flocks of birds, are more easily photographed from above or below.[6]
    • Photographing objects from below can also make them appear “towering” and powerful. For instance, a child flying a kite looks rather innocent when shot from an adult’s perspective, but photographing the scene from ankle-level could make the child and kite seem larger-than-life.
    • On the flipside, photographing objects from above can make them look unusually small.
7

Experiment with still vs. moving subjects.

  1. Try shooting still vs. moving objects against the same backdrop. For instance, if you’re photographing a sunrise over mountains, you can shoot trees, wildlife, hikers, and rock formations, all from the same angle. You can even sit on a park bench and photograph power lines, planes flying, dogs running, and so on.
    • Movement will make an image feel “alive” and dynamic, while stillness can convey serenity and simplicity. Play with both and see what happens.
    • Experiment with distance as well. A closeup of a hand has a totally different energy than a photo of person, taken from far way.
  2. Advertisement
10

Use post-processing to make your photos look great.

  1. Play with contrast, color temperature, exposure levels, and more. Adjusting contrast, for instance, will help different colors stand out from each other.[9] Temperature will make images look yellower (warmer) or bluer (colder).[10] Tweak these and other settings to make your silhouette photos really stand out.[11]
    • Many smartphone cameras and DSLRs come with built-in post-processing features.
    • Download third-party photo editing apps for your smartphone. These usually have more options and versatility than whatever software came with your device.
    • Use high-end image editing software like Adobe Photoshop to give your photos a professional look.

About This Article

Johnathan Fuentes
Co-authored by:
wikiHow Staff Writer
This article was co-authored by wikiHow staff writer, Johnathan Fuentes. Johnathan Fuentes is a writer based in the New York City region. His interests as a writer include space exploration, science education, immigration, Latinx cultures, LGBTQ+ issues, and long-form journalism. He is also an avid hiker and has backpacked in Alaska and Newfoundland, Canada. A son of Cuban immigrants, he is bilingual in English and Spanish. Prior to joining wikiHow, he worked in academic publishing and was a freelance writer for science websites. He graduated from Columbia University in 2021, where he studied nonfiction writing and wrote for the student newspaper. He is currently counting down the seconds until the release of Kerbal Space Program 2 in 2023—a game that will almost certainly take up what little free time he has. This article has been viewed 1,025 times.
How helpful is this?
Co-authors: 3
Updated: January 2, 2023
Views: 1,025
Categories: Learning Photography
Advertisement