This article was co-authored by Stephen Cardone. Stephen Cardone is the COO of NY Headshots, a New York City-based studio that specializes in shooting and producing headshots for individuals and businesses. Stephen has over four years of professional photography experience and over six years of documentary filmmaking experience. Stephen also works extensively as a photographer at NY Headshots. His work includes events, environmental photography, as well as headshots for actors, models, and corporate. He holds a BA in Non-fiction Writing from The New School.
There are 8 references cited in this article, which can be found at the bottom of the page.
This article has been viewed 40,465 times.
A 50 mm lens is a versatile choice for any DSLR camera. To take the best pictures with a 50 mm lens, it is crucial you adjust the camera settings appropriately. Depending on the sensor size of your camera, the 50mm can be used two ways. On a full-frame camera, the 50mm creates a field of view similar to your eyesight. On an APS-C or crop sensor, the 50mm is more like a telephoto portrait lens.[1] Once you have mastered the basics of a 50 mm lens, you can start doing more creative and technical shots, like bokeh, low-light, and off-center photos.
Steps
Choosing the Right Settings
-
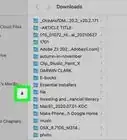
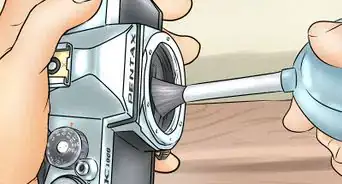
1Attach the lens to the camera. Remove the old lens from your camera, either by pressing a lens release button or twisting the lens off. On 1 end of the 50 mm lens, you should see 2 marks. Align these with the corresponding marks on the camera and press the lens down. Turn the lens clockwise until you hear a click.[2]
- Lenses may vary based on the manufacturer. For more instructions on how to attach a lens to your specific camera, read the manual that came with your camera.
-
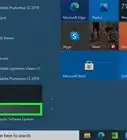
2Turn your camera to manual mode. In most cameras, you will do this by turning the dial to “M” or by pressing the “Mode” button. Manual mode allows you to choose your own shutter and aperture settings.[3]
- Once you are in manual mode, the screen of your camera should allow you to select both shutter and aperture settings. Refer to your camera's manual for more instructions.
Advertisement -
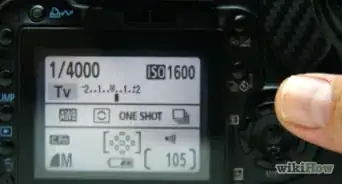
3Change the shutter speed to 1/50 or faster. Shutter speed is the length of time that the shutter is open. It is measured in fractions of seconds. The general rule for shutter speed is to divide 1 by the focal length of the lens. This is the slowest shutter speed you should use.[4]
- Use a faster shutter speed, such as 1/125 or 1/250, to catch fast moving objects like cars or birds. If you want more blurred movement in your photograph, choose a slower speed, like 1/60.
- If you're in a dark or low-light area, choose a shutter speed of 1/250 or faster.
-
4Adjust your aperture settings. Aperture affects the exposure (or brightness) and the focus of your photograph. A larger aperture will have more background blur and a brighter exposure. A smaller aperture will have less blur and a darker exposure.[5]
- Apertures are measured as "f stops." The smaller the number, the larger the aperture is.
- For objects that are far away in normal light conditions (such as landscapes, architectural photos, or group pictures), select an aperture of f4 or f5.6.
- If you’re working in low-light conditions or close up (such as portraits or still life), use a f1.4, f1.8, or f2.8 setting.


Framing Your Shot
-
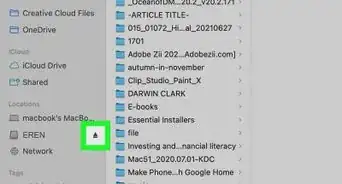
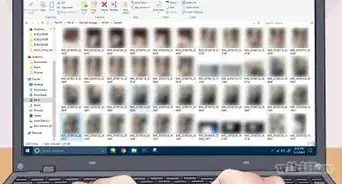
1Use the lens in an open room or outside for APS-C or crop sensor cameras. For APS-C or crop sensor cameras, these lenses do not work for capturing wide shots of small, enclosed spaces. Instead, use the lens for portraits or close-up shots if you have one of these cameras.[6]
- For full-frame cameras, normal lenses like the 50mm create a field of view similar to your natural eyesight. You can use this lens's versatility to your advantage to create a variety of compositions.
-
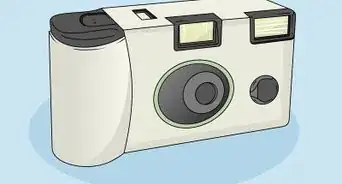
2Choose a single subject for the photograph. Wide angle lenses, like the 50 mm lens, will focus beautifully on the closest object to them. For that reason, it is better to frame the subject so that it is the closest object to the lens.[7]
- Landscape shots where everything is an equal distance away from the lens may not work as well with a 50 mm lens.
- Don’t clutter the shot with too many objects. A 50 mm lens works well with a few prominent objects, not a ton of detail.
- If you are taking a portrait, make sure that the subject is facing straight towards the camera, not turned off to the side. If you don't, the camera may focus on whatever body part is closest to the camera and blur out the rest.
-
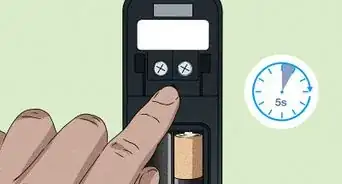
3Stand about 45 centimetres (18 in) away from the subject. To focus correctly, you need to stand away from the subject. The subject should still be the closest object to the camera. If you're too close to it, however, it won't focus properly.
-
4Make sure that you have good lighting. Even in low-light conditions, there should be a direct source of light focused on the subject of the photograph. If you are using the right aperture, the background and other details do not need focused lighting.[8]


Taking the Photograph
-
1Hold the lens with your non-shooting hand. One hand should support the lens from below while the other will press the button to take the picture. This will keep the lens from shaking, which will give you a clear, sharp shot.[9]
-
2Focus on the subject. In most cases, using your camera’s autofocus will work best. Make sure the subject is the closest object to the camera, and the camera will automatically focus on it when you take the picture.[10]
-
3Take the picture. Once you have set up the shot, press down on the button to take the picture. Always take a few shots to ensure that you get the perfect photo.


Taking Different Shots
-
1Take a bokeh shot by lowering the aperture settings. A bokeh shot has 1 sharp, focused object in the foreground and a blurred background. A 50 mm lens is ideal for these. Set the aperture to either f1.8 or f.2.8. Focus on the subject in the foreground. When you take the picture, the background will be blurred.
-
2Use a diffuser when you need flash in low-light conditions. The 50 mm lens is ideal for dark settings, but you still may need a flash sometimes. A flash diffuser will reduce the harshness of the flash and create softer light. A flash diffuser attaches over your flash or to an external flash.
- You can buy diffusers from any of the major camera manufacturers and at electronic stores.
-
3Focus on a subject that is off-center. It may be tempting to always center the subject of your photograph, but off-center subjects work beautifully with a 50 mm lens. The lens will focus on the subject off to the side, creating an interesting effect.[11]


Expert Q&A
-
QuestionCan I take portraits with a 50mm lens?
 Stephen CardoneStephen Cardone is the COO of NY Headshots, a New York City-based studio that specializes in shooting and producing headshots for individuals and businesses. Stephen has over four years of professional photography experience and over six years of documentary filmmaking experience. Stephen also works extensively as a photographer at NY Headshots. His work includes events, environmental photography, as well as headshots for actors, models, and corporate. He holds a BA in Non-fiction Writing from The New School.
Professional PhotographerYes, you can. You'll need to get slightly closer to your subject than you would with other lenses, but you can still create a great portrait.


References
- ↑ Stephen Cardone. Professional Photographer. Expert Interview. 26 June 2020.
- ↑ http://www.tomsguide.com/faq/id-2355995/change-lens-canon-dslr.html
- ↑ https://www.thephoblographer.com/2013/09/24/5-tips-for-noobs-on-how-to-make-the-most-of-your-new-50mm-lens/
- ↑ https://digital-photography-school.com/shutter-speed/
- ↑ https://www.thephoblographer.com/2013/09/24/5-tips-for-noobs-on-how-to-make-the-most-of-your-new-50mm-lens/
- ↑ Stephen Cardone. Professional Photographer. Expert Interview. 26 June 2020.
- ↑ https://www.digitalphotomentor.com/5-mistakes-beginners-make-using-a-wide-angle-lens-and-how-to-avoid-them/
- ↑ https://www.digitalphotomentor.com/5-mistakes-beginners-make-using-a-wide-angle-lens-and-how-to-avoid-them/
- ↑ https://improvephotography.com/1365/how-to-properly-hold-a-dslr-camera/
About This Article