This article was co-authored by Isaac Hess. Isaac Hess is a Baseball Coach, Instructor, and the Founder of MADE Baseball Development and Champion Mindset Training Program, a baseball training program based in Los Angeles, California. Isaac has over 14 years of experience coaching baseball and specializes in private lessons and tournaments. He has played baseball for both professional and collegiate leagues including Washington State University and the University of Arizona. Isaac was ranked as one of Baseball America's top 10 prospects for 2007 and 2008. He earned a BS in Regional Development from the University of Arizona in 2007.
This article has been viewed 99,792 times.
Throwing a curveball in baseball is a fantastic way to dazzle your friends and baffle your opponents. Most of the technique of how to throw these curveballs is in the grip of the ball and the release. Although it takes a bit of practice, once you’ve put some time and commitment into it, you’ll be throwing steep curve-balls like the pros in no time!
Steps
Mastering the Basic Form
-
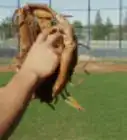
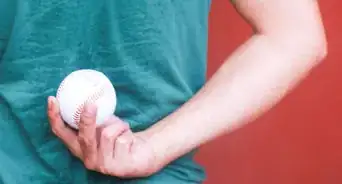
1Grip the baseball as you would with a 2-seam fastball. Place your middle finger on the right side of the ball and your index finger right beside it. The most important part of the grip here is that your middle finger is on the inside of the seam.[1]
- By having your middle finger on the inside of the seam, it allows you to flick downwards later on when you release the ball. This is what actually creates the spin.
- Your thumb and other fingers should be on the bottom of the ball and from the side your hand will look like a horseshoe around the ball.
-
2Load up by leaning back on your right leg and lifting your left leg in the air. This will prepare you to engage in the weight shift necessary to get maximum power on the throw. Your left leg should be bent and your knee should be brought towards your chest.
- These instructions are for a right-handed pitcher. If you’re a left-handed pitcher, lean back on your left leg and raise your right leg instead.
Advertisement -
3Snap your left leg forward and plant it on the ground. This is the first part of the weight transfer which helps you maximize the velocity and spin of the pitch. Your hips also need to open up from the coiled position they were in before.[2]
-
4Pull your arm forward as you snap your leg forward/downward. The chain of motion should go as follows: left leg first, followed by opening up of the hips, followed by your pitching arm snapping forwards and finishing down by your opposite hip.[3]
- This process incorporates your entire body into the pitch. When you’re throwing at game speed, every pitch should have maximum effort in it. The only difference between a fastball and a curveball is where you are applying the spin.
- Try practicing this chain of motion at a reduced speed before you work up to full pace.
-
5Flick your fingers down over the front of the seam when you release. This is the single most important contributing factor to actually creating the curve. When you do this, you create the forward spin on the ball that makes the ball drop and curve in the air.[4]
- It takes a lot of practice to get this motion right but once you get it, the results will be very clear.
-
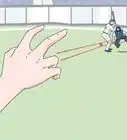
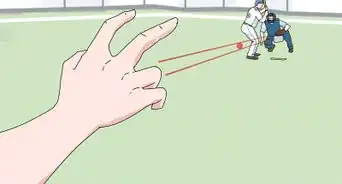
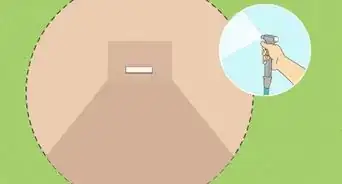
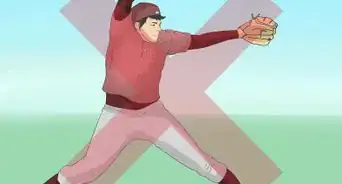
6Aim to throw the ball so it finishes underneath the strike-zone. The goal of this type of curveball is to entice the batter into swinging at the ball early to elicit a strike. To do this, you need to throw the ball so it looks as though it is coming into the strike zone and then curves downwards at the end.
- This is something that obviously takes a lot of practice to master but before you throw at full speed, aim to be able to do this with about 80% accuracy.


Practicing Your Curveball
-
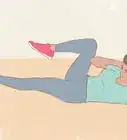
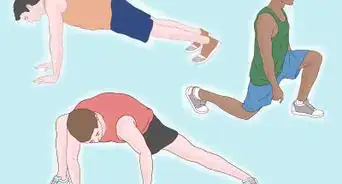
1Warm up your arm by doing a few different arm exercises. The absolute last thing you want to do is to injure your arm just when you’re starting to practice a new skill. Make sure you do a dynamic warm-up in which you get your arm moving gently first.[5] A few ideas for warm-up exercises you can do are:
- Swinging your arms horizontally and vertically for 30 seconds each way.
- Using an elastic exercise band to stretch your throwing arm.
- Gently moving through the throwing motion 20 times.
-
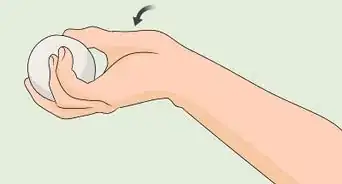
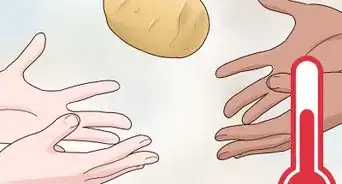
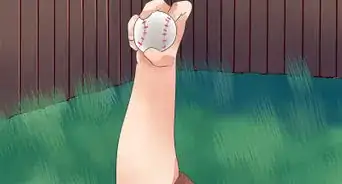
2Practice flicking the ball upward while getting spin on it. The direction of the spin should be such that the ball is spinning forward. Doing this isolates the actual action which creates the spin on the ball. You can do this anywhere as long as you have a baseball and you can toss the ball up a few feet in the air.[6]
- When doing this, really try to emphasize the flick in your fingers as you drag them down over the front of the ball.
- The goal of this is to maximize the revolutions you can get on the ball but start out by just mastering the direction of the spin and then working towards full revolutions.
-
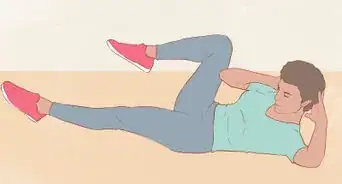
3Get down onto your knees while you’re practicing. When you pitch, putting your whole body into each pitch is really important as this gives you the maximum force you can get. However, when you are just starting to practice the curveball, isolating your arm and hand action is helpful, which is easier to do when you're on your knees.
- This is also a great way to build muscle memory and minimize the number of factors involved in your throwing action.
-
4Throw the ball at half of regular speed to your partner when practicing. A really important part of throwing a curveball is ensuring that you get the direction of the spin correct and that you can repeat this at least 80% of the time. As such, throwing at half your regular speed is a good halfway point to get your action started but to minimize the variables you have to battle.
- If you feel like you want to start at lower than half your regular speed then that is absolutely fine, the key is that you don’t jump straight into 100% and sacrifice your accuracy.
- Don’t be too concerned if you aren’t seeing too much curve from the ball here. Everything you’re doing at the moment is working to maximize the efficacy of the throw when you move to 100% effort.
-
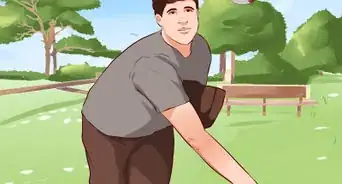
5Practice pitching standing up once you get more comfortable with the throw. After practicing on your knees and getting the hang of throwing a curveball, it's a good idea to try pitching while standing up so you can practice throwing with a fuller motion. This is a more realistic representation of how you will actually be pitching when you play.[7]
- You don’t need to start out at full effort level here, the most important thing is that you are standing up and preparing to use your lower body.
-
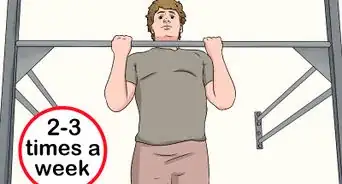
6Practice every day if you can! This is a skill that takes hours and hours of practice but the results are incredibly rewarding. Always listen to your body if your arm is getting sore and take breaks as necessary.[8]
- Sometimes videoing yourself pitching can help as you can pick up on errors you are making that you don’t realize you are.


Expert Q&A
-
QuestionHow do I grip the ball for a curveball?
 Isaac HessIsaac Hess is a Baseball Coach, Instructor, and the Founder of MADE Baseball Development and Champion Mindset Training Program, a baseball training program based in Los Angeles, California. Isaac has over 14 years of experience coaching baseball and specializes in private lessons and tournaments. He has played baseball for both professional and collegiate leagues including Washington State University and the University of Arizona. Isaac was ranked as one of Baseball America's top 10 prospects for 2007 and 2008. He earned a BS in Regional Development from the University of Arizona in 2007.
Baseball Coach & InstructorSo you grip it by the side of the seam that makes the horseshoe, but there are a few variations depending on the type of curveball you're throwing. -
QuestionShould the side of my hand face the pitcher?
 Community AnswerNo, the palm of your hand should be facing your head to get the full 12-6 rotation.
 -
QuestionWhat happens if I do flick my wrist?
 Community AnswerYou could break or fracture your wrist. Learn the right mechanics when you pitch.
Warnings
- Some people suggest that it can be dangerous to attempt curveballs under the age of 16. This is really only true if these pitchers are throwing with poor technique. If you can get the technique mastered at a lower intensity, you can work your way up to throwing curveballs.⧼thumbs_response⧽
- Always warm up thoroughly before you jump into pitching baseballs. The shoulder is a high-risk zone for injuries and you can be out for months or even years with a bad shoulder injury.⧼thumbs_response⧽
-Step-8.webp)
References
- ↑ Isaac Hess. Baseball Coach & Instructor. Expert Interview. 20 March 2020.
- ↑ http://betterpitching.com/your-arm-slot-and-throwing-a-good-curveball/
- ↑ http://betterpitching.com/your-arm-slot-and-throwing-a-good-curveball/
- ↑ Isaac Hess. Baseball Coach & Instructor. Expert Interview. 20 March 2020.
- ↑ http://www.stack.com/a/curveball
- ↑ http://www.stack.com/a/curveball
- ↑ http://www.stack.com/a/curveball
- ↑ http://www.stack.com/a/curveball
About This Article