This article was co-authored by Art Fricke. Art Fricke is a home renovation and repair specialist and the owner of Art Tile & Renovation based in Austin, Texas. With over 10 years of experience, he specializes in bathroom and kitchen renovations. Art focuses on a single contractor approach to customized renovation work, and performs projects such as installing custom tile showers, fixing tiled shower leaks, replacing cracked tiles, and installing floor and wall tile.
There are 12 references cited in this article, which can be found at the bottom of the page.
This article has been viewed 63,876 times.
If you want to replace an old tiled surface, you might think that you can only do so by painstakingly removing the old tile first. As long as the old surface is in a fairly sturdy condition, however, you can lay fresh tile over old tile. Doing so simply requires a little more preparation than usual.
Steps
Part One: Prepare the Surface
-
1Check for loose tiles. Lightly tap on each old tile with a wood mallet. If the sound is solid, the tile is fine. If the sound seems hollow, the tile is loose and needs to be fixed.[1]
- Mix a small batch of thin-set mortar according to the manufacturer's instructions and apply it to the back of the tile. Lay the old tile back in its place.
- If you had to adhere old, loose tiles, wait 24 hours for the mortar to dry before moving onto the next step.
-
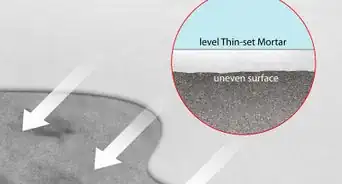
2Mark high and low spots. Using a 4-foot (1.2-m) level, look for any abnormal high spots or low spots on the existing tile surface.
- Mark high and low spots with chalk. Use different symbols to distinguish one from the other. For instance, an "L" or flat line for a high spot and an "H" or triangle for a high spot.
- Make sure that all four corners of your high or low spot are marked.
Advertisement -
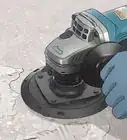
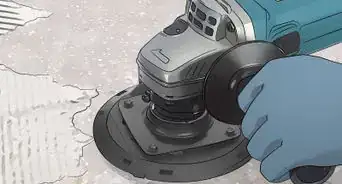
3Grind off any high spots. Use a right-angle grinder with a masonry wheel attachment to grind down any old tiles currently creating a high spot in your floor.
- Periodically check your work using a level to verify that the spot is roughly even with the rest of the floor.[2]
- Note that you can only fix high spots during this stage. You can remedy low spots later on.
-
4Roughen the rest of the tile. Sand down the entire tiled surface using a belt sander or orbital sander with an 80-grit belt.[3]
- Make sure that any surface glaze or finish has been thoroughly scratched.
- A rough surface has more grooves in it for mortar to sink in, allowing the mortar adhere better. For that reason, roughing up the surface of the old tiles will make it easier for the new titles to stick in place.
- Alternatively, you could roughen the tiles by using a bundle of steel wool if an actual belt sander is not available to you.[4]
-
5Remove any difficult grout. Most of the old grout will likely be fine to keep, but you should dig out any moldy or loose grout using a rotary tool or carbide scraper.[5]
-
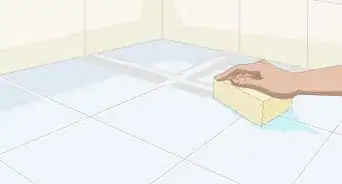
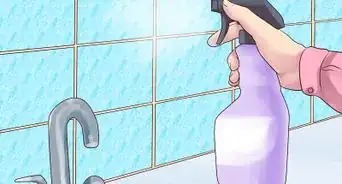
6Clean the surface.[6] Vacuum the surface with a heavy duty shop vacuum, then scrub down the surface with detergent and warm water to remove any further traces of grime and other debris.
- The detergent must have the ability to degrease ceramic surfaces.
- Rinse the surface with clear water and dry up excess moisture with clean towels or rags. Let the remaining water dry by air for one to two hours.


Part Two: Lay the New Tile
-
1Apply thin-set mortar to the floor.[7] Mix a batch of latex-modified thin-set mortar and apply it in a thick, even layer over the working surface, using a notched trowel.[8]
- As a general rule, it is better to work in small sections that you feel you can complete within 30 minutes or so. If you mix up too much mortar, it could start to skin over and become less effective.
- Apply the thin-set adhesive in a single direction. Do not swirl it around. There should, however, be small groves in the thin-set.
- If there is a crack in your old tiled surface, you may need to use a little more thin-set than usual to fill in that crack.
- The thickness of the mortar should be about 1/4 inch (6.35 mm).
- Consider using powdered thin-set mortar mix and combining it with liquid latex bonding additive instead of water.
-
2Add more stability with mesh tape, if necessary. When you are tiling over a cracked surface, you should embed a strip of mesh tape into the fresh mortar over the crack. Only use enough mesh tape to cover the crack.[9]
- The tape will help stabilize the thin-set. As a result, the underlying crack is much less likely to reappear in the new layer of tile.
-
3Apply thin-set mortar to each tile. Mix up additional thin-set as needed and apply a thin, even layer to the back of each tile using a trowel. Make sure that the adhesive completely covers the entire back of the tile.[10]
- Again, it is often best to work only with the number of tiles you think you can go through within a 30-minute period.
- Apply the thin-set in a single direction, creating small grooves with the trowel.
- The thickness of the mortar on the back of your tiles should be no more than 1/4 inch (6.35 mm) thick, if not a little less.
-
4Lay the tile. Slide the tiles in place along your surface, positioning them according to your pre-planned arrangement. The thin-set strokes on your surface should run perpendicular to the thin-set strokes on the backs of your tiles.[11]
- You must lay the tile by locating the center point of your surface and working your way out to the outer perimeter, just as you would when tiling over any non-tiled surface.
-
5Add extra mortar to raise up a low spot. When you reach areas of the floor marked as low points, apply enough extra thin-set to the back of the tile you expect to place there to raise that tile up to the level of the tiles around it.[12]
- Check the new level of your tile with a level to verify that it is now at the same level as the adjacent tiles. Since thin-set dries slowly, you should be able to remove a newly placed tile and adjust the amount of mortar as needed to fix the issue if you do not get it right on the first try.


Part Three: Add the Finishing Touches
-
1Let dry for 24 hours.[13] Before doing anything else with your newly tiled surface, you need to let the thin-set dry for a full 24 hours at minimum.[14]
- Note, however, that you can gently clean off any wet mortar from the surface of your tiles with a wet rag before 24 hours pass. Doing so is even advised, since dry mortar is more difficult to clean off.
- When dry, gently tap each tile with a wooden mallet to make sure that it is secured properly. As before, loose tiles can be found by listening for a hollow sound. There should not be any loose tiles at this point, but if there are, remove the problem tiles and reapply thin-set to the back of the tile. Place the tile back in its correct position in your floor and let the mortar dry for another 24 hours.
-
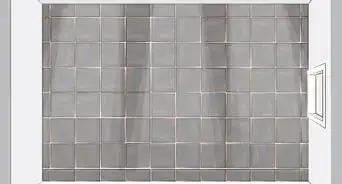
2Grout in between the tiles. Mix the grout according to the manufacturer's instructions and swipe it over the joints in between your tiles, sealing them together. Force the grout in between individual tiles using a trowel.[15]
- Use a sanded grout if you are tiling over a floor and a non-sanded grout if you are tiling over a wall.
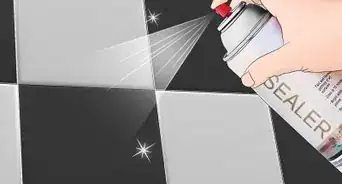
- Let the grout cure for about three days.
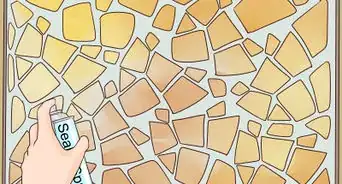
- After the grout has cured, consider coating it with a silicone grout sealer to protect it.
-
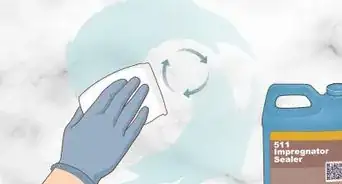
3Clean the surface again. Use detergent and warm water to scrub any "grout haze" from the surface of your new tiles once the grout has cured.[16]
- This extra step will improve the overall appearance of your newly re-tiled space.
- This step should also complete the process.


Expert Q&A
-
QuestionHow do you remove loose tile?
 Art FrickeArt Fricke is a home renovation and repair specialist and the owner of Art Tile & Renovation based in Austin, Texas. With over 10 years of experience, he specializes in bathroom and kitchen renovations. Art focuses on a single contractor approach to customized renovation work, and performs projects such as installing custom tile showers, fixing tiled shower leaks, replacing cracked tiles, and installing floor and wall tile.
Home Renovation & Repair SpecialistChip away the old caulk or grout around the tile and use a crowbar to lift up the old tile. Work carefully to avoid damaging the old tile.
Warnings
- Watch out for cracks in the old tile. Oftentimes, these cracks could be a sign that there is a problem with the underlying concrete. While you can lay fresh tile over such cracks, it is better in the long-run if you fix the underlying problem instead of simply covering it up.⧼thumbs_response⧽
- You may need to cut into your door frame or trim the bottom of your door if the newly tiled floor threshold is too high and runs into the base of the door, preventing it from closing.⧼thumbs_response⧽
- Wear safety goggles, a dust mask, and sturdy working gloves (leather or rubber) as you work to protect your eyes, lungs, and hands.⧼thumbs_response⧽
- You can only tile over tile if the floor underneath is solid concrete or mortar. If this is not the case, you will need to tear up the tile and start fresh. You can usually tell when a floor is not solid if it shifts or moves when you walk over it.⧼thumbs_response⧽
- Your new surface will be higher than your old one. Keep this in mind when you need to place pieces back on a newly tiled floor or on a newly tiled wall.⧼thumbs_response⧽
Things You'll Need
- Dust mask
- Safety glasses
- Leather gloves and/or rubber gloves
- Shop vacuum
- Detergent
- Water
- Clean towels and sponges
- Angle grinder
- Masonry wheel
- Level
- Belt sander
- 80-grit sanding belts
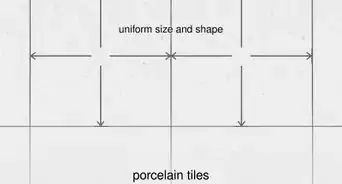
- Ceramic tile
- Thin-set mortar with latex fortifier
- Notched trowel
- Mesh tape
- Rotary tool
- Grout
- Silicone grout sealer
- Chalk
- Tape measure
- Wooden mallet

References
- ↑ https://www.familyhandyman.com/tiling/tile-installation/tile-installation-how-to-tile-over-existing-tile/
- ↑ Art Fricke. Home Renovation & Repair Specialist. Expert Interview. 1 July 2020.
- ↑ Art Fricke. Home Renovation & Repair Specialist. Expert Interview. 1 July 2020.
- ↑ http://myoldcountryhouse.com/yesyou-can-tile-over-tile/
- ↑ https://www.bobvila.com/articles/how-to-remove-grout-regrouting-tile/
- ↑ Art Fricke. Home Renovation & Repair Specialist. Expert Interview. 1 July 2020.
- ↑ Art Fricke. Home Renovation & Repair Specialist. Expert Interview. 1 July 2020.
- ↑ https://www.thisoldhouse.com/how-to/how-to-tile-floor
- ↑ http://heightslibrary.org/materials/hrrc/28-Misc_Interior_Repairs/NEW_CERAMIC_TILE_OVER_OLD.pdf
- ↑ https://www.bobvila.com/articles/can-you-tile-over-tile/
- ↑ https://todayshomeowner.com/how-to-lay-a-tile-floor/
- ↑ http://www.todayshomeowner.com/video/how-to-lay-tile-over-a-tile-floor/
- ↑ Art Fricke. Home Renovation & Repair Specialist. Expert Interview. 1 July 2020.
- ↑ https://www.homeadvisor.com/r/drying-time-for-tile/
- ↑ https://www.bobvila.com/articles/how-to-grout-tile/
- ↑ https://www.bobvila.com/articles/how-to-remove-grout-haze/
About This Article