This article was co-authored by wikiHow staff writer, Nicole Levine, MFA. Nicole Levine is a Technology Writer and Editor for wikiHow. She has more than 20 years of experience creating technical documentation and leading support teams at major web hosting and software companies. Nicole also holds an MFA in Creative Writing from Portland State University and teaches composition, fiction-writing, and zine-making at various institutions.
wikiHow marks an article as reader-approved once it receives enough positive feedback. In this case, 81% of readers who voted found the article helpful, earning it our reader-approved status.
This article has been viewed 385,996 times.
Learn more...
If you want to convert a raster (bitmap) to a vector in Inkscape, you’ll need to trace the image. Fortunately, Inkscape comes with an automatic tracing tool that requires neither a steady hand nor a giant hunk of time. If you need more precise control over the paths you create, you can opt to use Inkscape’s built-in drawing tools to trace manually. No matter the method you choose, Inkscape makes it simple to vectorize your bitmap images.
Steps
Tracing Automatically
-
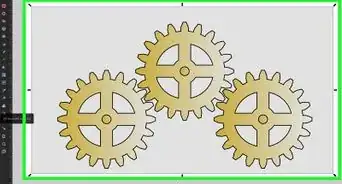
1Import your image. Click “File” on the menu bar, and then select “Import.”
-
2Open the tracing tool. To open Inkscape’s tracing engine, click “Path” on the menu bar, then select “Trace Bitmap.” [1]Advertisement
-
3Choose between single and multiple scans. Select “single” if you’d like to create a single path from the image, or “multiple” if you’d prefer many overlapping paths. [1]
- Choosing single scan options:
- Brightness cutoff uses the shade of a pixel to decide whether it should become black or white. The higher the threshold setting, the darker the image will become. [1]
- Edge detection will create a path based on differences in the brightness of pixels. The threshold settings adjust the darkness of the output. Again, a higher threshold will produce darker output.
- Color quantization produces a path based on differences in color. The “number of colors” setting gives you the opportunity to specify how many colors you’d want in your output were it possible to output in color. An algorithm is then used to turn those theoretical colors black or white.
- Choosing multiple scan options:
- Brightness steps allows you to specify the total number of scans. [2]
- Colours uses the number in the “Scans” box to determine how many colors to output.
- Grays is like colors, but with shades on the grayscale.
- Extra options: The "Smooth" option will apply a Gaussian blur before tracing, and “Stack scans” gets rid of holes in path coverage. [2] Check “Remove background” to get rid of background, which usually has the lightest color.
- More options:
- Suppress speckles will eliminate any spots, dust, distortion, and other unwanted bits. [2]
- Optimize paths merges Bezier curves.
- Choosing single scan options:
-
4Click “Update” to see a preview. If your lines appear too thick or not prominent enough, you likely selected a trace mode that’s better suited for a different type of image. Inkscape recommends running the tracer tool three times in order to determine which of the three options best suits your personal needs. [1]
-
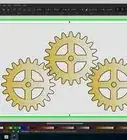
5Click OK to create the paths. The bitmap image will be preserved in the SVG file.
-
6Edit and fine-tune your results. Click on the "Edit paths by nodes" button to the left (or F2) to adjust nodes and curves.


Tracing Manually
-
1Import your image. Click “File” on the menu bar, and then select “Import.”
-
2Open the Layers dialog. While tracing on a new layer is technically optional, it will help you see what you are doing by giving you the option to play with the opacity settings on your image (or the tracing layer). Click “Layer” on the menu bar, then select “Layers.” [3]
-
3Add a new layer. Click the “+” button to add a new layer. Type a name for the layer (like “tracing layer”) and switch to “Above current” for the position. Click “Add.” [4]
-
4Select a tracing tool. There are different tools available to suit different needs.
- Press the F6 key on your keyboard (or click on the pencil icon on the tool menu) to select the pencil/freehand tool. This tool will allow you to freely draw anywhere on your image. If you’re using a drawing tablet, have a steady hand or not much to trace, this tool may suit your needs.
- Press Shift+F6 simultaneously (or click on the pen icon on the tool menu) to open the pen/Bezier tool. This tool allows you to click at the ends of lines you want to trace, which will create small, easy-to-manipulate segments. If you have several lines to trace and/or are using a mouse, this tool will give you the most precise results. Double-click at the end of each line to end the path.
-
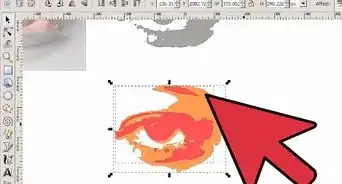
5Using your drawing tablet or mouse, trace every line in your image. If you’re using the pen tool, try using shorter lines instead of a single continuous line. This will make your trace easier to edit, as you won’t have to start a long line all over again if you make a tiny mistake at the end.
- You can switch between your layers in the layer dialog box. Just double click on the layer name you want to work with and you’ll be switched to that view.
- It may help to make your bitmap more (or less) opaque as you draw your paths. With the layer selected in the dialog box, move the slider bar beneath “Opacity” to see which settings works best for you.
-
6Open the “Edit Node” tool. On the tool menu, click the second arrow button from the top (the “edit” arrow) to active edit mode. In this mode, you’ll be able to click and drag nodes for fine-tuning.
- If you have too many nodes and it’s taking you forever to move them all where they need to be, you can simplify your nodes. This may change the shape of your line just slightly, but it may not be noticeable. Use Ctrl+L (⌘ Cmd+L on a Mac) to reduce the amount of nodes.[5]
-
7View your trace without the bottom layer. To make sure you traced every line you want in your vector image, click on the first layer (the raster image) and reduce the opacity until all that’s visible are the lines you drew. If you find you left out a line, return to the layer tool and increase the opacity so the lines you need to trace are visible.
-
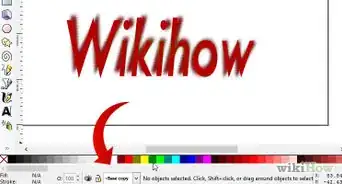
8Remove the bottom layer and save your image. In the layer tool, click on the first layer (the layer containing the original artwork) and delete it by clicking the subtraction symbol. To save your trace, click File and then Save As.


Community Q&A
-
QuestionI tried this but nothing would come up by way of preview. I also tried changing the type and clicking OK but to no avail. What should I do?
 Community AnswerYou need to select the Image you want to preview on the bitmap panel, then it should start showing up.

References
- ↑ 1.01.11.21.3https://inkscape.org/en/doc/tutorials/tracing/tutorial-tracing.html
- ↑ 2.02.12.2http://tavmjong.free.fr/INKSCAPE/MANUAL/html/Trace-Multi.html
- ↑ http://wiki.inkscape.org/wiki/index.php/Layer_Dialog
- ↑ https://www.youtube.com/watch?v=PJIcZLfRaOs
- ↑ https://inkscape.org/en/doc/tutorials/advanced/tutorial-advanced.html
- ↑ http://tavmjong.free.fr/INKSCAPE/MANUAL/html/Trace-SIOX.html
- ↑ http://www.siox.org/
About This Article

To trace an image automatically in Inkscape, start by importing the image you want to trace. Next, open the “Path” menu and select “Trace Bitmap.” When the menu opens, adjust the complexity of your tracing by choosing either a single scan or multiple scans. Once you’ve selected the settings you like and are satisfied with the preview image, click “OK” to trace the image automatically. Then you can edit the results by using the “Edit paths by nodes” tool. Keep reading to learn how to trace an image manually!