This article was co-authored by wikiHow staff writer, Darlene Antonelli, MA. Darlene Antonelli is a Technology Writer and Editor for wikiHow. Darlene has experience teaching college courses, writing technology-related articles, and working hands-on in the technology field. She earned an MA in Writing from Rowan University in 2012 and wrote her thesis on online communities and the personalities curated in such communities.
This article has been viewed 26,761 times.
Learn more...
This wikiHow will teach you how to uninstall YouTube updates on Android phone or tablet. If you use an iPhone or an iPad, you'll need to download a third-party app to be able to see and download previous app versions since this is not something that you can do normally. Fortunately for Android users, the process is quick and simple.
Steps
-
1Disable the Auto-update feature in the Google Play Store. Before you get started, you'll need to make sure new updates aren't installed automatically. Here's how:
- Open the Play Store app and tap the menu at the top-left corner.
- Go to Settings > Auto-update apps.
- Select Don't auto-update apps.
-
2Open your Android's Settings. You can find the gear icon in the Quick Menu panel by swiping down from the top of your screen, or tap the app icon in your app list.Advertisement
-
3Tap Apps. Depending on the model and manufacturer of your Android, this menu might say "Apps & Notifications" instead.
- You might need to tap "See all apps" to see a list of every app installed on your Android
-
4Tap YouTube. You can browse the list of apps installed on your Android or use the search bar at the top of the screen to search for "YouTube."
-
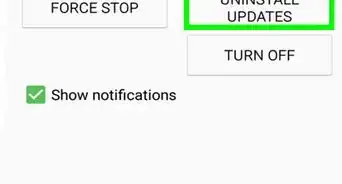
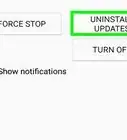
5Tap Uninstall Updates. If you don't see this in the center of your screen, tap ⋮ in the upper right corner.
- Tap OK to continue.[1]
References
About This Article
1. Disable the Auto-update feature in the Google Play Store
2. Open Settings.
3. Tap Apps.
4. Tap YouTube.
5. Tap Uninstall Updates.


