This article was co-authored by wikiHow staff writer, Nicole Levine, MFA. Nicole Levine is a Technology Writer and Editor for wikiHow. She has more than 20 years of experience creating technical documentation and leading support teams at major web hosting and software companies. Nicole also holds an MFA in Creative Writing from Portland State University and teaches composition, fiction-writing, and zine-making at various institutions.
This article has been viewed 172,579 times.
Learn more...
You can batch upload photos to Facebook in several ways. You can upload photos to albums or directly on a post. Facebook supports a Java-based uploader and a basic uploader, so you have some options when uploading your photos. The Facebook mobile app can also be used to upload photos from your mobile media gallery.
Steps
Uploading Multiple Photos to a New Album
-
1Go to Facebook. Visit Facebook’s home page from any web browser.
-
2Log in. Use your Facebook account and password to log in. The login fields are found on the upper right corner of the page. Click the “Log in” button to proceed.Advertisement
-
3Access your photos. Click on your name on the header toolbar. You will be brought to your Timeline, or wall. Click on the Photos tab, right below your cover photo, and you will be brought to your Photos page.
-
4Click the “Create Album” button on the Photos page taskbar. A small window will open with your local computer directory.
-
5Select the photos to be uploaded from your local computer. To select multiple photos to be uploaded at the same time, hold the CTRL key (or CMD key, for Mac) as you click on each photo to upload.
-
6Upload photos. Click on the “Open” button on the lower right corner of the small window, and the selected photos will start uploading to Facebook under a new album.
- A “Create Album” window will appear while the photos are uploading. You can name your new album here in the textbox at the top of the page, and add some more details about the album below that the name field.
-
7View photos. Once the photos have uploaded to the new album, they will be displayed as thumbnails. You can add descriptions to your photos and tag your friends on this page.
- Click on the “Post” button on the lower left corner of the “Create Album” window to save and post your album to your Timeline.


Uploading Multiple Photos to an Existing Album
-
1Go to Facebook. Visit Facebook’s home page from any web browser.
-
2Log in. Use your Facebook account and password to log in. The login fields are found on the upper right corner of the page. Click the “Log in” button to proceed.
-
3Access your photos. Click on your name on the header toolbar. You will be brought to your Timeline, or wall. Click on the Photos tab, right below your cover photo, and you will be brought to your Photos page.
-
4Select the albums to add photos to. On the Photos page, click on the Albums section from the subheader to only display your photo albums. Scroll through them and click on the album where you want to add more photos to.
-
5Add photos to the album. On the album’s page, click on the “Add photos” box located on the top left corner. A small window will open with your local computer directory.
- Select the photos to be uploaded from your local computer. You can select multiple photos to be uploaded at the same time by holding the CTRL key (or CMD key, for Mac) as you click each photo to upload.
- Click on the “Open” button on the lower right corner of the small window, and the selected photos will start uploading to Facebook into the selected album.
- An “Add Photos” window will appear while the photos are uploading. Here, you can see the album details on the left panel of the window.
-
6View photos. Once the photos have uploaded to the existing album, they will be displayed in thumbnails. You can add descriptions to your photos and tag your friends.
- Click on the “Post” button on the lower left corner of the “Add Photos” window to save and post your new photos to your Timeline.


Uploading Multiple Photos to a New Post
-
1Go to Facebook. Visit Facebook’s home page from any web browser.
-
2Log in. Use your Facebook account and password to log in. The login fields are found on the upper right corner of the page. Click the “Log in” button to proceed.
-
3Start a post. On almost all pages on Facebook, you can make a new post. There’s a post box located at the top of the News Feed, on your Timeline, and on your friends’ pages. Locate this post box to start making a post.
-
4Add photos to the post. Inside the post box are some options for posting. You can post photos and videos, along with your status. Click the Photo/Video link in the post box, and a small window will open with your local computer directory.
- Select the photos to be uploaded from your local computer. You can select multiple photos to be uploaded at the same time.
- Click on the “Open” button on the lower right corner of the small window, and the selected photos will start uploading to the post box. You can see them being uploaded right on the post box.
-
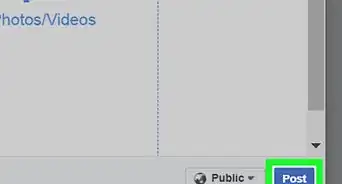
5Post the photos. Once the photos have uploaded to the post box, they will be displayed in thumbnails. You can add an accompanying status or message to your post, and tag your friends too. Click the “Post” button on the post box to post your new post with the photos.


Uploading Multiple Photos to an Album on the Facebook App
-
1Launch Facebook. Look for the Facebook app on your mobile device and tap it.
-
2Log into your account. If you logged out of your previous Facebook session, you will be asked to log in again, so enter your registered email address and password into the fields, and tap “Log in” to access your account.
- Skip this step if you’re still logged into Facebook upon launch.
-
3Go to Photos. Tap on your name on the header toolbar. You will be brought to your Timeline, or wall. Tap on the Photos box, right below your cover photo. You will be brought to your Photos screen.
-
4Select an album. The photos on the mobile app are organized by albums. Tap on the album where you want to add the photos to. The album will be opened, and the photos inside it will be displayed. Tap on the plus icon on the upper right corner of the album header bar to bring up your mobile media gallery.
- If you want to upload the photos to a new album instead of an existing one, tap on the “Create Album” box at the upper left corner of the Photos screen.
-
5Select photos. Tap on the photos you want to be uploaded at the same time. The photos will be highlighted.
-
6Post photos. Tap on the “Done” button on the upper right corner of the media gallery view. A small “Update Status” window will appear with your selected photos. You can filter the audience of these photos here, and you can also add a description or a message with your post.
- Tap the “Post” button on the upper right corner of the “Update Status” window to upload and post your photos. Your status update with your photos will be posted on your Timeline, or wall, and to the corresponding album where they were uploaded to.


Uploading Multiple Photos to a New Post on the Mobile App
-
1Launch Facebook. Look for the Facebook app on your mobile device and tap on it.
-
2Log into your account. If you logged out of your previous Facebook session, you will be asked to log in again, so enter your registered email address and password into the fields, and tap “Log in” to access your account.
- Skip this step if you’re still logged into Facebook upon launch.
-
3Head to your wall. Tap on your name on the header toolbar, and you will be brought to your Timeline or wall. You can directly upload photos as a new status update or post on your Timeline or wall. No need to create a new album or select an existing one.
-
4Tap on the “Share Photo” button at the top of your wall. Your mobile media gallery will be brought up.
-
5Select photos. Tap on the photos you want to be uploaded at the same time. The photos will be highlighted. Once you’ve finished selecting, tap on the “Done” button on the upper right corner of the media gallery view.
-
6Upload and post your photos. A small “Update Status” window will appear with your selected photos. You can filter the audience of these photos here, and you can also add a description or a message with your post.
- Tap the “Post” button on the upper right corner of the “Update Status” window to upload and post your photos. Your status update with your photos will be posted on your Timeline, or wall.


Community Q&A
-
QuestionHow can I move pictures from Snapchat to Facebook?
 Vassily KniggeCommunity AnswerConnect your phone to a computer, go to files on your computer, copy the photos and paste them to FB.
 -
QuestionHow do I put more photos on an existing album if I'm using an Android cell phone?
 Community AnswerYou have to click and hold and it should show a little circle. Touch the pictures you want to add to the album, after that click on the three dots at the right corner of the screen and click on move to album or copy to album.
 -
QuestionWhat is the computer directory and how to find my pictures?
 Community AnswerThe computer directory is where all your files are found. If the photos are downloaded, they should be in a folder called “downloads.” If they were manipulated in any software on your computer, there should be folders created by the various programs, and those would either be found within application files or your documents.


About This Article