This article was co-authored by wikiHow staff writer, Nicole Levine, MFA. Nicole Levine is a Technology Writer and Editor for wikiHow. She has more than 20 years of experience creating technical documentation and leading support teams at major web hosting and software companies. Nicole also holds an MFA in Creative Writing from Portland State University and teaches composition, fiction-writing, and zine-making at various institutions.
This article has been viewed 525,723 times.
Learn more...
Creating a photo album on Facebook is an excellent way to share your memories with your friends in a fun and organized fashion. It only takes a few minutes to create a Facebook photo album and you can go back to edit the album at any time. This wikiHow teaches you how to create a Facebook photo album on your Android, iPhone, iPad, or computer.
Steps
Using a Phone or Tablet
-
1Open the Facebook app on your Android, iPhone, or iPad. It's the blue-and-white "f" icon typically found on the home screen or in the app drawer.
-
2Tap What's on your mind? or Write something here. One of these options will appear at the top of the screen below the story icons.[1]Advertisement
-
3Tap Photo/Video. It's the green photo icon below the typing area. This opens your phone or tablet's camera roll.
- If you haven't yet given Facebook permission to access your photos, follow the on-screen instructions to do so when prompted.
-
4Select photos to include in the album. The photos you select will appear in the album in the order they're selected.
-
5Tap Done when you're finished. It's at the top-right corner.
-
6Tap the + Album button. It's near the top of the screen just below your name.
-
7Tap + Create Album. It's the first option at the top of the menu.
-
8Enter an album title and description. The album's title is mandatory, but the description is optional. Tap the Album name field to enter a descriptive name for your album, and the Add a description field (optional) to type anything else you'd like to include about the photos.
-
9Select an audience. The privacy menu is just below the "Description" field. It'll be set to your default post privacy setting by default. If you want to change who can see your album, tap the menu and select one of these options:
- Public (anyone on Facebook)
- Friends (your Facebook friends)
- Friends except… (all friends except any you add to a list)
- Specific friends (only friends you add to a list)
- Only me (private)
-
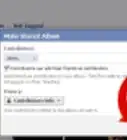
10Allow friends to add photos (optional). If you'd like certain Facebook friends to be able to contribute their own photos to this album, slide the "Add Contributors" switch to the On (blue) position, and then tap Choose Friends to select some friends. If not, leave this switch alone.
-
11Tap Save (iPhone/iPad) or CREATE (Android). This prepares the selected photos for your new album.
-
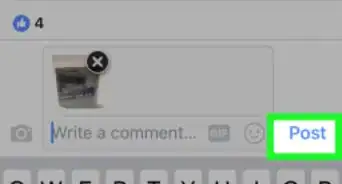
12Tap Upload (iPhone/iPad) or Post (Android). This uploads the selected photos and adds them to your new album. You'll find your album in the Photos section of your profile.


Using a Computer
-
1Go to your Facebook profile. If you haven't already done so, go to https://www.facebook.com and click your name at the top of the page. If you're not already signed in, follow the on-screen instructions to do so now.
-
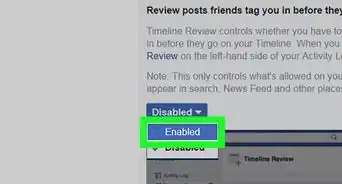
2Click the Photos tab. It's near the top of your profile below your cover image.[2]
-
3Click the + Create Album button. This button is also near the top of the page, but below the cover image. Your computer's file browser will appear.
-
4Select the photo(s) you want to add. Browse to the folder in which you store your photos (usually called Photos or Pictures). To select only one photo, click its name to highlight it. To select more than one photo, hold down the Ctrl (PC) or ⌘ Command (Mac) key as you click additional photos.
-
5Click Open. The selected photos will now upload to Facebook. This may take some time depending on the size and amount of photos you selected.
-
6Enter an album title and description. You can use the form on the left side of the window to enter information about your album. Type a descriptive name for the album into the "Album name" field. If you'd like, you can also type a description into the "Description" box below.
- To add a description or other text to an individual photo in the album, click the "Say something about this photo" box below its thumbnail image, and then type some text.
-
7Tag a location. If you'd like to tag a location for the whole album, click the Location box in the left panel, and then enter a landmark, city, business, neighborhood, or another place you'd like to tag.
- To tag the location for an individual photo, click the gear icon on the picture's thumbnail, select Edit Location, and then choose a location.
-
8Tag your friends. If any of your Facebook friends appear in your photos, you can tag them to let people know who they are. Click the photo's thumbnail on the right side of the panel, and then select the desired friend.
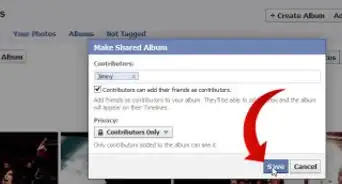
- To allow certain Facebook friends to add photos to the album, check the box next to "Add Contributors" and select some friends.
-
9Customize the album's date. The album's date will be today's date unless you specify others. To customize the date, click Pick a Date, or choose Use date from photos to backdate the album to when the photos were taken.
-
10Choose the order of your photos. You can leave your photos as they are, or you can adjust them after they've been uploaded. To move a photo, just drag its thumbnail to a different place in the album.
- You can also click on the Order by Date Taken button at the top-right corner to arrange photos in date order.
-
11Choose your album cover. By default, the first photo in the album will be the cover of your album. If you'd like to change this, click the gear icon at the bottom-right corner of any photo's thumbnail, and then select Make Album Cover.
-
12Select your audience. The privacy menu is near the bottom-right corner of the "Create album" window. It'll be set to your default post privacy setting by default. If you'd like to change who can see your album, click the menu and select one of these options:
- Public (anyone on Facebook)
- Friends (your Facebook friends)
- Friends except… (all friends except any you add to a list)
- Specific friends (only friends you add to a list)
- Only me (private)
-
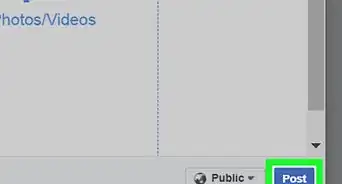
13Click Post to save your album. It's the blue button at the bottom-right corner of the window. Your album is now available in the Photos section of your profile. You can go back to your album to add, delete, or edit your photos at any time.


Community Q&A
-
QuestionWhy is my album taking so long to post?
 Community AnswerHigh-quality photos can take a long time to upload, especially over a slow internet connection. Try reducing the size of your photos, preferably below 15 MB.
 -
QuestionHow do I save an album as a draft?Community AnswerSet the album's privacy settings to "Only Me," then post it. No one else will see the album until you change its privacy settings.
-
QuestionHow large can the album be?
 Community AnswerYou can put roughly 1,000 photos in a single album.


References
About This Article

1. Tap What's on your mind?
2. Tap Photo/Video.
3. Select photos and tap Done.
4. Tap + Album.
5. Tap + Create Album.
6. Enter your album details and preferences.
7. Tap Save or CREATE.
8. Tap Upload or Post.