This article was written by Mitch Harris and by wikiHow staff writer, Travis Boylls. Mitch Harris is a Consumer Technology Expert based in the San Francisco Bay Area. Mitch runs his own IT Consulting company called Mitch the Geek, helping individuals and businesses with home office technology, data security, remote support, and cybersecurity compliance. Mitch earned a BS in Psychology, English, and Physics and graduated Cum Laude from Northern Arizona University.
This article has been viewed 111,770 times.
Do you want to learn how to use Dropbox on iPad? Dropbox is an application that uses cloud data storage service that allows you to save and share your files online. With a Dropbox account, you can easily save and access your files from your iPad and other devices. Dropbox allows you to sync your files across all of your accounts and computers, and you can use it to share and collaborate with others. This wikiHow teaches you how to use Dropbox for iPad.
Steps
Installing Dropbox and Creating an Account
-
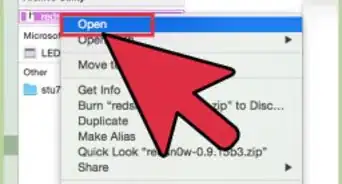
1Download the Dropbox app. Dropbox has a blue icon with a white image that resembles a white box. You can download it for free from the App Store. Use the following steps to do so:
- Open the App Store. Make sure that you are connected to a network.
- Tap the Search tab at the bottom.
- Type Dropbox in the search bar and tap Search in the keyboard.
- Tap GET next to the Dropbox app.
-
2Launch the Dropbox app. To do so, tap the Dropbox icon on your Home screen. Alternatively, if you are still in the App Store, you can tap Open next to Dropbox once it is finished installingAdvertisement
-
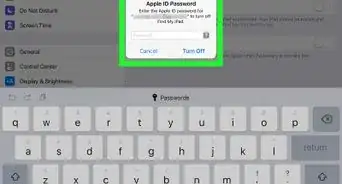
3Creating a new account. You can create a new account using your Apple ID or Google account. To do so, tap Sign In with Apple or Sign in with Google on the login page. You can also sign up with an email address. Dropbox accounts are free and come with 2 GB of storage. You can pay a subscription fee for extra services and increased storage space. Use the following steps to sign up with an email address:
- Tap Create account below the blue "Sign In" button.
- Enter your first and last name.
- Enter a valid email address.
- Enter your desired password. You can tap Use Strong Password to randomly generate a strong password and save it to your iCloud Keychain, or enter your own password.
- Tap Create account
- Tap I agree to agree to the Dropbox Terms of Service.
-
4Decide if you want to do a free trial of Dropbox Plus. If you want to try a free 30-day trial of a Plus subscription, tap Try free for 30 days. If you want to continue with a free account, tap Cancel in the upper-right corner.
- A Plus subscription comes with 2 TB of data (2000 GB), as well as connect an unlimited number of devices. It also gives you access to additional features, such as a password manager, and the Vault where you can save encrypted files that require a PIN to access.
-
5Decide if you want to view any of the tutorials. If you want to view any of the tutorials on-screen, tap the tutorial you want to view. If you would rather go straight to Dropbox, tap Skip in the upper-right corner.
- If you complete the Dropbox "Get Started" checklist, you can get 250 MB of additional storage space free. Steps include, taking a tour of Dropbox, installing Dropbox on two or more computers, putting files in a folder, sharing a folder, and inviting others to use Dropbox.[1]


-
1Tap Home. It's has an icon that resembles a house. It's in the lower-right corner. This displays the Home page. This is the default page that displays when Dropbox opens. The Home page has four tabs at the top of the page. They are as follows:
- Recent: This tab displays recent files you have uploaded and other recent activities.
- Shared: This tab displays files that you have shared with other people and files that have been shared with you.
- Starred: This displays files that you have starred. You can star your favorite items for quick access.
- Offline: This displays files that you have saved for offline access.
-
2Tap the Files. It's the second button in the lower-left corner. It has an image that resembles a folder. This displays all the files and folders you have uploaded to Dropbox.
-
3Tap Create. It's the third button in the lower-left corner. It has an icon with a plus (+) sign. This displays a pop-up menu with several options for creating or uploading new files to Dropbox. They are as follows:
- Upload photos: This option allows you to upload photos and videos to Dropbox.
- Create folder: This option allows you to create a new folder in Dropbox.
- Create or upload files: This option allows you to upload files, such as Microsoft Office files, as well as create new text files.
- Scan Document: This option allows you to scan a physical document with your camera and upload it as a PDF or PNG file.
- Send copy of files: This option allows you to send a copy of your Dropbox files to other people.
- Take photos: This option allows you to take photos with your camera and upload them to Dropbox.
- Record Audio: This option allows you to use your microphone to record an audio recording.
-
4Tap Photos. It's the fourth option in the lower-left corner. It has an icon that resembles a photograph. This displays all photos and videos you have uploaded to Dropbox. Photos and videos are organized by date. Videos have an icon that resembles a video camera in the lower-left corner of the thumbnail image.
-
5Tap Account. It's the fifth option in the lower-left corner. It has an icon that resembles a person. This displays all your account information and the features you have access to. The following information can be found on the Account page.
- Name and email address: You can view your username and the email address associated with your Dropbox account at the top of the page.
- Space Used: This shows how much storage space your Dropbox files are currently using.
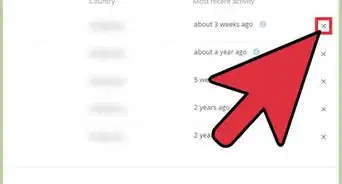
- Manage Devices: Tap this option to view what devices are connected to your Dropbox account. You can use this menu to remove connected devices.
- Dropbox Backup: You can use your Dropbox account to backup important files and information on your computer. Use this option to access files you have backed up to your Dropbox account.
- Camera Uploads: This option allows you to manage your automatic camera upload settings.
- Manage offline files: If you have any files saved for offline access, you can view and manage them with this option.
- Passwords (Plus only): If you have a Plus subscription, Dropbox comes with a password manager. Use this option to manage your passwords.[2]
- Vault (Plus only): If you have a Plus subscription, you can upload files to the Vault for added security. Files uploaded to the Vault are encrypted and require you to enter a PIN in order to access them.[3]
- Connect a computer: This option allows you to connect a computer to your Dropbox account.
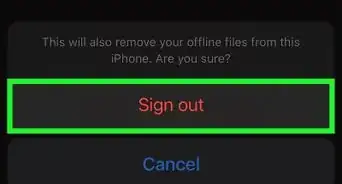
- Sign out from this Dropbox account: If you need to sign out of your current Dropbox account, tap this option to do so
-
6Tap the Settings icon . It's the icon that resembles a gear in the upper-right corner of the Account page in the panel to the left. This displays the Settings menu. This page gives you the option to view your offline storage space, view the Terms of Service, and Privacy Policy, clear your cache and history, view the app version, and more


Uploading Files
-
1Tap Create. It's the third button in the lower-left corner. It has an icon that resembles a plus (+) sign. This displays a menu with options for uploading and creating files.
-
2Tap Upload photos. It's the first option in the pop-up menu. You will see all photos and videos you have on your iPad in the panel to the left.
- Alternatively, you can tap Upload at the top of the "Files" menu.
- If you want to upload files that aren't photos or videos, tap Create or upload file instead. Then tap Upload file. Tap Browse in the upper-right corner. Then tap the location you want to browse. Then tap the files you want to upload.
-
3Tap the photos and/or videos you want to upload. This selects the photos/videos. You will see a blue checkmark icon in the lower-right corner of the thumbnail images you have selected.
- To search for photos and videos, tap the search bar at the top of the panel. Then enter the name of a photo or video in the search bar.
- To search for photos by photo album, tap Album at the top of the panel to the left. Then tap a photo album to see view all the photos in the album.
-
4Tap Add, It's in the upper-right corner of the panel to the left.
-
5Select a folder to save your photos/videos too. Tap the folder you want to upload your photos and videos to below "Upload to" in the panel to the left. If you don't see the folder you want to upload your files to, use the following steps to add the folder you want to upload your photos and videos to:
- Tap Choose a different folder.
- Tap the folder you want to save your photos and videos to. You can also tap Create folder to create a new folder.
- Tap Save in the lower-right corner of the panel to the left.
-
6Tap Upload. It's in the upper-right corner of the panel to the left. This uploads your photos and videos to the folder you selected.


Creating a Folder
-
1Tap Create. It's the third button in the lower-left corner. It has an icon that resembles a plus (+) sign. This displays a menu with options for uploading and creating files.
-
2Tap Create folder. It's the second option in the pop-up menu.
- Alternatively, you can tap Folder at the top of the "Files" menu.
-
3Tap Folder name. It's the first option in the panel to the left.
-
4Enter a name for the folder. You can name the new folder anything you want. Use the on-screen keyboard to type a name for the folder and then tap the blue button that says done.
-
5Select a folder you want to create a new folder in (optional). You can save folders within folders. If you want to create a folder within another folder, tap the folder you want to create it in below "Save to". If you don't see the folder you want to create a folder in, use the following steps to add and select it:
- Tap Choose a different folder.
- Tap the folder you want to save your folder in.
- Tap Save in the lower-right corner of the panel to the left.
-
6Tap Create. It's in the upper-right corner of the panel to the left. This creates your folder.


Creating Files
-
1Tap Create. It's the third button in the lower-left corner. It has an icon that resembles a plus (+) sign. This displays a menu with options for uploading and creating files.
-
2Tap Create or upload file. It's the third option in the pop-up menu. This gives you several options for creating a file.
-
3Tap the file type you want to create. You can create a Paper, Microsoft Word, Excel, PowerPoint, or a plain text file. Tap the file type you want to create.
- In order to create a file in Dropbox, you need to have the Paper, Word, Excel, or PowerPoint app installed on your iPad.
- For text documents, type your text and then tap Next in the upper-right corner.
-
4Create a file name for the file. Use the following steps to do so.
- Tap File name.
- Enter the file name you want to name your file.
- Tap Done.
-
5Select a folder to create your file in. Tap the folder you want to upload your file to below "Save location" in the panel to the left. If you don't see the folder you want to upload your files to, use the following steps to add the folder you want to upload your photos and videos to:
- Tap Choose a different folder.
- Tap the folder you want to save your files to. You can also tap Create folder to create a new folder.
- Tap Save in the lower-right corner of the panel to the left.
-
6Tap Create. This creates the file and saves it to your Dropbox. You can edit the file using the appropriate app.


Scanning a Document
-
1Tap Create. It's the third button in the lower-left corner. It has an icon that resembles a plus (+) sign. This displays a menu with options for uploading and creating files.
-
2Tap Scan document. It's the fourth option in the Create menu. This option allows you to scan a physical document with your camera and save it to Dropbox.
- Alternatively, you can tap Scan at the top of the "Files" menu.
-
3Hold your camera above a document. Make sure the document is on a contrasting surface (i.e, white paper on a dark surface) and that the surface area is well lit. Hold the camera still and it will scan the document automatically, Allow a few seconds for it to finish scanning your document.
-
4Add another page (optional). If you want to add another page, tap the icon that resembles a plus (+) sign on a stack of papers. It's in the lower-left corner. Hold your camera over the next page until it scans. Repeat for as many pages as needed.
- To rearrange your pages, tap Arrange at the top. Then tap and drag the pages to rearrange them.
-
5Tap Next. It's in the upper-right corner.
-
6Create a file name for your document. Use the following steps to create a file name for the document:
- Tap File name.
- Enter the file name you want to name your document.
- Tap Done.
-
7Select a file type. You can save the document as a PDF or a PNG image. To select a file type, tap PDF or PNG next to "File type."
-
8Adjust the image quality. Higher-quality images will take up more space in Dropbox. Use the slider bar below "Image quality" to adjust the quality of the image.
-
9Select a folder to save the document to. Tap the folder you want to save the folder do below "Save location." If you do not see the folder you want to save the folder to, use the following steps to add it:
- Tap Choose a different folder.
- Tap the folder you want to save your document to. You can also tap Create folder to create a new folder.
- Tap Save in the lower-right corner of the panel to the left.
-
10Tap Save. This saves the document to your Dropbox.


Taking Pictures and Audio Recordings
-
1Tap Create. It's the third button in the lower-left corner. It has an icon that resembles a plus (+) sign. This displays a menu with options for uploading and creating files.
-
2Tap Take photos or Record audio. If you want to take a picture, tap Take photos. If you want to create an audio recording, tap Record audio.
-
3Tap the Capture button. It's the large round button. If you are taking a picture, it's on the right side of the screen. If you are making an audio recording, it's at the bottom of the screen.
- If you are recording an audio recording, tap the capture button again to stop the recording when you are finished recording.
-
4Tap Use Photo or Retake. If you are taking a photo, tap Use photo if you want to keep the photo. If you are not happy with the photo, tap Retake and take another photo.
-
5Create a file name for the photo or audio recording. If you are taking a photo, tap Rename below the image preview. If you are making an audio recording, tap File name. Then type a file name for the file and tap Done.
-
6Select a folder to upload the photo or audio recording to. Tap the folder you want to save the folder do below "Upload to." If you do not see the folder you want to save the folder to, use the following steps to add it:
- Tap Choose a different folder.
- Tap the folder you want to save your photo or audio recording to. You can also tap Create folder to create a new folder.
- Tap Save in the lower-right corner of the panel to the left.
-
7Tap Save or Upload. It's in the upper-right corner. If you are uploading an audio recording, tap Upload. If you are taking a photo, tap Save. This saves the photo or audio recording to your Dropbox.


Managing Your Files
-
1Tap Files. It's the second button in the lower-left corner. It has an icon that resembles a folder. This displays all files and folders in your Dropbox.
-
2Tap ⋯ next to a file or folder. This opens the File menu, which you can use the manager your files and folders.
-
3Share a file or folder. To share your file tap Share in the File menu. Then tap one of the three options.
- Share link: This option creates a link to the file that you can share with other people. To create a share link, tap this option and then tap Copy Link Paste the link and send it to anyone you want to share the file with.
- Export file: This option gives you the option to open the file in another app, or download the file to your iPad. To open the file, tap Open in and then tap the app you want to open the file with. Tap Save fo files to save the app to your iPad. If the file was shared with you by another user, tap Save to Dropbox to save the file to your own Dropbox.
- Invite to file: This option allows you to invite someone to view the file. To do so, tap this option and the enter the name of a person, group, or email address you want to share the file with. Then tap Share. Alternatively, you can tap Share link to create a share link with the file.
-
4Edit the file settings. If you have recently shared the file with someone, you can change the share settings by tapping File settings in the File menu. Then tap Control access. This displays a menu that allows you to adjust who can view the file, enable or disable downloads, set an expiration day, or delete the share link.
-
5Send a copy of the file. This option allows you to create a link that will allow others to download a copy of the file. Open the File menu and use the following steps to send a copy of the file:
- Tap Send copy.
- Tap Continue
- Tap Set Expiration date and set how many days you want the link to be active.
- Tap Continue.
- Tap Copy Link
- Tap Copy.
- Paste the link and send it to whoever you want to share the file with.
- Tap Done
-
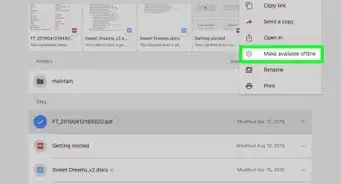
6Make a file available offline. This downloads the file to your iPad so that you can access it even when there is no internet connection. To make a file available offline, open the File menu and tap the toggle switch next to Make available offline.
- You need to have a Plus subscription to make entire folders available offline.
-
7Star a file or folder. Starring a file or folder makes that file or folder available under the "Starred" tab in the Home menu. This is a good way to make your favorite files and folders easily accessible. To star a file, open the File menu and then tap Star. #Rename a file or folder. To rename a file or folder, open the File menu and tap Rename. Then type a new file name for the file or folder and tap Rename in the upper-right corner.
-
8Duplicate a file or folder. If you want to create a duplicate copy of a file or folder, use the following steps to do so:
- Open the File menu.
- Tap Duplicate.
- Tap File name.
- Type a new file name for the duplicate file.
- Tap a folder to save the duplicate file to.
- Tap Save.
-
9Move a file. To move a file, open the File menu and tap Move. Then tap the folder you want move the file to. If you don't see the folder you want to move the file to below "Move to", tap Choose a different folder and tap the folder you want to add the file or folder to. Then tap Save.
-
10Delete a file. If you want to delete a file, open the File menu and tap Delete. Then tap Delete again to confirm you want to delete the file.


Enabling Camera Uploads
-
1Tap Account. It's the fifth icon in the lower-left corner. It has an icon that resembles a person. This opens your Account menu.
-
2Tap Camera Uploads. It's the second option below "Features." With Camera Uploads enabled, photos and videos you take with your iPad will be automatically uploaded to your Dropbox account.
-
3Select what photos you want to back up. To do so, tap Back up. Then tap either All photos or New photos only.
-
4Select a folder to upload from. By default, photos will be uploaded from your Camera Roll. If you want to select a different folder, tap Upload from and then select a folder you want to upload from. You can also tap the toggle switch next to any photos you want to upload.
-
5Select if you want to include videos. If you want to include videos in your camera uploads, tap the toggle switch next to Include videos.
- Select if you want to allow cell data to be used to back up your photos. Using cell data may result in extra charges. By default, cell data will not be used to upload your photos. If you want to allow Dropbox to use your cell data, tap the toggle switch next to Use cell data to back up.
-
6Select how you want to save HEIC photos. HEIC is the typical format that iPhone and iPad save images as. However, this format may not be compatible with many services. It's recommended that you save HEIC files as JPG images. However, if you would rather save your photos as HEIC files, tap Save HEIC photos as and then tap HEIC.
-
7Tap Turn on camera uploads. It's the blue button at the bottom of the page. This will enable camera uploads and start backing up your photos.


Linking a Computer
-
1Navigate to https://www.dropbox.com/connect in a web browser on your computer. You will see a five QR codes that resembles the Dropbox Logo.[4]
- Dropbox is most useful when it is installed on all of your devices. This will allow you to easily share files between all of the devices that Dropbox is installed on. However, a free Dropbox account only allows you to connect three devices.
-
2Tap Account in the Dropbox app on your iPad. It's the fifth option in the lower-left corner. This opens your account menu.
-
3Tap Connect a computer. It's the second to last option in the Account menu. This option will walk you through the steps of connecting a computer to your Dropbox account.
- If you have not given Dropbox permission to use your camera, you will be asked if you want to allow Dropbox to use your camera. Tap Allow to continue.
-
4Tap Yes, continue. It's in the middle of the pop-up menu. Make sure you are near your computer and you have the Dropbox Connect web page loaded in a web browser.
-
5Tap Next. This indicates that you are ready to go.
-
6Scan the QR with your iPad camera. To do so, hold the iPad camera in front of your computer screen so that the five QR codes are within the camera view in the center of your iPad screen. Wait for your iPad to scan the QR code. This will log you in to Dropbox on your computer and download a Dropbox installation file.
-
7Run the Dropbox installer. You can find the installation file in your web browser or Downloads folder. Click the file and follow the instructions to complete the installation. The installation process will be a little different depending on if you are using a Windows PC or a Mac. Once the installation is complete, you will be signed in to Dropbox automatically on your computer.
-
8Open the Dropbox app on your computer. You can find the Dropbox app in the Windows Start menu on Windows, or in the Applications folder on a Mac.
- Anything added to Dropbox on your computer will be accessible on your iPad, and vice versa.
-
9Connect other devices. Dropbox is available for Windows, Mac, iOS, and Android. You can connect up to 3 devices with a free account. If you have a Plus subscription, you can connect as many devices as you want.


Expert Q&A
-
QuestionWhat is the best way to share documents on Dropbox?
 Mitch HarrisMitch Harris is a Consumer Technology Expert based in the San Francisco Bay Area. Mitch runs his own IT Consulting company called Mitch the Geek, helping individuals and businesses with home office technology, data security, remote support, and cybersecurity compliance. Mitch earned a BS in Psychology, English, and Physics and graduated Cum Laude from Northern Arizona University.
Consumer Technology ExpertIt's always better to share a folder with a recipient rather than a link. That way, you can ensure that nobody else looks at your data. -
QuestionWhat Is the simplest way to manage my use of Dropbox 3 devices: all using the same account, or different ones?
 Community AnswerYou should use only one account. Simply put your files into your Dropbox cloud, and it should be available for download on your devices.
 -
QuestionAre photos uploaded or downloaded through Dropbox encrypted?
 Community AnswerYes, Dropbox uses a secure connection to transmit files to their servers. They may or may not encrypt your files on the server. Usually their privacy policy would tell you if they do encrypt the files. However, it is best not to use Dropbox for items you're concerned about because they can be forced to hand over decryption keys to law enforcement. Always encrypt your files using your own method of encryption and never store decryption keys on the server.


References
About This Article