This article was co-authored by Luigi Oppido and by wikiHow staff writer, Darlene Antonelli, MA. Luigi Oppido is the Owner and Operator of Pleasure Point Computers in Santa Cruz, California. Luigi has over 25 years of experience in general computer repair, data recovery, virus removal, and upgrades. He is also the host of the Computer Man Show! broadcasted on KSQD covering central California for over two years.
The wikiHow Tech Team also followed the article's instructions and verified that they work.
This article has been viewed 1,312,391 times.
Need to transfer files from your computer to your iPad? Don’t worry—it’s a simple process, and you have a few different options depending on what kind of computer you have. This wikiHow tutorial will show you how to transfer files from a Mac or PC to your iPad.
Steps
iTunes or Finder
-
1Connect your iPad to your computer. Plug one end of your iPad's charging cable into one of the computer's USB ports, then plug the other end of the cable into your iPad's charging port.[1]
- If you have a more recent iPad, like the iPad 11 Pro, you may have a USB-C to USB-C cord instead and will need an adapter so you can connect to your computer. These adapters are easy to find at any local retailer, like Target, Walmart, Amazon, or the Apple Store.
-
2Open iTunes (Windows) or Finder (Mac) on your computer. Its app icon resembles a multicolored musical note on a white background.
- If iTunes prompts you to update it, click Download iTunes on the prompt and then restart your computer after the update completes.
- Apple has announced that they will retire the iTunes app with the launch of macOS Catalina in the fall of 2019. Instead of using iTunes for file transfers, use Finder if you're on a Mac. Windows users will still be able to use the iTunes app.
Advertisement -
3Click the "Device" icon. It's an iPad-shaped button on the upper-left side of the window. This will take you to your iPad's page.
-
4Click File Sharing. When you click the file "Device" icon in the upper-left corner, you can see the "File Sharing" option in the sidebar to the left. It's next to an icon that resembles an "A".
-
5Select an app. In the column of apps in the middle of the window, click an app to which you want to add a file. The file type doesn't necessarily have to correspond to the app (for example, you could add a Microsoft Word file to the iMovie folder).
- Apple's Pages, Keynote, Numbers, iMovie, and GarageBand apps all have folders for saved projects on your iPad, meaning that you can use them to store literally any file type.
-
6Scroll down and click Add File…. This button is on the lower-right side of the page. Doing so will open your computer's File Explorer (Windows) or Finder (Mac).
-
7Select a file. Click the file that you want to add to your iPad to select it. You may first have to go to the file's folder location by clicking the appropriate folder on the left side of the window.
-
8Click Open. It's in the bottom-right corner of the window. You should see the file's name appear in the app's window in iTunes or Finder.
-
9Click Sync. This button is on the lower-right side of the iTunes window. Doing so will add the file to your selected app on the iPad. At this point, you can open the file on your iPad at any time, even if you aren't connected to the Internet.
- You can click Done after the sync completes to return to the main page.


iCloud Drive
-
1Go to https://www.icloud.com/ in your browser. This will open the iCloud login page.
- This is probably the easiest and fastest way to transfer files to and from your iPad from your Windows 10 computer.
-
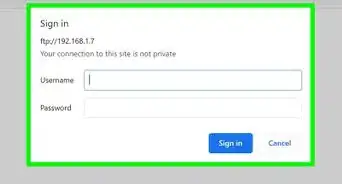
2Log into your iCloud account. Enter your Apple ID email address and password, then click the arrow icon to the right of the Apple ID and password bars.
- Skip this step if you're already logged into iCloud.
- If you have two-factor authentication enabled, you'll need to get the 6-digit number from your iPad to log in on your computer.
- If you are asked if you want to trust the device you are logging into, tap Trust on both your iPad and computer.
-
3
-
4Click the "Upload" icon. It's at the top of the page. The icon resembles a cloud with an arrow pointing up. Doing so will open a File Explorer (Windows) or Finder (Mac) window.
-
5Click the file that you want to upload to iCloud Drive. Use the file browser to navigate to the files you want to upload. Click a file to select it.
- You can also select all files in a given location by clicking one file and then pressing Ctrl+A (Windows) or ⌘ Command+A (Mac).
- To select open multiple files, hold down Ctrl (Windows) or ⌘ Command (Mac) while clicking each file you want to select
-
6Click Open. It's in the bottom-right corner of the window. Doing so will prompt your files to begin uploading to iCloud Drive.
-
7Wait for your files to upload. This can take anywhere from a few seconds to a few hours depending on your files' combined size. Once the files finish uploading, you can proceed.
-
8
-
9Tap the Browse tab. It's in the bottom-right corner of the screen.
-
10
-
11Tap Select in the top-right corner of the screen. This displays a blank circle next to each file.
-
12Tap each file that you want to move onto your iPad. This displays a checkmark in the circle next to each file you tap.
-
13Tap the Move. You'll find this at the bottom of the screen.
-
14Tap On My iPad. It's next to an icon that resembles an iPad. This displays a list of folders on your iPad
-
15Tap a folder you want to save your files to.
-
16Tap Move. It's in the top-right corner of the screen. Doing so will add the selected files to your selected folder, making them available on your iPad even when you aren't connected to the Internet.
- You can open the files from within the Files app.


AirDrop
-
1
-
2Click Go. It's in the menu bar at the top of the screen. This displays a drop-down menu of different common folders in the Finder.
-
3Click AirDrop. It's in the drop-down menu below "Go" in the Finder.
-
4Select Contacts only or Everyone in the drop-down menu. The drop-down menu is at the bottom of the screen next to "Allow me to be discovered by:" This makes you discoverable through AirDrop.
-
5
-
6Tap Browse. It's the second tab at the bottom of the Files app. This displays a sidebar menu to the left.
-
7Tap On My iPad. It's next to an icon that resembles an iPad in the menu to the left.
-
8Tap the program that has files you want to transfer. Program files in the Files app are organized by app. Tap the app folder that corresponds to the files you want to transfer. This displays all the files for that app.
- For example, if you have some Pages documents you want to transfer to your app, tap Pages.
-
9Tap Select. It's in the upper-right corner of the Files app. This displays a circular button next to each file.
-
10Tap the files you want to transfer. This displays a checkmark icon next to the files you select.
-
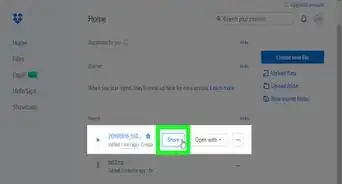
11Tap Share. It's in the lower-left corner of the Files app. This displays the Share menu.
-
12Tap the AirDrop icon in the share menu. It's the icon that has a number of concentric circles with an upside-down V at the bottom. This displays contacts that are available through AirDrop in the menu.
- In order for a contact to be available through AirDrop, they must be signed in to their Apple ID on their device. Both devices must be on the same Wi-Fi network and have Bluetooth turned on.
- AirDrop must be discoverable by "Contacts" or "Everyone" on the receiving device.
- Transferring files via AirDrop may not be available on some older iPhone, iPad, iMac, or Macbook models.
-
13Tap a contact in the AirDrop section. The AirDrop section is the second section in the Share menu. It displays the profile image and devices for all contacts (including yourself) that are available through AirDrop. This starts sending the files to your Mac. Your Mac will make a sound when the file transfer is complete. You can find the files in the "Downloads" folder in the Finder on your Mac.


-
1Open an Email app on your iPhone or iPad. Tap the email app you use to send an email on your iPhone or iPad. If you use Apple Mail, tap the blue icon with a white envelope at the bottom of the screen. If you use Gmail or Outlook, tap the app icon on your home screen.
- This is another easy solution that you can use to transfer files between your iPad and Windows 10 computer.
-
2Tap the compose icon. This is the icon you tap the create a new email message. In Apple Mail and Outlook, it's the icon that resembles a pencil and paper at the top of the screen. On Gmail, it's the icon with the plus sign (+) in the lower-left corner.
-
3Type your email address in the recipient line. This is usually the line that says "To:" or "Recipient" in the email composition form.
-
4Type a subject for the email. Use the subject line to type a subject for the email. This can be the name of the files or just "Files".
-
5Tap the attachment icon. This is usually an icon that resembles a paperclip. It's at the top of the screen, or in the upper-right corner of the on-screen keyboard.
-
6Tap Browse (if available). It's the second tab at the bottom of the screen.
- If you are using Gmail, just tap the file you want to send in the list of files.
-
7Tap On My iPad. It's next to an icon that resembles an iPad in the menu to the left.
-
8Tap the program that has files you want to transfer. Program files in the Files app are organized by app. Tap the app folder that corresponds to the files you want to transfer. This displays all the files for that app.
-
9Tap the file you want to transfer. This uploads the file as an email attachment
- Some email services may limit the size of the file you can upload. If you are unable to attach a file, it may be too big.
-
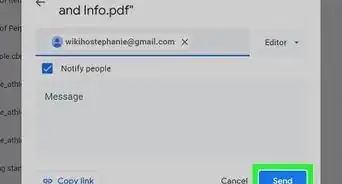
10Tap the Send icon. In Apple Mail, it's the button that says Send in the upper-right corner. In Outlook and Gmail, it's the icon that resembles a paper airplane in the upper-right corner.
-
11Open your email app on your Mac. If you are using Outlook or Apple Mail, tap the icon in the Applications folder in the Finder or the Dock. If you are using Gmail, navigate to https://mail.google.com in a web browser.
- If you are not signed in to your email automatically, type your email address and password to sign in.
-
12Open the email that you sent to yourself. Look for an email with the subject you typed and click it to open the email.
-
13Double-click the attachments to download them. Attachments are usually listed at the bottom of the email. By default, you can find your Downloads folder in the Finder.


Microsoft OneDrive
-
1Go to https://onedrive.com/ in your browser. This will open your Microsoft OneDrive main page if you're logged into your Microsoft account.
- If you aren't logged into your Microsoft account, enter your email address and password before proceeding.
-
2Click Upload. It's at the top of the page. A drop-down menu will appear.
- If you'd like to save the file in a specific folder, first click the folder in which you'd like to save it.
-
3Click Files. This option is in the drop-down menu. Doing so will open a File Explorer (Windows) or Finder (Mac) window.
- If you want to upload a folder full of files, click Folder here instead.
-
4Select files. Click a file that you want to upload to OneDrive or hold down Ctrl (Windows) or ⌘ Command (Mac) while clicking individual files to select them independently.
- You can also select all files in a given location by clicking one file and then pressing Ctrl+A (Windows) or ⌘ Command+A (Mac).
- If you want to upload a folder, click the folder that you want to upload instead.
-
5Click Open. It's in the bottom-right corner of the window. This will prompt your files to begin uploading to OneDrive.
-
6Wait for the files to finish uploading. The time needed for this step will vary depending on your files' collective size. Once the upload is complete, you can proceed.
-
7
-
8Tap and hold a file to select it then tap any other files/folders that you want to download onto your iPad to select. This selects the file. To select multiple files, tap and hold the first file, then tap each other file that you want to select.
-
9
-
10Tap Save to Files. This folder-shaped icon is in the menu at the bottom of the screen.
-
11Tap On my iPad. This displays a list of folders on your iPad.
-
12Tap a folder you want to save the files to. Below the "On My iPad" heading, tap a folder (e.g., Pages) to select it as the folder to which you want to save your OneDrive file.
-
13Tap Add. It's in the top-right corner of the screen. You can now open the file on your iPad even if you're not connected to the Internet.


Google Drive
-
1Go to https://www.drive.google.com/ in your browser. This will open your Google Drive account if you're logged into your Google account.
- If you aren't logged into Google Drive, click the blue Go to Google Drive button if available, then enter your email address and password before continuing.
-
2Click NEW. It's a blue button in the upper-left corner of the window. This will prompt a drop-down menu.
- If you'd like to save the file in a specific folder, first click the folder in which you'd like to save it..
-
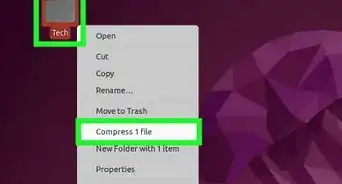
3Click File upload. This option is in the drop-down menu.
-
4Click a file that you want to upload to Google Drive. To select multiple files, hold down Ctrl (Windows) or ⌘ Command (Mac) and click the files you want ot upload.[2]
- You can also select all files in a given location by clicking one file and then pressing Ctrl+A (Windows) or ⌘ Command+A (Mac).
-
5Click Open. It's in the bottom-right corner of the window. Doing so will prompt your files to begin uploading to Google Drive.
-
6Wait for your files to upload. The time needed to complete this step will vary depending on how large your files are. Once the upload is complete, you can proceed.
-
7Tap the Google Drive app icon. It resembles a green, blue, and yellow triangle on a white background. This will open the Google Drive main page if you're logged in.
- Again, if you aren't logged into Google Drive, enter the email address and password for the account on which you uploaded the files.
-
8Tap and hold a file to select it. This selects the file. To select multiple files, tap and hold the first file, then tap each other file that you want to select.
-
9Tap ⋯. It's the icon with three dots next to each file in the Google Drive folder.
-
10Tap Make available offline. This option is in the pop-up menu. Doing so means that you'll be able to open the files within Google Drive even when your iPad isn't connected to the Internet.
- There is a Google Drive option in the Files app, but you can't download multiple files from Google Drive into your Files app like you can with other cloud storage apps.


Community Q&A
-
QuestionThis does not work, clicking on that icon does not show Copy files.... it shows nothing other than Sync with Itunes. GOD I detest apple.
 wikiHow Staff EditorThis answer was written by one of our trained team of researchers who validated it for accuracy and comprehensiveness.
Staff AnswerwikiHow Staff EditorStaff AnswerOne of the more recent updates for Apple products removed iTunes functionality. You can do everything you used to do in iTunes using Finder. -
QuestionHow do I transfer data from my PC back to my iPad?wikiHow Staff EditorThis answer was written by one of our trained team of researchers who validated it for accuracy and comprehensiveness.
Staff AnswerwikiHow Staff EditorStaff AnswerTo transfer data back from your computer to your iPad, you can follow the same steps with iCloud, email, One Drive, Cloud Drive, Google Drive, and AirDrop. -
QuestionI need to transfer a pdf file from PC to IpadwikiHow Staff EditorThis answer was written by one of our trained team of researchers who validated it for accuracy and comprehensiveness.
Staff AnswerwikiHow Staff EditorStaff AnswerTo transfer data from your computer to your iPad, you can follow the same steps with iCloud, email, One Drive, Cloud Drive, Google Drive, and AirDrop.
Warnings
- If you don't have iOS 11 or higher on your iPad, you won't have the Files app. If so, you'll need to open files from within your selected app.⧼thumbs_response⧽


References
About This Article

1. Connect the iPad to the computer.
2. Open iTunes.
3. Click the iPad icon.
4. Click File Sharing.
5. Select an app.
6. Click Add File.
7. Select a file.
8. Click Open.
9. Click Sync.