This article was co-authored by wikiHow staff writer, Nicole Levine, MFA. Nicole Levine is a Technology Writer and Editor for wikiHow. She has more than 20 years of experience creating technical documentation and leading support teams at major web hosting and software companies. Nicole also holds an MFA in Creative Writing from Portland State University and teaches composition, fiction-writing, and zine-making at various institutions.
This article has been viewed 14,610 times.
Learn more...
You can use a BitTorrent client to download many different types of files, including movies, audio files, and applications. If you downloaded software that was originally meant to be run or installed from a CD or DVD, you'll usually need to convert it to an ISO image so you can mount it like a disk. This wikiHow teaches you how to create an ISO from files you torrented in Windows and macOS.
Steps
Using BurnAware Free for Windows
-
1Unzip or decompress the downloaded file. If you downloaded a file that ends with .ZIP, .TAR, or .RAR, you will need to decompress it first:
- If it's a .ZIP file, double-click the file and click Extract all in the toolbar. Then, choose a location to which you want to extract the files (or make note of the current location in the "Browse" bar) and click Extract.
- If it ends with .RAR, you'll need WinRAR to decompress it. After installing WinRAR, double-click the downloaded .RAR file and click Extract To in the toolbar. Then, choose a folder to extract the files to and click OK.
- If it ends in .7z, you'll need to install 7-Zip. Once installed, double-click the .7z file, select all of the files in the window (press Ctrl + A to do so) and click Extract in the toolbar. Choose a folder to extract the files to and click OK.
-
2Install BurnAware Free. This is a free utility that can create an ISO image from the file(s) you torrented. Here's how to install it:
- Go to https://www.burnaware.com/download.html in a web browser.
- Click the Download link under "BurnAware Free." If the download doesn't start immediately, click Save.
- When the file is finished downloading, double-click its name in your Downloads folder, or single-click it at the bottom-left corner of your browser.
- Click Yes to run the installer, and then follow the on-screen instructions to install it on your PC. If you are prompted to install any additional software, click Decline.
Advertisement -
3Open BurnAware Free. If it doesn't open automatically after installing, click your Windows Start menu and select BurnAware Free in your program list.
-
4Click Make ISO. It's the icon of a sheet of paper with a yellow star at its top-left corner.
-
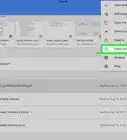
5Click the +. It's the green button at the top of the window.
-
6Select the files or folders you want to add and click Add. For example, if extracting the downloaded files created a new folder called My Game, open that folder, and then select the files and folders inside. To select multiple files and folders, hold down the Ctrl key as you click.
- The file ending in .torrent is not the file you want to add to the ISO—that file just contains metadata and network information for the download.
-
7Click Close. Now you'll see the files and folders you selected in the list.
-
8Click Make. It's at the top-left corner.
-
9Enter a name for the ISO and click Save. You can also choose a different folder than the default option if you'd like to save it somewhere different. Once you click Save, BurnAware Free will create the ISO and save it to the selected location.


Using Disk Utility on a Mac
-
1Unzip or decompress the downloaded file. If you downloaded a file that ends with .ZIP, .TAR, or .RAR, you will need to decompress the file first.
- If the file ends with .ZIP, just double-click the .ZIP file to unzip the folder inside.
- If the file ends with .RAR or .7Z, you can use a free utility called Unarchiver. You can get it from the App Store. After installing Unarchiver, open it from Launchpad or the Applications folder, click the File menu, select Unarchive to, select the .RAR or .7z file, and then click Extract.[1]
-
2Open Disk Utility on your Mac. You can do this by typing disk utility into the Spotlight search and clicking it in the search results. It's also in your Utilities folder, which you'll find in Finder under "Applications."
- Disk Utility will create a .CDR file, which works just like an ISO on your Mac.[2] You won't have to convert it to ISO to use it on your Mac, but if you want to use it on other platforms, the final steps of this method will show you how.
-
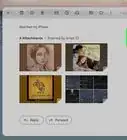
3Click the File menu and select New Image. Another menu will expand.
-
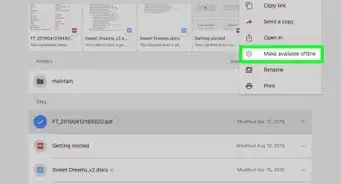
4Click Image from Folder. Now you'll be asked to select a folder.
-
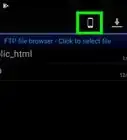
5Select the folder and click Open. Make sure you choose the folder that contains the files you torrented, not the folder that contains the file ending with .torrent. The .torrent file does not contain anything you need and shouldn't be included in the CDR/ISO.
-
6Enter a name for the image file. This goes into the "Save As" box. This name will be used to represent the disk image when you mount it on your Mac.
- The default saving location is set to "Desktop" by default. Keep this setting, as it'll make the final steps easier.
-
7Select DVD/CD master from the "Image Format" menu. This ensures that the file is cross-compatible.
-
8Click Save. Now Disk Utility will create the CDR image file from the selected folder and place it on your Desktop (or the folder you selected).
- Click Done to close the window when prompted.
- If you'll only be using this image file on your Mac, you don't need to continue, as a CDR functions exactly like an ISO. However, if you want to use the file elsewhere, such as on a PC, continue with this method.
-
9Open a terminal window. An easy way to do this is to type terminal into the Spotlight search bar and click Terminal in the search results. You'll also find Terminal in Applications > Utilities.
-
10Type cd ~Desktop and press ⏎ Return. This takes you to the Desktop folder, which is where you saved the CDR file.
-
11Enter the command to convert the CDR to an ISO. This command will complete the conversion. In this example, MYFILE.iso is the name of the new file we're creating, while MYFILE.cdr is the image file we created in Disk Utility—replace those names with your own:
- Type hdiutil makehybrid -iso -joliet -o -MYFILE.iso MYFILE.cdr and press Return.
- Once you run the command, you will find the new ISO file on your Desktop.


References
About This Article

1. Unzip the downloaded files.
2. Install BurnAware Free.
3. Open BurnAware Free and click Make ISO.
4. Click +.
5. Select the files and folders you want to add and click Add.
6. Click Close.
7. Click Make.
8. Enter a name and click Save.