This article was co-authored by Greg Maurer and by wikiHow staff writer, Christopher M. Osborne, PhD. Greg Maurer is a Health & Fitness Specialist and the Vice President of Fitness and Education for Workout Anytime. With over a decade of experience, he specializes in functional training, yoga, pilates, exercise and aging, home exercise programs, and numerous fitness diets. Greg holds a BS in Exercise Physiology from Temple University.
There are 19 references cited in this article, which can be found at the bottom of the page.
This article has been viewed 165,220 times.
If you haven't used gym equipment before, the thought of using it incorrectly, especially when other people may be watching, can be intimidating. But don’t let that stop you from getting fit and having fun at the gym! Just take some common-sense measures, read a few instructions and diagrams, ask for help when you need it, and listen to your body while working out. Also remember to focus on your own goals instead of whether anyone is watching you—unless, that is, your goal is to get noticed!
Steps
Weight Machines
-
1Repetitions and sets: Especially when you’re starting out using weight machines, aim to do 10 reps (repetitions) per set. For instance, do 10 consecutive lat pulldowns before taking a short break. Aim to do 3 sets total for each machine. If you can’t do 3 sets of 10 reps, cut back on the weight you’re trying to lift.[1]
- Alternatively, if you feel like you can easily do 15 or 20 reps per set, increase the weight a bit.
- A good strength training session should take around 30-60 minutes. Aim to do 2-3 sessions per week, allowing 48 hours of rest between sessions.
-
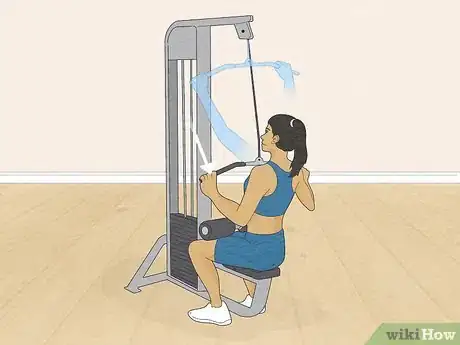
2Lat pulldown machine: Lat pulldowns can help you get rid of those slouched shoulders! Select a weight that you can do with moderate effort.[2] Adjust the seat so your knees fit under the thigh pads and so that you can reach the pulldown bar with your outstretched arms. Relax your shoulders as you slowly pull the bar down to touch your upper chest, then slowly guide it back to the starting position.[3]
- Don’t shrug your shoulders or crane your neck backward while pulling the bar downward. Keep your upper body still and upright.
Advertisement -
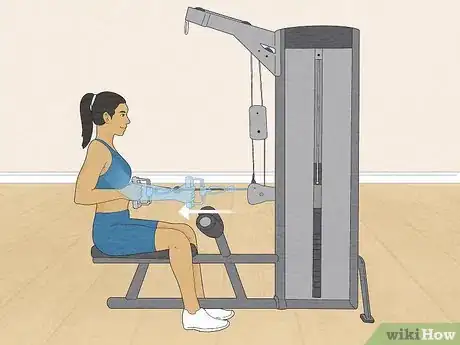
3Seated row machine:[4] Select a manageable weight, then adjust the seat so you can reach the handles with your outstretched arms while keeping your chest comfortably pressed against the chest pad. Keep your back straight and shoulders relaxed as you pull the handles to within a few inches/centimeters of your chest. Slowly return the handles to the starting position.[5]
- Remember to keep your back straight! Don’t lurch backward, arch your back, crane your neck, or hunch your shoulders.
-
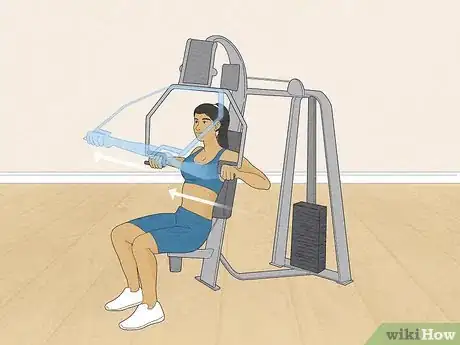
4Seated chest press machine:[6] If the machine has 2 separate weight stacks, make sure they’re set at the same weight. Adjust the seat so the hand grips are at mid-chest height and your bent elbows are even with or slightly in front of your chest, not behind it.[7] Extend your arms fully outward while keeping your back planted firmly to the seat, then slowly retract the hand grips to the starting position.[8]
- Don’t roll your shoulders forward or lean forward. Keep your back straight and use your arm and chest muscles. Imagine you’re pressing the seat backward instead of pushing the hand grips forward!
-
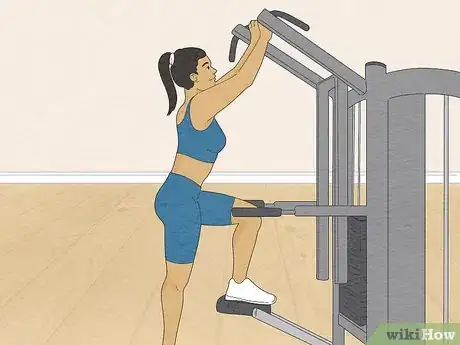
5Assisted pull-up machine: Start by setting the weight—but with this machine, which counterbalances your body weight, setting a higher weight makes the job easier! Climb the 2 steps, then get a firm grip (either overhand or underhand) on the handles above you. Step onto the foot bar, one foot at a time; it will dip down and raise the weight stack. Keep your legs, back, and neck straight and pull your body straight up with your arms until your eyes and hands are level. Slowly lower back down to the starting position.[9]
- When you’re done with your set, slowly step back off of the foot bar, one foot at a time, onto the top step. Keep ahold of the handles above you until you’re back on the top step, then carefully climb back down to the floor.
-
6Leg press machine:[10] Select a comfortable weight for doing 10 reps, then adjust the seat. With your back flat against the seat and your feet flat against the plate, your shins should be at a right angle to your thighs. Slowly extend your legs until they’re nearly—but not fully—extended, then slowly return to the starting position.[11]
- Don’t extend your legs fully and lock your knees—you may cause knee pain or injury.
- Use the hand grips at your sides to maintain your body position. Keep your butt, back, neck, and head planted firmly against the seat.
-
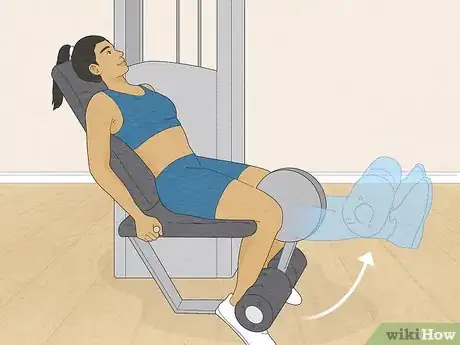
7Leg extension machine: Be very careful to select a reasonable weight here, so you don’t put undue strain on your knees. Set the machine so you can sit firmly against the seat back with your knees at right angles and your shins pressed against the padded bar. Hold the grab bars and steadily raise your legs until they’re fully extended out in front of you, then slowly lower your legs and the weight.[12]
- Don’t thrust your hips forward or press down on the grab bars to lift the weight. Focus on using only your quadriceps muscles. Reduce the weight if necessary.
Free Weights
-
1Reps, sets, and sessions: Just like with weight machines, aim to do 3 sets of 10 reps (repetitions) for each free weight exercise. If you can’t lower and lift the bar 10 times during a bench press set, for example, cut back on the weight until you can. If you can easily lift it 15 or 20 times, add some weight.[13]
- Whether you’re doing only free weights, only weight machines, or both, a typical strength training session should run around 30-60 minutes. Plan to do 2-3 sessions per week, with at least 48 hours of rest between sessions.
-
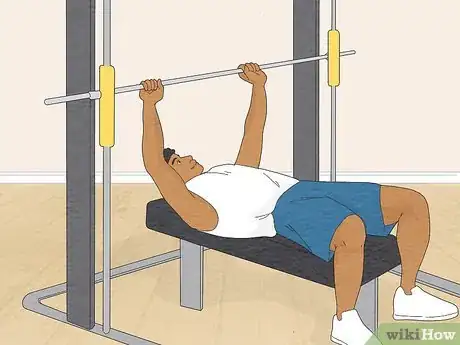
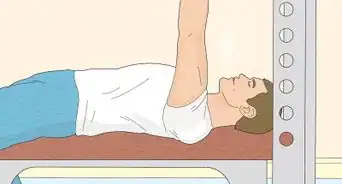
2Bench presses: Start with just the bar, which typically weighs between 33 and 45 lb (15 and 20 kg), or add limited weight so you can focus on your technique.[14] Choose an attentive “spotter,” a helper for lifting the bar off the rack, putting the bar back on the back, counting your reps, and giving encouragement. Lie flat on your back and grip the bar at slightly beyond shoulder width with your arms nearly fully extended. Lift the bar off the rack with your spotter’s guidance, then slowly bend your elbows, lower the bar to your chest, and extend your elbows to raise the bar back to the starting point.[15]
- Don’t arch your back—keep it flat on the bench. Move slowly and deliberately so you keep your arms (and the bar) even and balanced. Your spotter should be ready to help you as needed!
- As you get more comfortable with the bench press, you can try widening and narrowing your grip to target specific muscle groups.
-
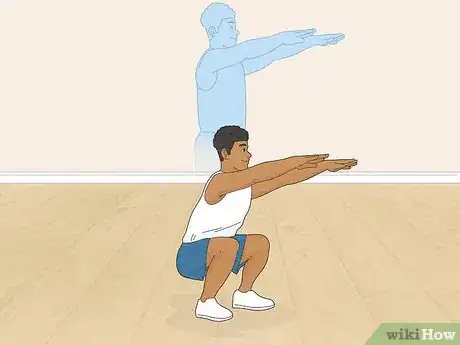
3Squats: Perfect your technique with body-weight squats before adding weights.[16] Start by standing with your feet at shoulder width and your toes turned outward between 5 and 30 degrees. Keep your feet flat on the floor and your chest puffed out. Engage your core, bend your knees, and push your hips back as you slowly lower your body until your thighs are parallel to the floor. Pause for a moment, then reverse the process to return to the starting position.[17]
- When you’re ready to add weight, start by holding a pair of dumbbells in front of your shoulders. Hold them steady throughout the process.
- Wait until you’re fully confident in your technique before advancing to barbell squats (with the bar behind your head). Grasp the bar with both hands and keep it in contact with the back of your shoulders throughout the process. Use a spotter!
-
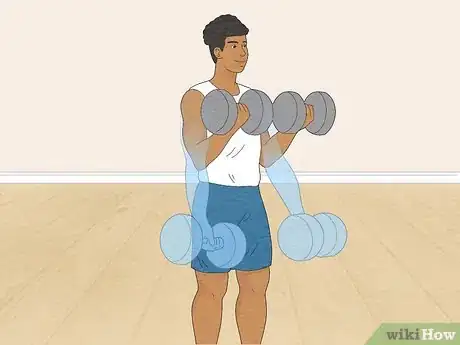
4Biceps curls:[18] Stand upright with your feet at shoulder width and the dumbbells in your hands resting against the sides of your legs. Bend your elbows very slightly and face your palms forward. Keep your legs and upper body steady and engage your core as you bend your elbows and raise the dumbbells to your shoulders, pause for a moment, and slowly lower them to the starting position.[19]
- Or, raise 1 dumbbell at a time, alternating arms with each rep throughout your set.
- Go slowly and pause at the top and bottom of the maneuver so you don’t use the momentum of your swinging arms.
- Keep your elbows tucked against (or in close proximity to) your sides.
-
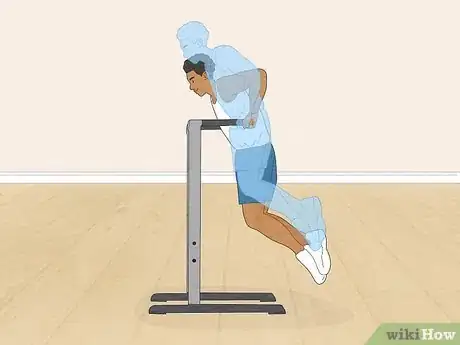
5Triceps dips: If your gym has parallel bars, try this classic triceps dip using only your body weight at first. Stand with the parallel bars at your sides, grip them firmly, and lift yourself up until your arms are locked. Your arms and upper body should be straight and parallel. Bend your knees at 90-degree angles and cross one ankle over the other. Dip down, keeping your body straight, until your elbows are at about 90-degree angles. Repeat to complete your set.[20]
- When you’re ready, attach a weight plate securely to a properly-fitted weight belt—get help from a staff member if you’re new to using them. Start with a very light weight, such as 5–10 lb (2.3–4.5 kg). Use the same technique as with a body-weight dip.
- If your gym doesn’t have parallel bars, there are triceps dip variations that require nothing more than a bench. The parallel bars dip, however, especially with a reasonable weight added, provides the most complete workout.
-
6Barbell rows: Add a limited amount of weight to the bar, since it’s critical that you’re able to maintain good technique during barbell rows. Stand with the bar on the floor about 1 ft (30 cm) in front of you. With your feet shoulder-width apart, bend your knees slightly and bend over at the waist. Grip the bar securely with both hands, palms down. Engage your core, squeeze your shoulders, and lift the bar straight up until it touches your chest. Look straight ahead and keep everything but your arms still. Slowly lower the bar and repeat.[21]
- Use slow, steady motions. Don’t jerk the bar upward or arch your back. If you feel any back pain, stop, take a break, and try using less weight during your next workout session.
-
7Lateral arm raises: Stand straight up with your feet at hip-width and a dumbbell in each hand, resting at or near your hips. Engage your core and keep your back and arms straight as you steadily lift your arms out to your sides simultaneously until they’re parallel with the floor. After a momentary pause, steadily lower your arms back to the starting position, then repeat.[22]
- Do not flap your arms wildly or thrust your shoulders back. Maintain a steady, controlled motion throughout and keep your legs, core, and head still.
- Don’t start out by using heavy dumbbells! Use lighter weights so you can maintain your form and perfect your technique, then slowly increase the weight.
Cardio Machines
-
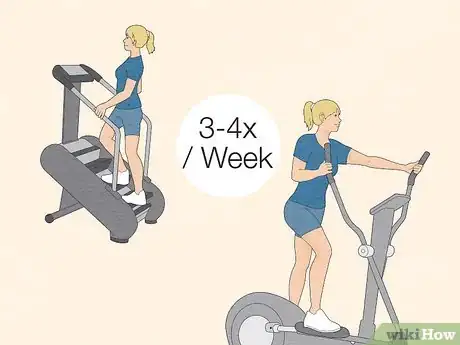
1Workout frequency: The average adult should aim for at least 150 minutes of moderate-intensity cardiovascular exercise per week. That means that using a treadmill, stair climber, or elliptical machine for 20-30 minutes, 3-4 times per week will put you well on your way to reaching your goal![23]
- Exercise is considered moderate intensity if you’re breathing hard enough that you can’t sing a song, but you can still carry on a conversation.
- Each minute of high-intensity exercise (when you’re breathing so hard you can talk but not carry on a conversation) counts as 2 minutes of moderate-intensity exercise.
- Consult your doctor before starting a cardio regimen if you have existing health conditions or live a sedentary lifestyle.
-
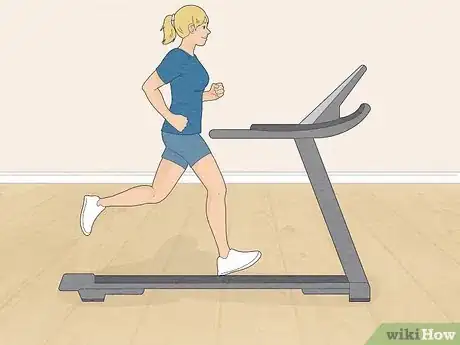
2Treadmill:[24] Climb up onto the machine before starting it up. Choose a preset program that suits your fitness level, health goals, and expertise with the machine. Grasp the handles and start walking slowly when the walking surface starts moving. Whether you’re walking, jogging, or running, stay centered on the walking surface and keep your feet beneath you. If you can’t keep up the pace, slow the machine down![25]
- With a preset program, you’ll start slow as a warmup, get moving a bit (or a lot) faster during the main part of the workout, then slow down again to finish up. You can manually increase or decrease the treadmill’s speed as desired, but try to follow the preset as-is if you’re new to using a treadmill.
- Most treadmills let you manually or mechanically increase or decrease the incline of the walking surface; increasing it ups the intensity while decreasing it reduces the intensity.
- A light- to moderate-intensity treadmill workout should last around 20-30 minutes. If you’re doing a high-intensity running workout, it may last only 5-10 minutes.
-
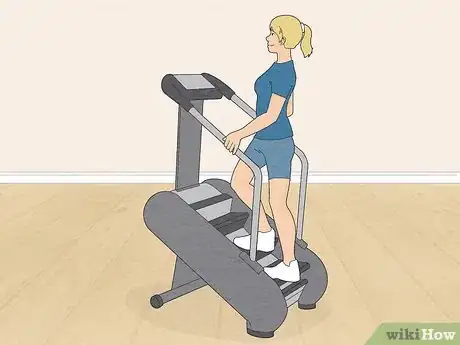
3Stair climber: With the machine off, grab the handles and ascend the staircase. Choose a preset program that suits your needs and goals. Maintain a normal stepping motion with your feet beneath you, making sure not to drift down the moving staircase. Continue to grip the handlebars throughout. Use the buttons on the machine to decrease or increase the pace of the machine if necessary.[26]
- Like with the treadmill, aim for 20-30 minutes of low- to moderate-intensity training.
-
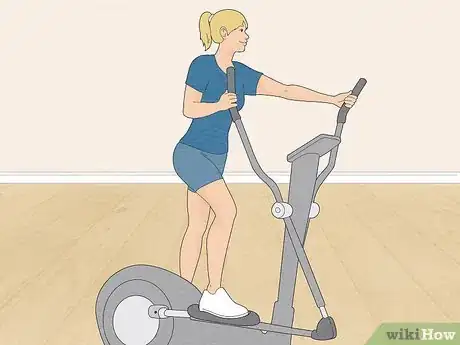
4Elliptical: Before starting up the machine, put your feet firmly on the pedals and get a good grip on the handles. Once you select an appropriate preset and get moving, get a full workout by engaging your arms and legs. Push and pull with your hands and use a rotating motion with your legs. Keep your feet flat and pressed to the pedals. Stand up straight and engage your core muscles.[27]
- Once you get comfortable with the forward motion, try going in reverse. You’ll rotate your legs as if you’re walking or running backward!
- A low- to moderate-intensity workout should last around 20-30 minutes, while a high-intensity elliptical session may only last 5-10 minutes.
Health, Safety, and Success
-
1Start slow if you’re new to working out or have health conditions. It’s great that you’ve decided to hit the gym and get fit, but don’t overdo it! Ease your body into your new workout routine to reduce your risk of injury. And, especially if you live a sedentary lifestyle or have existing health conditions, consult with your doctor before beginning a new exercise regimen.[28]
- Start out by going to the gym 2-3 times per week, for maybe 30 minutes at a time. Listen to your body for cues—such as moderate or severe soreness—that you’re overdoing it.
- In some cases, your doctor may recommend that you work with a physical therapist before starting a solo exercise program. Or, you might decide to work with a trainer, at least to start out.
- No matter your health situation, there is an exercise program that’s right for you!
-
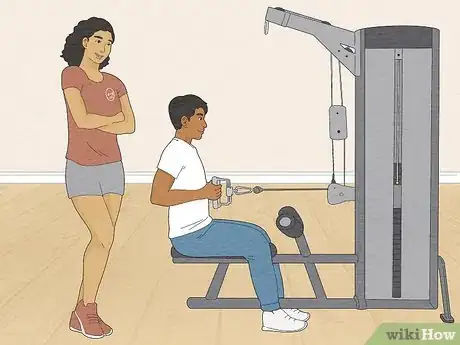
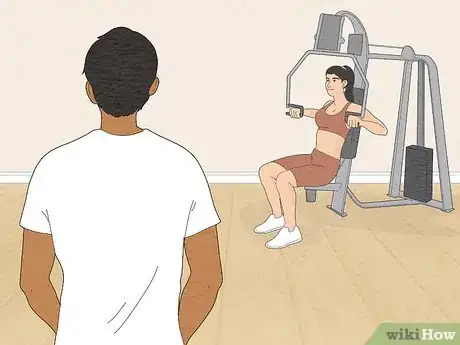
2Observe an experienced person before trying new equipment yourself. If you’re working with a trainer or with a friend who has more workout experience, watch them use the machine before trying it yourself. Observe how they adjust the equipment, their body positioning, their technique, and their pace. Ask questions and get tips from them.[29]
- If you’re working out alone, discretely watch people who clearly know what they’re doing as they use various pieces of equipment—for example, while you’re drinking some water or stretching out. Ideally, observe people who have a similar body type to yours.
-
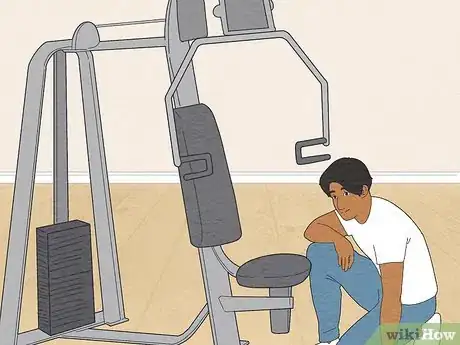
3Inspect the gym equipment for signs of excessive wear or damage. Worn-down or broken gym equipment can be dangerous. Before using any piece of equipment, take a quick look for signs of wear or damage. Alert a staff member if anything seems out of sorts.[30]
- As with unsanitary conditions, you’re better off finding a new gym if the equipment, in general, appears excessively worn or damaged.
-
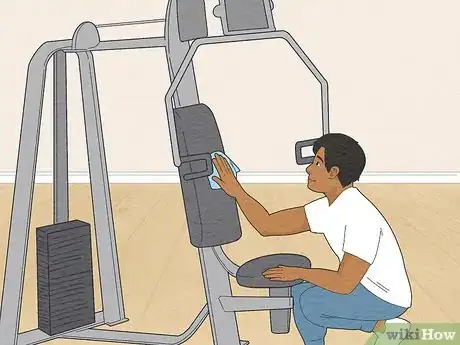
4Disinfect each piece of gym equipment before and after you use it. The days of simply wiping down gym equipment with your sweaty towel are long gone! Use a disinfectant cleaner and a clean cloth or paper towel to thoroughly wipe down each piece of equipment before and after use.[31]
- Cleaning gym equipment thoroughly is a matter of both common courtesy and public health.
-
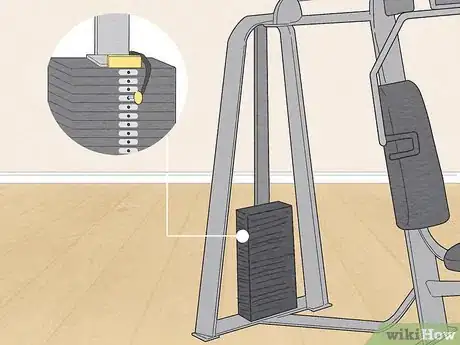
5Adjust the equipment to suit you, according to the instructions. If a piece of equipment has posted instructions or diagrams, check these out before attempting to adjust or use it. Once you’re sure you know how to make adjustments, use any levers, knobs, dials, etc. to fine-tune the equipment to suit your body type, fitness level, and goals.[32]
- If you’re not sure, for example, how to adjust a leg press machine or treadmill, ask a staff member. Don’t just make your best guess!
-
6Start out with lighter weights and focus on perfecting your technique. Don’t worry about putting on a show! Instead of maxing out on the weight you’re trying to lift, start with lighter weights so you can more easily maintain good technique.[33] Once you’ve mastered your technique, you can then start to ramp up the weight.[34]
- Generally speaking, you should be able to do 10 repetitions (reps) without your technique breaking down any. If you can easily do more than this, increase the weight a little. If your form starts to break down before 10 reps, cut back on the weight so you can focus on technique.
-
7Use even, steady movements and keep your body under control. Using gym equipment the right way isn’t about showing off, and it also isn’t a race! Body control is the key to good technique, and good technique is critical to a truly beneficial workout. Focus on remaining under control and using smooth, steady movements.[35]
- For instance, you should be doing biceps curls with a smooth, even motion, not a jerking, stop-and-go motion. Relax, focus on your technique, and reduce the weight if necessary.
- Being under control doesn’t necessarily mean going slow. There’s nothing wrong with getting your legs pumping on an exercise bike, for example. That said, don’t go so fast that your movements can’t remain fluid and under control.
-
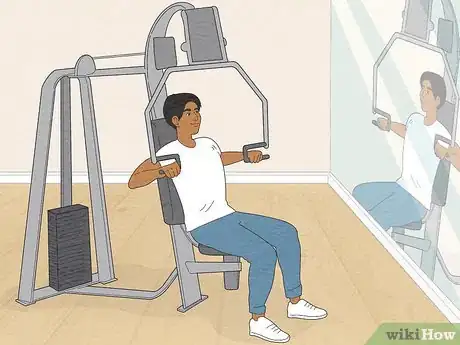
8Exercise in front of a mirror so you can keep an eye on your technique. Using a mirror at the gym doesn’t have to be about vanity! Use the mirror to observe yourself in action, and pay close attention to your form and technique. That way, you can make on-the-spot adjustments to get the most from your workout.[36]
- If a mirror isn’t available and you’re working out with another person, have them observe your technique and give advice as needed.
-
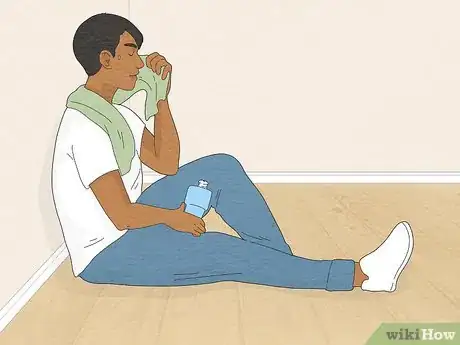
9Listen to your body before, during, and after your workout. Yes, you should “feel the burn” while working out, but you shouldn’t feel outright pain! Stop what you’re doing and take a break if you feel unexpected pain or discomfort. If it doesn’t pass within a few minutes, cut short your workout and give your body time to rest. If the pain worsens or lingers, contact your doctor.[37]
- If your body is still sore from your last workout, give it more time to recover before working out again. Generally speaking, you should allow for at least 48 hours of rest before exercising a particular muscle group again.
- A good fitness routine might include lifting free weights 2-3 times per week, doing cardio 2-3 times per week, and doing flexibility or range-of-motion activities 1-2 times per week, all the while making sure to give your body ample recovery time.
- If you feel faint or unexpectedly short of breath, stop what you’re doing, sit down, and try to relax. If you develop chest pains or other signs of a potential heart attack, get medical help right away.
Expert Q&A
-
QuestionWhat gym equipment is best for beginners?
 Greg MaurerGreg Maurer is a Health & Fitness Specialist and the Vice President of Fitness and Education for Workout Anytime. With over a decade of experience, he specializes in functional training, yoga, pilates, exercise and aging, home exercise programs, and numerous fitness diets. Greg holds a BS in Exercise Physiology from Temple University.
Health & Fitness Specialist In a well-rounded program, you should do some cardio and some strength training. So, pick at least one thing in the gym to use for cardiovascular exercises, like a bike, an elliptical, or a treadmill. For weight training, it is safer and easier for a beginner to use a selectorized equipment instead of picking up free weights.
 -
QuestionWhat are the best exercises for beginners at the gym?
 Greg MaurerGreg Maurer is a Health & Fitness Specialist and the Vice President of Fitness and Education for Workout Anytime. With over a decade of experience, he specializes in functional training, yoga, pilates, exercise and aging, home exercise programs, and numerous fitness diets. Greg holds a BS in Exercise Physiology from Temple University.
Health & Fitness Specialist You can start with three simple movements. All you really need to do at first would be a leg press, a seated row and a chest press. Try building up three sets of those and learning how to do them properly with the help of a trainer if possible.
 -
QuestionWhy we should clean the equipment after doing exercise?
 Community AnswerIt's a courtesy to other gym goers and helps prevent germs like MRSA from spreading.
Warnings
- If you’re reading this during the COVID-19 pandemic, make sure any gym you attend is closely following every guideline ordered by government health authorities. And, even then, working out at home may be the safer option.⧼thumbs_response⧽
- While gyms are a great place to get healthy, they can also harbor sources of illness. A healthy gym will look clean, have employees that engage in regular cleaning, have ample signage reminding everyone of the importance of keeping things clean, and have easily-accessible cleaning supplies for customers’ use. If your gym lacks these things, find a new one![40]⧼thumbs_response⧽
- Read all the safety warnings before using any piece of equipment. A medicine ball may not have a safety warning on it, but a leg press machine and a treadmill certainly will! Don’t just ignore these warning stickers and start using a piece of equipment—instead, take a few moments to read over the safety material.[41]⧼thumbs_response⧽
- Use a spotter if you’re working with free weights. If you’re doing curls with 5 lb (2.3 kg) dumbbells, maybe you can get by without a second person acting as your spotter. However, if you’re doing squats, bench presses, or similar free weight exercises, make sure to have an attentive spotter who can help you as needed.[42]⧼thumbs_response⧽
- Don't get into competitions with other members, trying to lift more weight or set your treadmill for a faster speed. Not only will you compromise your own workout, you may also injure yourself.⧼thumbs_response⧽
References
- ↑ https://www.shape.com.sg/fitness/correct-use-gym-equipment/
- ↑ Julian Arana, M.S.eD., NCSF-CPT. Certified Personal Trainer. Expert Interview. 19 March 2020.
- ↑ https://www.shape.com.sg/fitness/correct-use-gym-equipment/
- ↑ Greg Maurer. Health & Fitness Specialist. Expert Interview. 13 August 2021.
- ↑ https://www.shape.com.sg/fitness/correct-use-gym-equipment/
- ↑ Greg Maurer. Health & Fitness Specialist. Expert Interview. 13 August 2021.
- ↑ Julian Arana, M.S.eD., NCSF-CPT. Certified Personal Trainer. Expert Interview. 19 March 2020.
- ↑ https://www.coachmag.co.uk/gym-equipment/8136/what-the-weights-machines-in-your-gym-do
- ↑ https://youtu.be/H_Z5BBiJxLY?t=10
- ↑ Greg Maurer. Health & Fitness Specialist. Expert Interview. 13 August 2021.
- ↑ https://www.shape.com.sg/fitness/correct-use-gym-equipment/
- ↑ https://www.coachmag.co.uk/gym-equipment/8136/what-the-weights-machines-in-your-gym-do
- ↑ https://www.shape.com.sg/fitness/correct-use-gym-equipment/
- ↑ Julian Arana, M.S.eD., NCSF-CPT. Certified Personal Trainer. Expert Interview. 19 March 2020.
- ↑ https://www.sweat.com/blogs/fitness/how-to-use-gym-equipment
- ↑ Julian Arana, M.S.eD., NCSF-CPT. Certified Personal Trainer. Expert Interview. 19 March 2020.
- ↑ https://www.self.com/story/5-ways-youre-probably-doing-squats-wrong
- ↑ Julian Arana, M.S.eD., NCSF-CPT. Certified Personal Trainer. Expert Interview. 19 March 2020.
- ↑ https://gethealthyu.com/exercise/bicep-curl/
- ↑ https://www.coachmag.co.uk/exercises/arm-exercises/156/bench-dip
- ↑ https://www.coachmag.co.uk/exercises/back-exercises/177/bent-over-row
- ↑ https://www.coachmag.co.uk/exercises/shoulder-exercises/206/lateral-raises-%E2%80%93-how-do-them-and-why-you-should
- ↑ https://www.heart.org/en/healthy-living/fitness/fitness-basics/aha-recs-for-physical-activity-in-adults
- ↑ Greg Maurer. Health & Fitness Specialist. Expert Interview. 13 August 2021.
- ↑ https://spoonuniversity.com/healthier/workout-machines-to-try-if-youre-new-at-the-gym
- ↑ https://spoonuniversity.com/healthier/workout-machines-to-try-if-youre-new-at-the-gym
- ↑ https://spoonuniversity.com/healthier/workout-machines-to-try-if-youre-new-at-the-gym
- ↑ https://www.nytimes.com/2015/07/05/travel/safety-tips-for-using-hotel-gym-equipment.html
- ↑ https://www.nbcnews.com/better/lifestyle/new-gym-use-these-strategies-make-most-your-workouts-ncna963666
- ↑ https://www.nytimes.com/2015/07/05/travel/safety-tips-for-using-hotel-gym-equipment.html
- ↑ https://www.nytimes.com/2015/07/05/travel/safety-tips-for-using-hotel-gym-equipment.html
- ↑ https://youtu.be/MBM5XN-PE7s?t=30
- ↑ Julian Arana, M.S.eD., NCSF-CPT. Certified Personal Trainer. Expert Interview. 19 March 2020.
- ↑ https://www.sweat.com/blogs/fitness/how-to-use-gym-equipment
- ↑ https://www.shape.com.sg/fitness/correct-use-gym-equipment/
- ↑ https://www.nbcnews.com/better/lifestyle/new-gym-use-these-strategies-make-most-your-workouts-ncna963666
- ↑ https://www.health.harvard.edu/healthbeat/10-tips-for-exercising-safely
- ↑ https://www.self.com/story/guide-to-navigating-free-weights-at-the-gym?verso=true
- ↑ https://www.nbcnews.com/better/lifestyle/new-gym-use-these-strategies-make-most-your-workouts-ncna963666
- ↑ https://www.ncbi.nlm.nih.gov/pmc/articles/PMC6269393/
- ↑ https://www.shape.com.sg/fitness/correct-use-gym-equipment/
- ↑ https://www.nbcnews.com/better/lifestyle/new-gym-use-these-strategies-make-most-your-workouts-ncna963666
About This Article
Before using gym equipment, look for instructions on or near the machine, because there might be special safety information. Then, if you’re using weight machines, adjust the seats and benches to fit your height, and start with a weight that you know won’t be too heavy. Lift slowly, and add more weight if the workout is too easy. For cardio machines, start slow and increase your speed once you’re comfortable. To finish, decrease your speed over several minutes. For more tips, including instructions on how to safely use free weights, keep reading!

