This article was medically reviewed by Luba Lee, FNP-BC, MS. Luba Lee, FNP-BC is a Board-Certified Family Nurse Practitioner (FNP) and educator in Tennessee with over a decade of clinical experience. Luba has certifications in Pediatric Advanced Life Support (PALS), Emergency Medicine, Advanced Cardiac Life Support (ACLS), Team Building, and Critical Care Nursing. She received her Master of Science in Nursing (MSN) from the University of Tennessee in 2006.
There are 8 references cited in this article, which can be found at the bottom of the page.
This article has been viewed 58,635 times.
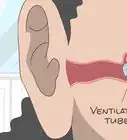
An otoscope is a medical instrument used by a doctor to examine the ear. The otoscope magnifies the inside of the ear to detect problems or issues with the outer and middle ears, such as Swimmers ear, earwax build-up, or otitis media. It generally has a magnifying glass, a cone shaped speculum at the end of a tube, and a light source illuminate specific areas of the ear. Your doctor may even use an otoscope to examine your throat or nasal passages.[1] You can effectively use an otoscope by getting ready for the exam, conducting the examination, and cleaning the instrument after each use.
Steps
Getting Yourself and Your Patient Ready
-
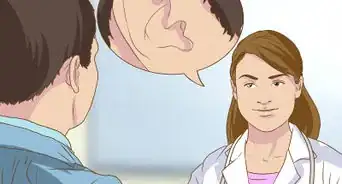
1Be gentle with the patient. The ear is a very sensitive organ and can injure easily if improperly examined. Avoid pulling, pushing, or generally being rough with the patient you are examining. This can calm your patient and minimize the risk of injury from sudden movements.[2]
- Ask your patient if the pressure is acceptable to them. For example, “Is the pressure I’m using ok, Mr. Neumaier? Let me know if you have any discomfort.”
-
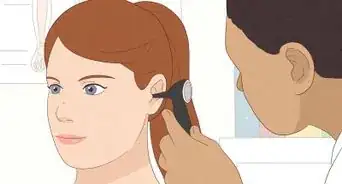
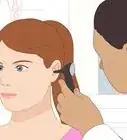
2Handle the otoscope properly. Turn the otoscope’s light on and hold your otoscope “upside down” between your thumb and pointer finger like a pen or pencil. Place the back of your hand along the person’s cheek so that otoscope is steady and braced. While the position may feel awkward at first, it soon will feel natural. Use your dominant hand to examine both ears.[3]
- Your stabilizing hand acts a protecting lever if the person suddenly moves the head.
Advertisement -
3Straighten the ear canal. Use your opposite hand to gently pull the outer ear up and back on patients older than 12 months. Straightening your patient’s ear canal can make it easier to examine the ears.[4]
- Pull the outer ear down for babies and children younger than 3 years old.
- Grasp the ear at the 10 o’clock position when examining the right ear and the 2 o’clock position for the left.[5]


Examining the Ear
-
1Choose the right speculum size. Put a new speculum, or pointed end, onto your otoscope before each patient. Select the largest possible speculum that your patient’s ear will accommodate. When inserted, the speculum should fit snugly into the outer third of the ear canal. Speculums that are too small can cause discomfort and reduce how much of the ear you can examine. Use the following guidelines for speculum size:[6]
- Adults: 4 to 6 millimeters
- Children: 3 to 4 millimeters
- Infants: as small as 2 millimeters
-
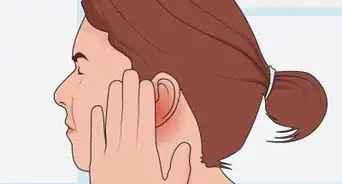
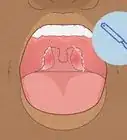
2Examine the external ear first. Without using the otoscope, take a look at the person’s external ear and notice any redness, discharge or swelling. Manipulate the ear gently and ask the patient if there is any pain. With Swimmer’s ear there is often pain, swelling, redness, and discharge that can be observed before even using the otoscope.
-
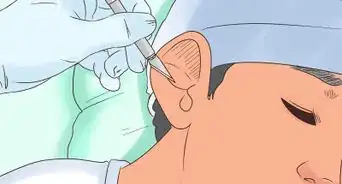
3Insert the otoscope slowly into the ear canal. Place the otoscope at your patients ear, not in it.[7] Look into your otoscope and then slowly insert the pointed end of it into the ear canal. Steady your hand on the side of the individuals face if necessary. Slow and gentle insertion can prevent unwanted movement in your patient. It also keeps your hand and scope in line with the ear and minimizes the risk of injury.
- Avoid putting too much pressure on the otoscope, which can bump the inner canal wall, causing the patient discomfort.
-
4Push the speculum 1 to 2 centimeters into the canal. Avoid ramming the speculum into the ear canal. Insert it at most 1 to 2 centimeters and then use the light to view beyond the tip of the speculum. Stop the examination immediately if the patient expresses any pain or discomfort. Examine the middle ear and eardrum.[8]
-
5Angle the otoscope. Angle the tip of the otoscope towards the person’s nose. This follows the normal angle of the ear canal. From here, move the otoscope gently at different angles. This allows you to view the person’s eardrum and canal walls. Stop the exam at any sign of increased pain or discomfort.[9]
-
6Remove the otoscope. Return the otoscope back to your starting position. As you watch through the speculum, gentle take the speculum and scope out of the person’s ear canal and outer ear. Release the person’s ear from your grasp.
-
7Throw away the speculum. Remove the speculum from the otoscope. Throw it away in a certified medical waste container to minimize the spread of disease or infection to other patients.[10]
- If you don’t have disposable speculums, scrub each tip with hot water to remove excess wax. Then soak the speculum in a covered dish of rubbing alcohol for 10 minutes.


Identifying Potential Problems
-
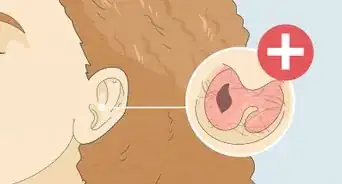
1Recognize the signs of a healthy ear. Ears can vary in size, shape, and color. However, healthy ears have the same general characteristics. Recognizing these signs can help you quickly examine your patient and identity potential problem areas. The following are signs of a healthy ear canal and eardrum:[11]
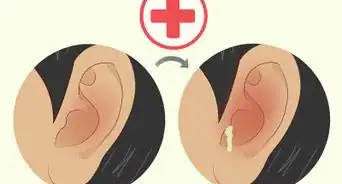
- The ear canal should be the color of skin with tiny hairs. It may have some yellowish brown or reddish brown earwax, which is normal. There should be no swelling.
- The eardrum should be pearly white or grey and translucent. You should see tiny bones pushing on the eardrum and a cone of light visible at the 5 o'clock position in the right ear and the 7 o'clock position in the left
-
2Detect abnormalities. Infected or diseased ears also exhibit a variety of general symptoms. Identify abnormalities during your examination. This can help you get prompt treatment for potential problems. Look for the following abnormalities in the ear canal and eardrum that may signal a problem:[12]
- Wiggling or pulling on the outer ear causes pain or discomfort. The ear canal may also be red, tender, swollen or filled with pus.
- The eardrum may have little or no light reflection. You may also see redness bulging, visible amber liquid or bubbles behind the eardrum. There may also be visible hole(s), whitish scars on the surface of the eardrum, wax blockage, and blockage with an object such as a bean or bug.
-
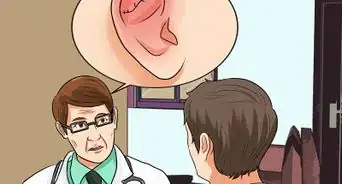
3Seek medical attention. Schedule an appointment with a medical doctor if you are performing an exam and are not trained to diagnose medical conditions. This can ensure that you or your patients get a proper diagnosis and prompt treatment for infections or other conditions that can affect your ear. Seek medical attention for any of the following visible abnormalities in the ear:[13]
- Inflammation
- Redness
- Swelling
- Pus
- A dull or red eardrum
- Fluid or bubbles behind the eardrum
- A hole in the eardrum
- Foreign objects or impacted wax


References
- ↑ http://ispub.com/IJORL/5/2/4205
- ↑ https://myhealth.alberta.ca/Health/pages/conditions.aspx?hwid=zm2528
- ↑ http://www.meddean.luc.edu/lumen/meded/medicine/pulmonar/pd/pstep18.htm
- ↑ https://www.mottchildren.org/health-library/hw227459#aa37178
- ↑ https://www.ncbi.nlm.nih.gov/pmc/articles/PMC1317759/pdf/jathtrain00025-0054.pdf
- ↑ https://www.ncbi.nlm.nih.gov/pmc/articles/PMC1317759/pdf/jathtrain00025-0054.pdf
- ↑ https://www.ncbi.nlm.nih.gov/pmc/articles/PMC1317759/pdf/jathtrain00025-0054.pdf
- ↑ https://www.ncbi.nlm.nih.gov/pmc/articles/PMC1317759/pdf/jathtrain00025-0054.pdf
- ↑ https://www.adctoday.com/learning-center/about-otoscopes/how-use-otoscope
- ↑ https://www.ncbi.nlm.nih.gov/pmc/articles/PMC1317759/pdf/jathtrain00025-0054.pdf
- ↑ https://my.clevelandclinic.org/health/articles/13076-ear-care-tips
- ↑ https://my.clevelandclinic.org/health/articles/13076-ear-care-tips
- ↑ https://my.clevelandclinic.org/health/diseases/8613-ear-infection-otitis-media
Warnings
- Use caution with an otoscope. Your doctor is trained in proper techniques and can minimize the risk of injury from improper use.⧼thumbs_response⧽


Medical Disclaimer
The content of this article is not intended to be a substitute for professional medical advice, examination, diagnosis, or treatment. You should always contact your doctor or other qualified healthcare professional before starting, changing, or stopping any kind of health treatment.
Read More...