This article was medically reviewed by Luba Lee, FNP-BC, MS. Luba Lee, FNP-BC is a Board-Certified Family Nurse Practitioner (FNP) and educator in Tennessee with over a decade of clinical experience. Luba has certifications in Pediatric Advanced Life Support (PALS), Emergency Medicine, Advanced Cardiac Life Support (ACLS), Team Building, and Critical Care Nursing. She received her Master of Science in Nursing (MSN) from the University of Tennessee in 2006.
There are 8 references cited in this article, which can be found at the bottom of the page.
This article has been viewed 18,459 times.
If you’ve suffered an injury or are recovering from surgery, then your doctor may require that you wear a soft or hard neck brace for a period of time. A brace or collar is designed to minimize the movement of your neck to promote healing. To properly wear your neck brace, pay close attention to your doctor’s instructions for daily use and care. Remove and reattach your brace in a lying down position, unless advised otherwise by your doctor. Clean your brace daily and take extra care when going about your regular activities.
Steps
Removing Your Neck Brace
-
1Practice how to remove your brace before being discharged. After you are fitted for your brace and shown how to care for it, you’ll be given a chance to practice putting it on and removing it. Go through this process as many times as you need to master it. While you are manipulating the brace, feel free to ask your nurse, doctor, or physiotherapist for tips.[1]
- It sometimes helps to practice handling your brace while positioned in front of a mirror. Or, the other person can video you, so that you can see what you are doing right or wrong.
-
2Lie down flat on your bed. Sit down on the edge of your bed and swing your legs up so that they are resting on top of the bed. Brace yourself with your arms against the bed and slowly lower yourself down, keeping your neck and head still. When you are finished you should be lying completely flat on the bed.[2]
- Place your head flat on the bed without using a pillow under it.
- As you are moving, don’t bend your neck in any direction. Watch to make sure that you aren’t leaning forward.
Advertisement -
3Feel the brace’s straps with your fingers. When you are in position, take a moment to familiarize yourself with exactly where each strap is currently at. Slide your fingers along the edge of the Velcro to see how far the straps are secured. This will keep you from over-tightening them when you reattach your brace.[3]
-
4Undo the brace’s Velcro straps. Grasp a single strap at a time and apply gentle pulling force until it releases. Repeat this process until all of the straps are undone. Keep your movements calm and controlled or you’ll risk jostling your neck.[4]
-
5Pull the front of the collar away from your neck. When the straps are all undone, place a single hand on each side of the brace and gently pull upwards. This will disconnect the brace from contact with your neck, so it’s important to hold still. Then, slide the remaining back panel out from under your neck.[5]
-
6Take off your neck brace while sitting up if your doctor permits it. Sit in a sturdy chair positioned in front of a full-length mirror. Keep your neck straight and slowly undo the Velcro straps securing the brace. Hold the sides of the brace and pull it away from your neck.[6]
- It’s very tempting to move around while in this sitting position. But, it could hurt your neck. Keeping your chin level will help minimize your movements.


Putting Your Brace Back On
-
1Place the back panel underneath your neck. Once you are lying flat on the bed, hold your neck very still. Slide the thin, back panel of the brace under your neck in its original position. It should be centered right in the middle of the space underneath your neck.[7]
-
2Slide the top section of the brace along your chest. Undo the side straps of the collar. Move the brace along your chest, so that it stays flat. Keep going until the top portion of the brace touches your chin and cups it.[8]
- Positioning the top of the brace based on your chin helps to make sure that the device is centered and not slanted to the side.
- If the location of the brace against your neck and chin doesn’t feel right, pull it back and try again.
-
3Secure the brace’s Velcro straps. When the 2 pieces of the brace are in position, it is time to attach them together. Grab a single strap and fasten it at the same level of tension that it was previously. Continue with each of the straps until your brace is fully reattached.
- If you don’t remember exactly how tight each strap was pulled, give it your best guess. You can always lay back down and readjust the brace if you need to.
-
4Replace the brace when sitting if your doctor says it’s okay. Sit on a firm chair. Position the back piece of the brace in the center of your neck. Connect the back straps just slightly to the front brace piece. Tighten a single strap at a time until the brace is back to the correct position and is comfortable against your neck.[9]


Living with Your Brace
-
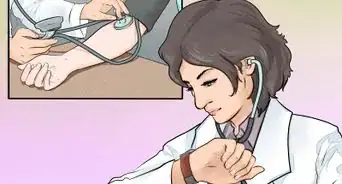
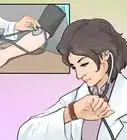
1Wear your brace for the timeframe suggested by your doctor. As part of getting your brace, your doctor or physiotherapist will tell you exactly how many days that you’ll need to use it. They will also tell you how many hours per day to wear your brace and whether or not it should be worn at night or during showers/baths.[10]
- Wearing a brace for longer than suggested can actually cause your neck muscles to stiffen and atrophy.
- Not wearing your brace enough can further irritate any injuries and slow down your recovery process.
-
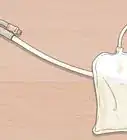
2Use a pillow or recliner to support your neck while sleeping. In some cases, your doctor may allow you to sleep without your collar or use a soft brace at night. Even in these situations, it is important to use a specialty pillow to limit the movement of your neck at night. Some people even sleep in recliners or armchairs to provide more neck stability.[11]
- Special neck support pillows are available at medical supply or sleep stores.
- You may need to experiment with various sleeping positions and pillow options before finding what works for you.
-
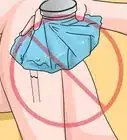
3Modify your eating and drinking practices to prevent spills. Since you won’t be able to tilt your head downwards to look at your plate or to drink, it’s important to make a few changes for comfort and cleanliness. Drink using a straw to help with swallowing. Sit in a lower chair or use a TV tray to elevate your plate. Place a large napkin under your chin and around the brace to catch any errant spills.[12]
- Be patient with yourself when mastering eating and drinking with your brace. You may have a few accidents at first, but you’ll figure it out with time.
-
4Practice shaving while lying down. You've probably grown accustomed to tilting your head and neck to shave your neck, but you can't do this in a neck brace. Lie down on the floor and shave while keeping your head straight.[13]
- Have a friend assist you in shaving. They'll be able to maneuver around your neck better and help hold your head still.
-
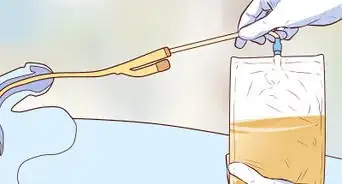
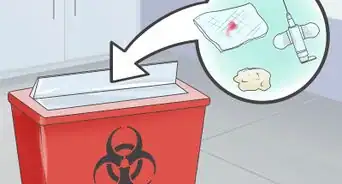
5Clean and replace your brace’s pads every day. Pull off the soiled pads from inside your brace. Attach a new set of pads to your brace and reposition it around your neck. Rinse off the soiled pads with mild dish soap and warm water. Lay them out to air dry. Repeat this process each day.[14]
- This is why it is important to have at least 2 sets of pads for your brace.
- If you need to clean the outside of your brace, simply wipe it down with a slightly damp cotton cloth. It will air dry quite quickly.


Warnings
- Reach out to your doctor right away if you develop sores underneath your brace or if you feel numbness in your hands or arms. These are signs that your brace needs an adjustment.[17]⧼thumbs_response⧽


References
- ↑ https://www.uhd.nhs.uk/uploads/about/docs/our_publications/patient_information_leaflets/orthopaedics/Cervical_Collar_patient_information_V2.pdf
- ↑ https://www.hey.nhs.uk/patient-leaflet/guide-wearing-cervical-hard-collar/
- ↑ https://www.hamiltonhealthsciences.ca/wp-content/uploads/2019/08/CervicalCollar-trh.pdf
- ↑ https://www.hamiltonhealthsciences.ca/wp-content/uploads/2019/08/CervicalCollar-trh.pdf
- ↑ https://www.hey.nhs.uk/patient-leaflet/guide-wearing-cervical-hard-collar/
- ↑ https://www.hey.nhs.uk/patient-leaflet/guide-wearing-cervical-hard-collar/
- ↑ https://www.uhn.ca/PatientsFamilies/Health_Information/Health_Topics/Documents/How_to_use_the_Aspen_Cervical_Collar.pdf
- ↑ https://www.uhn.ca/PatientsFamilies/Health_Information/Health_Topics/Documents/How_to_use_the_Aspen_Cervical_Collar.pdf
- ↑ https://www.hey.nhs.uk/patient-leaflet/guide-wearing-cervical-hard-collar/
- ↑ https://myhealth.alberta.ca/Health/aftercareinformation/pages/conditions.aspx?hwid=te8260
- ↑ https://ioaregenerative.com/blog/how-to-sleep-with-cervical-radiculopathy
- ↑ https://patient.uwhealth.org/healthfacts/5409
- ↑ https://patient.uwhealth.org/healthfacts/5409
- ↑ https://patient.uwhealth.org/healthfacts/5409
- ↑ https://myhealth.alberta.ca/Health/aftercareinformation/pages/conditions.aspx?hwid=te8260
- ↑ https://patient.uwhealth.org/healthfacts/5409
- ↑ https://www.drugs.com/cg/soft-cervical-collar-aftercare-instructions.html


Medical Disclaimer
The content of this article is not intended to be a substitute for professional medical advice, examination, diagnosis, or treatment. You should always contact your doctor or other qualified healthcare professional before starting, changing, or stopping any kind of health treatment.
Read More...