An easy-to-follow guide on inserting a border in Word documents
X
This article was co-authored by wikiHow staff writer, Jack Lloyd. Jack Lloyd is a Technology Writer and Editor for wikiHow. He has over two years of experience writing and editing technology-related articles. He is technology enthusiast and an English teacher.
The wikiHow Tech Team also followed the article's instructions and verified that they work.
This article has been viewed 968,971 times.
Learn more...
This wikiHow teaches you how to create a border around text, images, or pages in a Microsoft Word document.
Steps
Method 1
Method 1 of 2:
Adding a Border to Content
-
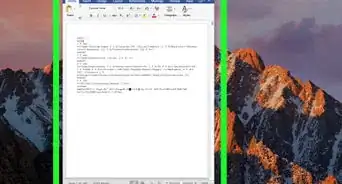
1Open your Word document. Double-click the Word document to which you want to add borders. This will open the document in Microsoft Word.
- If you haven't yet created your Word document, open Word, click Blank document, and create the document as needed before proceeding.
-
2Click the Home tab. It's at the top of the Word window. Doing so will open the correct toolbar here.Advertisement
-
3Select content. Click and drag your mouse across the text or image(s) around which you want to place a border.
-
4Find the "Borders" button. This button resembles a square divided into four smaller squares; you'll find it in the "Paragraph" section of options in the toolbar, just right of the paint bucket icon.
- Skip this step on a Mac.
-
5
-
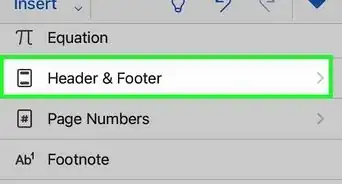
6Click Borders and Shading…. It's at the bottom of the drop-down menu.
- On a Mac, you'll find this option in the middle of the Format drop-down menu.
-
7Select a border setting. In the left-most column, click the border option that you want to use.
- For example, if you want a simple border to go all the way around your text, you would click Box here.
-
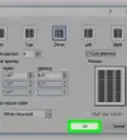
8Select a border style. In the "Style" column, scroll down until you find the border style you want to use, then click the style.
- If needed, you can also change the border's color and width from the "Color" and "Width" drop-down menus, respectively.
-
9Click OK. It's at the bottom of the window. Doing so will apply your border to the selected text or picture.


Advertisement
Method 2
Method 2 of 2:
Adding a Border to a Page
-
1Open your Word document. Double-click the Word document to which you want to add borders. This will open the document in Microsoft Word.
- If you haven't yet created your Word document, open Word, click Blank document, and create the document as needed before proceeding.
-
2Position your cursor to create a new section. If you don't want to add a border to every page in the document, place your mouse cursor at the bottom of the page that comes before the page on which you want to add the border.
- If you want to apply the border to every page in the document, skip this step and the next one.
-
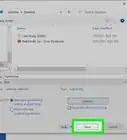
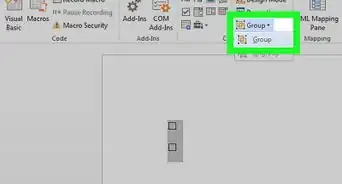
3Create a new section. This will ensure that your border isn't applied to the whole document:
- Click the Layout tab.
- Click Breaks in the "Page Setup" section.
- Click Next Page in the resulting drop-down menu.
-
4Click the Design tab. This option is at the top of the Word window.
-
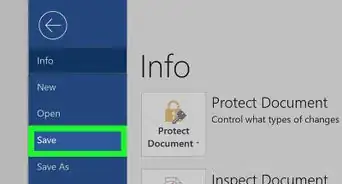
5Click Page Borders. It's on the far-right side of the Design toolbar. Doing so opens a pop-up window.
-
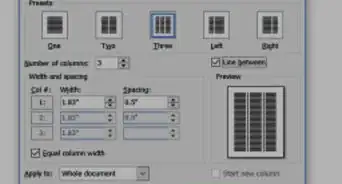
6Select a border setting. In the left-most column, click the border option that you want to use.
- For example, if you want a simple border to go all the way around your text, you would click Box here.
-
7Select a border style. In the "Style" column, scroll down until you find the border style you want to use, then click the style.
- If needed, you can also change the border's color and width from the "Color" and "Width" drop-down menus, respectively.
-
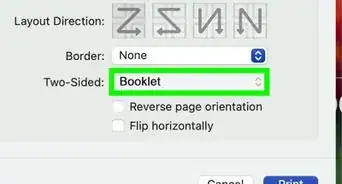
8Select pages to use. If you created a new section earlier in this method, click the "Apply to" drop-down box, then click the section to which you want to apply the border in the resulting drop-down menu.
- To apply the border to the first page of your section, for example, you'd click This section - first page only in the drop-down menu.
-
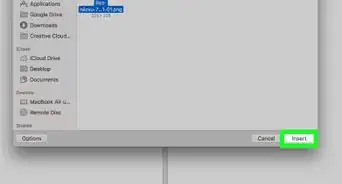
9Click OK. It's at the bottom of the page. This will apply the border to your document's specified page(s).


Advertisement
Community Q&A
-
QuestionHow can I place a border around a picture I've inserted into a document?
 Community AnswerYou do what is shown above, but instead, you click on the picture before you go through the steps.
 -
QuestionHow do I put a border around a table in Microsoft Word?Community AnswerGo into Format --> Borders and Shading. There you'll find options for borders you can apply to the table.
-
QuestionWhat three options can I set regarding a picture border?
 Community AnswerThe three option you can set are: small, medium and large.
Advertisement
Warnings
- Always remember to save your work after making changes to it. You can do this by pressing Ctrl+S (Windows) or ⌘ Command+S (Mac).⧼thumbs_response⧽
Advertisement


About This Article
Jack Lloyd
wikiHow Technology Writer
This article was co-authored by wikiHow staff writer, Jack Lloyd. Jack Lloyd is a Technology Writer and Editor for wikiHow. He has over two years of experience writing and editing technology-related articles. He is technology enthusiast and an English teacher. This article has been viewed 968,971 times.
How helpful is this?
Co-authors: 15
Updated: August 12, 2022
Views: 968,971
Categories: Microsoft Word
Advertisement