This article was co-authored by Christina Bachelor and by wikiHow staff writer, Nicole Levine, MFA. Christina Bachelor is a Marketing and Advertising Specialist and the Co-Founder and CEO of Bach Enterprises in Los Angeles, California. She specializes in navigating social media landscape, building long-lasting branded partnerships, and producing digital content. Christina holds a BA in Accounting from The University of Florida and an MA in Accounting from The University of Southern California. She has created numerous partnerships with notable brands including Toyota, Lyft, Postmates, EA Games, and Trident. Christina was the Executive Producer of “Dead House” for Kevin Hart’s Laugh Out Loud Network and the Co-Executive Producer for “Where’s the Money” starring King Bach, Logan Paul, Kat Graham, and Terry Crews. Christina also co-founded the RuJohn Foundation, which is a non-profit organization with a mission to provide the necessary tools for education to rural and inner-city schools throughout Jamaica and the United States.
There are 7 references cited in this article, which can be found at the bottom of the page.
This article has been viewed 17,997 times.
Want to take your brand or business to the next level on Instagram? If you need to access analytics, run ads, sell products, or display a contact button on your profile, you can easily convert your personal Instagram account to a professional profile. Switching to a Business account on Instagram is free and only takes a few minutes. This wikiHow article will help you create your own professional profile on Instagram.
Things You Should Know
- Business accounts have access to analytics, advertising, enhanced inboxes, contact buttons, and monetization tools.
- If you choose a Business profile, you can also use third-party post scheduling and advertising tools, as well as create an entire Instagram storefront.
- If you want to run ads or sell products on Instagram, you'll need to link a Facebook Page to your Business account.
Steps
Adding a Business Profile
-
1Sign in to the Instagram app. You can easily convert your personal Instagram account into a professional account at any time. If you don't want to use your personal account for your business, you can simply add a new professional account in the app. We'll show you how to do both in this method.
-
2Tap the profile icon. You'll see your profile photo or an outline of a person's head and shoulders at the bottom-right corner of the Instagram app. Tapping this icon will take you to your profile.
-
3Tap the three-line menu ☰. You'll see it at the top-right corner of your profile.
-
4Tap Settings. This opens your Instagram settings.
- Depending on your account, you might see the option to Switch to Professional Account or Add new professional account on your Settings page.[1] If you see it, skip to Step 6. If not, continue to the next step.
-
5Tap Account. This option is near the middle of the menu.
-
6Choose whether to convert your existing profile or create a new account.
- If you want to convert your existing Instagram account to Business, select Switch to Professional account.
- To create a new Instagram account for your business or brand, choose Add a new professional account instead.
- If you added a new professional account instead of converting, you can easily switch between accounts by double-tapping your profile icon at the bottom-right corner of Instagram.
- If your account is already a business account and you want to switch to a different account type (including back to a Personal account), you can do so here.
-
7Tap Continue to proceed through the introduction. These screens introduce the features of Instagram professional accounts.
-
8Select a category for your business or persona. Choose the category that best describes the focus of your business or account.
-
9Choose Business account.
-
10Connect a Facebook Page. While professional Instagram accounts used to require you to link to a Facebook Page, you can now tap Skip if you don't want to deal with Facebook. However, skipping Facebook isn't a good idea for everyone—if you want to run ads, set up shopping, or share content and administrative access across platforms, you have to have a Facebook Page connected to your Instagram account.[2]
- Follow the on-screen instructions to sign in to Facebook and select a Page for which you're an administrator.
- If you don't have a Facebook Page for your business, you'll be asked to create one.
-
11Edit your contact details. Next, you'll be able to customize the contact button that appears as the top of your Business profile.
- If you linked a Facebook Page, this information will auto-populate from your Page details.
- If not, add the email address, phone number, and address that you wish to make visible when a user clicks Contact.
-
12Tap Done or ✓. Now that you've added your Business account, you can start tracking analytics, running ads, and selling products.


Viewing Your Insights
-
1Tap Insights on your profile to view your Instagram analytics. This is where you can learn about your followers and the performance of your posts, Stories, and Reels.[3]
-
2Filter your Insights by date. By default, you'll see Insights for the last 7 days. To choose a different time period, tap the menu at the top-left and select a different time period, such as Last 30 Days.
-
3Explore your account's Insights Overview. At the top of the Insights page, you'll see general statistics for your account, including the number of accounts your content has reached, engagement rate, and how many followers you've gained in the selected time period.
- Tap any of the insights in the overview to view additional information, including audience demographics, interaction breakdowns, and more. Demographics are available once you have 100 followers or more.
- You can adjust the date range after selecting an insight to track growth or decline over time.
-
4View content-specific insights. The "Content You Shared" area of Insights breaks down the performance of individual posts, Stories, Reels, videos, and live streams. You can use this information to track your best performing content, see what people are sharing, and note what needs to be improved.
-
5View insights for a specific post, Story, Reel, or ad. You can easily tap View Insights under any existing photo, video, Story, or other content you've published to see how it's performing without opening the Insights panel.[4]


Running Promotions
-
1Connect a Facebook Page to your profile. As long as you've connected a Facebook Page to your Business account, you can create ads on Instagram. If you haven't already linked your Facebook Page, you can do so now:
- Tap Edit Profile at the top of your profile.
- Tap Page.
- Select Connect an Existing Page (or Create Facebook Page if you don't already have one).
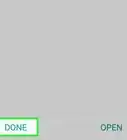
- Select a Page and tap Done.[5]
-
2Add a payment method to your Instagram account. You'll need to have a valid payment method on file to run ads on Instagram. Any payment methods you've added to Facebook are imported automatically, but you can add additional payment methods if you'd like:
- Tap the three-line menu at the top-right corner of Instagram.
- Tap Settings.
- Tap Business.
- Tap Ad payments.
- Tap Payment methods.
- Select a payment method from your Facebook account or link a card or PayPal account.
-
3Create an ad from a post or Reel. If you want to create an ad from an existing Instagram photo or video Reel, it's easy to do in Instagram.
- Scroll to the photo or video you want to boost.
- Tap Boost below the post or Reel.
- Enter your goals, audience, daily budget, and duration for the ad.[6]
- Tap Next and review your ad.
- Tap Boost post or Boost Reel to submit your ad for review. Once your ad is accepted, Instagram will run your ad for the selected duration.
- You can also make any new post an ad by toggling on Create Ad when publishing a new post.
-
4Run a Story ad. If you want to create an ad from an existing Instagram Story, you can boost that Story. Story ads can contain up to 5 interactive elements, including a location sticker, hashtag sticker, tappable text, and an @mention sticker for your profile.[7] Avoid using other stickers and music in Story ads that feature branded content. To boost a Story:
- Tap your profile photo at the top of the feed to view your Story.
- When you get to the Story you want to boost, tap Boost, and then Boost again.
- Enter your goals, audience, daily budget, and duration for the ad. The ad will continue to run even after your Story expires after 24 hours.
- Tap Create ad. Once the ad is accepted, Instagram will run it on Stories.
-
5Use the Ad Tools button at the top of your profile to manage your ads. This button displays all of your current ads and gives you options for managing them, including adjusting your budget and ending a campaign.


References
- ↑ https://help.instagram.com/502981923235522
- ↑ https://www.facebook.com/help/instagram/790156881117411?helpref=faq_content
- ↑ https://help.instagram.com/1533933820244654
- ↑ https://www.facebook.com/help/instagram/788388387972460
- ↑ https://www.facebook.com/help/instagram/570895513091465
- ↑ https://www.facebook.com/help/instagram/2090822074310288
- ↑ https://www.facebook.com/help/instagram/2281642782069520
About this article