X
This article was co-authored by wikiHow staff writer, Jack Lloyd. Jack Lloyd is a Technology Writer and Editor for wikiHow. He has over two years of experience writing and editing technology-related articles. He is technology enthusiast and an English teacher.
This article has been viewed 181,463 times.
Learn more...
This wikiHow teaches you how to create an email signature in Microsoft Outlook. You can create a signature in all three of Outlook's platforms: online, in the mobile app, and in the desktop program that comes with an Office 365 subscription. Once you've created a basic signature, you can edit it to make it more appealing.
Steps
Method 1
Method 1 of 3:
On the Website
-
1Open Outlook. Go to https://www.outlook.com/ in your preferred web browser. This will open your Outlook inbox if you're already signed into Outlook.
- If you aren't signed into Outlook, enter your Microsoft email address (or phone number) and password to log in.
-
2Click Settings . This gear-shaped icon is in the upper-right side of your Outlook inbox. Doing so prompts a drop-down menu.Advertisement
-
3Click Options. It's at the bottom of the drop-down menu.
-
4Scroll down and click Email signature. This option is in the Layout section of the options on the left-hand side of the page.
- You may first have to click Layout to expand it in order to view the Email signature option.
-
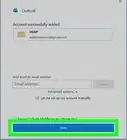
5Enter your signature. Type your signature into the text box on the right side of the screen.
-
6Make sure your signature is active. Click the "Automatically include my signature on new messages I compose" box to place a checkmark in it. This will ensure that messages you compose from now on have your signature at the bottom of the message by default.
- You can also check the "Automatically include my signature on messages I forward or reply to" box to place your signature at the bottom of every email you send.
-
7Click Save. It's in the top-left corner of the Email Signature section. This will save your changes and add a signature to your Outlook emails.


Advertisement
Method 2
Method 2 of 3:
On Mobile
-
1Open Outlook. This app is blue with a white envelope and a blue "O" on it.
- If you aren't signed into Outlook, enter your Microsoft email address (or phone number) and password to log in.
-
2Tap ☰. It's in the upper-left corner of the screen.
-
3
-
4Tap Signature. It's in the middle of the Settings page.
-
5Enter a new signature. Tap the current signature, then remove it and type in your own signature.
-
6


Advertisement
Method 3
Method 3 of 3:
On Desktop
-
1Open Outlook 2016. This program resembles a blue and white envelope with a white "O" on it.
-
2Click New Email. It's on the far left side of the Home toolbar.
-
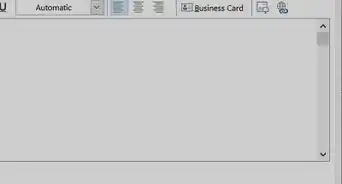
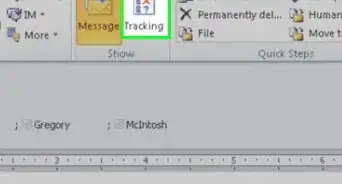
3Click Signature. This drop-down box is in the "Include" group of options in the Message toolbar.[1]
-
4Click Signatures. It's in the Signature drop-down menu.
-
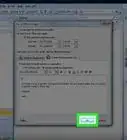
5Click New. This button is below the "Select signature to edit" text box in the upper-left side of the Signatures and Stationery window.
-
6Type in your name and click OK. This will create a name for your signature.[2]
-
7Enter your name. Do so in the "Edit signature" box at the bottom of the page.
-
8Enable your signature for new emails. Click the "New messages:" drop-down box in the top-right side of the Signatures and Stationery window, then click your name. This will automatically place your signature at the bottom of all new emails you send.
- You can repeat this process for the "Replies/forwards:" drop-down box to place your signature on every email you send, including replies and forwards.
-
9Click OK. It's at the bottom of the window. Doing so saves your signature and applies it to all subsequent emails you send from the Outlook program.


Advertisement
Warnings
- Your signature will not synchronize across your devices.⧼thumbs_response⧽
Advertisement

References
About This Article
Jack Lloyd
wikiHow Technology Writer
This article was co-authored by wikiHow staff writer, Jack Lloyd. Jack Lloyd is a Technology Writer and Editor for wikiHow. He has over two years of experience writing and editing technology-related articles. He is technology enthusiast and an English teacher. This article has been viewed 181,463 times.
How helpful is this?
Co-authors: 9
Updated: June 3, 2021
Views: 181,463
Categories: Outlook
Advertisement