wikiHow is a “wiki,” similar to Wikipedia, which means that many of our articles are co-written by multiple authors. To create this article, volunteer authors worked to edit and improve it over time.
This article has been viewed 80,318 times.
Learn more...
Do you have a game that needs to be played with a vertical monitor? Are you trying to set up a unique home computer display? Are you building a retro arcade? Rotating your monitor isn't a common procedure, but with the right equipment you can configure your monitors however you'd like. Once your monitor is set up, you can change the way Windows is displayed on it so you don't have to tilt your head to see. Finally, you can calibrate the monitor so that the colors look as good as possible.
Steps
Changing the Orientation
-
1Try rotating your screen with keyboard shortcuts. This is the fastest way to rotate the way your screen is displayed, but it doesn't work on every system. The quickest way to find out if it works is to simply test. If these shortcuts don't work, move on to the next step:
- Ctrl+Alt+← will rotate your display 90° to the left.
- Ctrl+Alt+→ will rotate your display 90° to the right.
- Ctrl+Alt+↓ will flip your display upside down.
- Ctrl+Alt+↑ will return your display to its original rightside-up orientation.
-
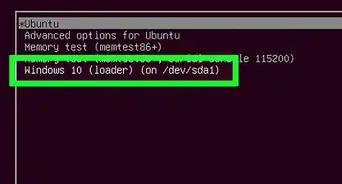
2Open the Screen Resolution window. In Windows 7 and 8, this can be accessed by right-clicking on the desktop and selecting "Screen Resolution". In Windows Vista, select "Personalization" and then click the Display Settings option.
- In Windows XP, select "Properties" and then click the Settings tab.
Advertisement -
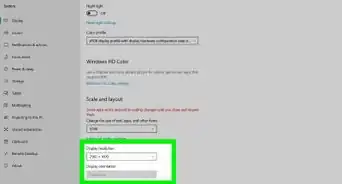
3Select your rotation option. Look for the "Orientation" drop-down menu. This will let you choose how you would like your display rotated. Select the option you want and then click Apply.
- If you do not see an Orientation option, move on to the next step.
-
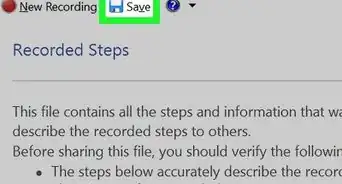
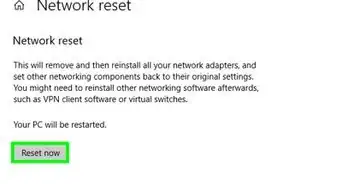
4Open your video card's control panel. Screen rotation is handled by your video card, and not by Windows. While most modern video cards will add the rotation options to the Windows Screen Resolution window, you may need to open the video card's control panel to access it.[1]
- You can usually access the control panel by right-clicking on your desktop and clicking on the video card's control panel option. You can also access it by opening the Windows Control Panel, and then selecting it from there.
- Select the "Rotation" or "Orientation" section of the control panel. You can use this to rotate the display to your liking.
- If you can't rotate the screen with keyboard shortcuts, don't have the option in your Screen Resolution window, and don't have the option in your video card's control panel or don't have a video card installed, you will not be able to rotate the display.


Adjusting Monitor Settings
-
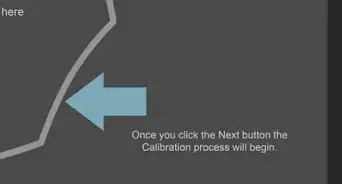
1Open a calibration image. There are lots of free calibration images available online. A calibration image will help serve as a reference point as you adjust your monitor's settings.
-
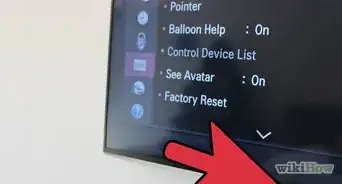
2Open your monitor's menu. Most monitors have an onscreen menu that you can use to adjust the color, brightness, and contrast. If you do not have an onscreen monitor, you may have specific buttons for these functions.
-
3Set your color temperature. Monitor calibration images will usually have blocks of bright color. Use these to find a color temperature that seems natural and allows you to distinctly see all of the shades.
- 6500K is the standard for monitors, though some calibration images will ask you to turn it up to 9300K. Not all monitors will allow you to set a temperature value.
-
4Set your brightness and contrast. Use the brightness and contrast controls to adjust how well you can see the dark boxes on the calibration image. You typically want to be able to distinguish the later boxes, but the first few boxes should be indistinguishable. This will ensure that black and dark scenes in movies and games look good.
-
5Adjust the screen position. Sometimes the screen won't fit exactly right in the confines of your monitor, and you may notice that your mouse goes off the screen a little, or there may be noticeable black bars around the edge. You can adjust this from your monitor menu.
- You can shift the screen horizontally and vertically, and you can stretch and squish it. use these controls to make the screen fit your monitor perfectly.


Physically Rotating the Screen
-
1Wall-mount your screen. If you want to permanently rotate your screen (a retro arcade, perhaps?), the easiest way to do so safely is by using a wall mounting kit. These will not fit all screens, so check that the kit is compatible with your monitor's make and model.
-
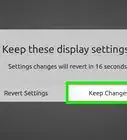
2Purchase a monitor that rotates. There are several monitors available that you can rotate at the base. This lets you easily rotate the monitor 90°. Note that when you rotate your monitor manually, you will still need to adjust the orientation through your video card settings.
- There are stands that you can purchase that may allow you to rotate your existing monitor without too large of an investment. Just make sure that it is compatible with your monitor model.
-
3Check if your monitor can tilt. Some monitors have stands that allow you to tilt the monitor up or down. This is especially useful if you have an LCD monitor, as they are best viewed from specific angles. You can usually tilt your monitor by gently grabbing both the top and bottom and then pulling the bottom or pushing the top.
-
4Avoid simply turning the monitor without support. Many monitors are not designed to be turned, especially old CRT monitors. Any time you rotate your monitor, it should be well supported by either a stand or a mount. Using other objects to support the monitor could cause it to be unstable or lead to it overheating.