X
wikiHow is a “wiki,” similar to Wikipedia, which means that many of our articles are co-written by multiple authors. To create this article, volunteer authors worked to edit and improve it over time.
This article has been viewed 28,903 times.
Learn more...
Have you just downloaded Pencil2D on your Mac OS X or Windows computer? Even though the app is in its beta stage, you can still do tons with it! It's simple, free, and very easy to use.
Steps
Part 1
Part 1 of 4:
Getting to Know the Tools
-
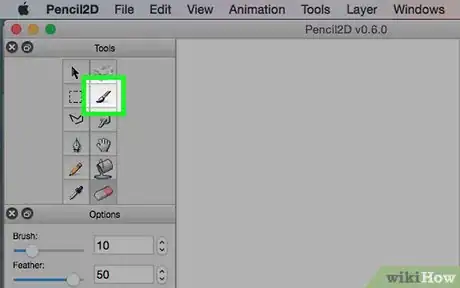
1Get to know the brush tool. It's quickly accessible with the B key. This tool will allow you to draw colorful, thick, luscious lines. You can change the color on the far right side of the screen, or create a custom color.
-
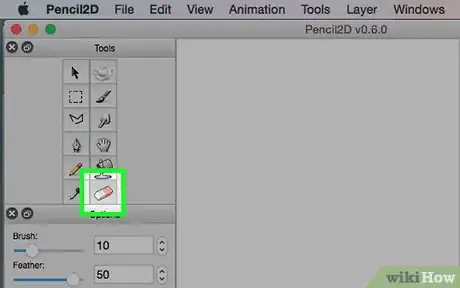
2Press E to access the eraser when you need it. You can change the size of the eraser on the far left, and hold down left-click in order to erase anything on your screen.Advertisement
-
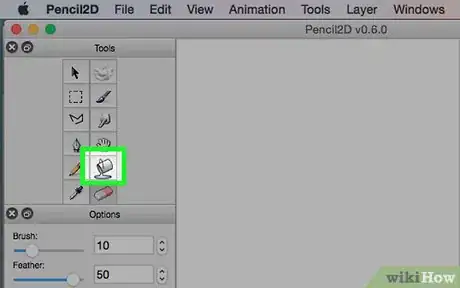
3Use the bucket tool to fill color. It can be used by pressing K. It's a little glitchy, so look out for issues if you use it.
-
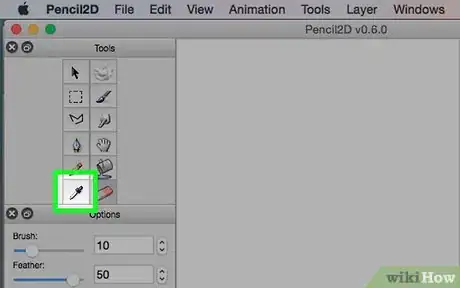
4Use the eyedropper tool to remember what colors you created or edited. You can access it with the I key. If you created a custom color, just press the I key on your keyboard, left-click on the spot you want, and voila! You've got your custom color back!
-
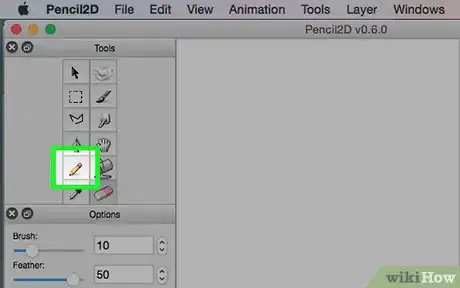
5Press N to access the pencil tool. This will draw thinner lines, and it can be useful for more advanced detailing.
Advertisement
Part 2
Part 2 of 4:
Creating an Animation
-
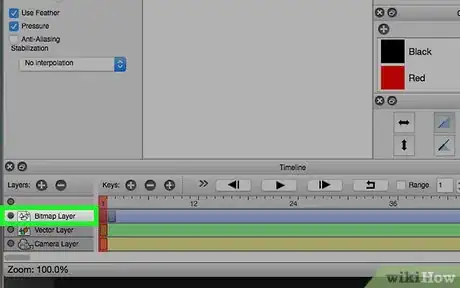
1Make sure that you're on the first frame with Bitmap ON (on the bottom of your screen). This will guarantee that you don't have blank frames at the beginning of your animation.
-
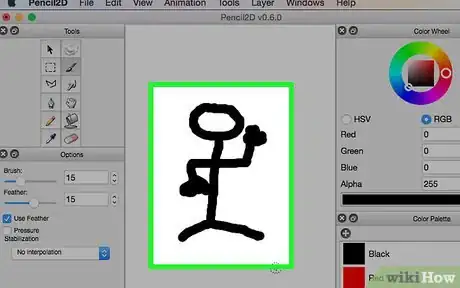
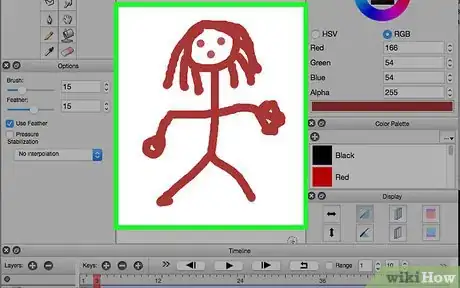
2Draw what you'd like for your first frame, For the starting animation, maybe try a stick figure. Try to make it seem realistic, and take your time to make sure it's the way you want it to be!
-
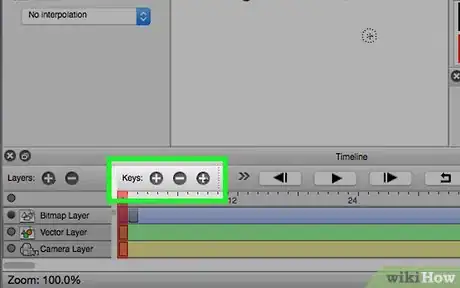
3When you're done, look near the bottom left of your screen. You should see 3 circular buttons that are arranged in this order. (+) (-) (+)
- Pressing the first button will add a new blank slide.
- If you left-click the second button, it will remove the most recent slide, or whatever slide you're on.
- If you click on the third button (arguably the most useful one), then it will duplicate your slide and create another one.
-
4Keep repeating this process until you've got a really nice animation. If you want to just test out all of the features before creating your first real animation, then try to make a stick figure running in the forest, park, or wherever else you can think of!
Advertisement
Part 3
Part 3 of 4:
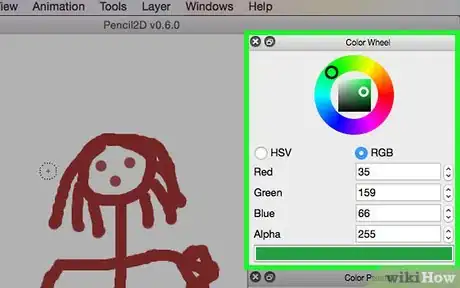
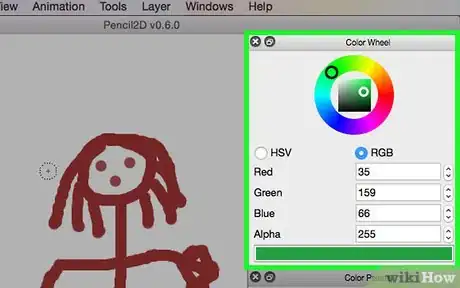
Creating Your Own Custom Colors
Part 4
Part 4 of 4:
Troubleshooting
-
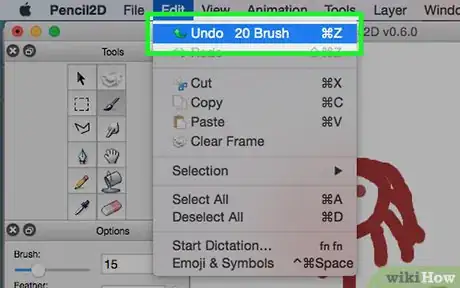
1Use "undo" when you make mistakes. If you accidentally get bumped while animating, move your mouse the wrong way, or, put simply, mess up while drawing something, you can always push Ctrl+Z or ⌘ Cmd+Z, and it will undo your last action.
-
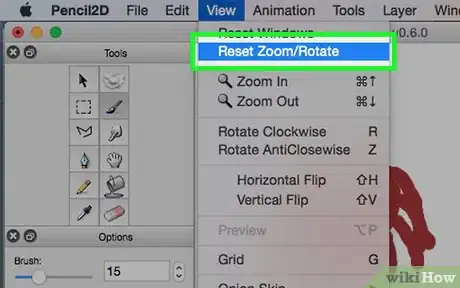
2Look out for issues with your view. Let's say that you're casually creating an animation, thinking that it looks awesome, and then suddenly, when you try to undo an action with Ctrl+Z or ⌘ Cmd+Z, you click something else and your screen rotates weird. Oh no! What do you do? Left-click on the View button on the top-left of your screen and click on "Reset Zoom/Rotate." Then, your animation will be saved, and you can safely keep working on it once more!
Advertisement
Community Q&A
-
QuestionIs a brush or a pencil a better option for animating a stickman?
 BananaBus223Community AnswerUse Pencil. It's usually a good choice to use pencil for thin lines. Brushes will add a lot of fade.
 -
QuestionI have a problem. I cannot see the fading lines in the animator. They're just not there.
 Vipul GhummanCommunity AnswerThe issue may be a disabled or improperly configured visual effect or a display problem on the device. Check the software settings or adjust the screen settings. If the problem persists, consult the user manual or technical support for assistance.
 -
QuestionWhere do I find the onion skin?
 Community AnswerGo to "View" at the top menu and select "Onion Skin Mode". You can also press "o" and "alt o" for shortcuts if you are using a keyboard.
Advertisement
About This Article
Advertisement
