This article was co-authored by wikiHow Staff. Our trained team of editors and researchers validate articles for accuracy and comprehensiveness. wikiHow's Content Management Team carefully monitors the work from our editorial staff to ensure that each article is backed by trusted research and meets our high quality standards.
This article has been viewed 21,916 times.
Learn more...
Furnace cement is the go-to product for filling cracks and voids in furnaces, stoves, and other appliances that regularly produce high-temperature environments. Although application can seem like an intimidating process, a bit of simple preparation and you'll be ready to apply your furnace cement with a caulking gun or putty knife, and use your furnace after cement application.
Steps
Preparing for Furnace Cement Application
-
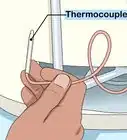
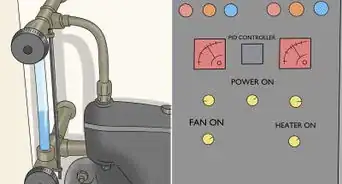
1Purchase pre-mixed furnace cement with high temperature resistance. Each furnace cement product comes with its own temperature resistance. For example, some can withstand temperatures up to 2,000 °F (1,090 °C), while others can resist temperatures up to 2,700 °F (1,480 °C). Choose a product with a temperature resistance suitable for the appliance you plan to apply it to.
- A thermistor temperature sensor can be used to test furnace or appliance temperatures up to 1,382 °F (750 °C). Thermocouples and infrared pyrometers are best for anything higher.
-
2Avoid furnace cements that contain asbestos. Asbestos is a set of silicate minerals that were commonly used in many American construction products. Some furnace cements that contained asbestos in the past (prior to 1980s) include Johns Manville, Hercules, and Rutland Fireclay brands.
- Always choose products that guarantee no asbestos and no formation of toxic fumes during the process of heat curing (when material hardens due to application of heat).
Advertisement -
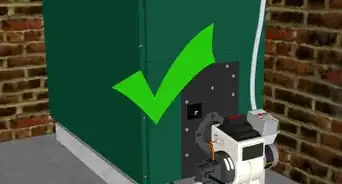
3Never apply furnace cement if your home was built before the 1980s. Even if you avoid asbestos-containing furnace cements, you can still agitate microscopic fibres of asbestos minerals in older furnaces. As a rule, any apartment or home that was built before the 1980s and has not experienced renovations is a risk.
- Contact a local asbestos abatement expert to test your furnace or oven for the presence of the toxic mineral. Since it's considered toxic waste, many local environmental regulations require it to be removed following local laws.
-
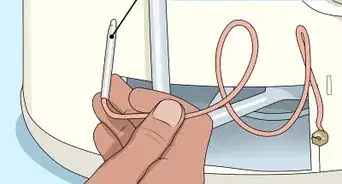
4Measure the length of the metal joints you're going to fill. Furnace cement cartridges will list the maximum length of metal joints that they bond and seal when using a caulking gun. Most caulking gun cartridges are designed for metal joints that are less than 1/8".
- Furnace cement designed for less than 1/8" can still be used for bigger cracks—you'll just have to apply it manually with a trowel or putty knife instead.
-
5Determine the materials your furnace cement is applicable to. Check the label of your furnace cement for a list of applicable materials. Most furnace cement is applicable to steel, cast iron, or firebrick. Never use a product that is not designed for your appliance's material.[1]
- Most products will list specific appliances that they can be used for, such as furnaces, boilers, stoves, chimneys, and combustion chambers.
-
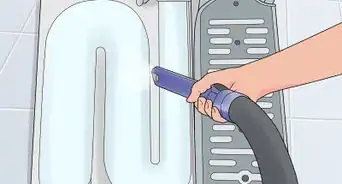
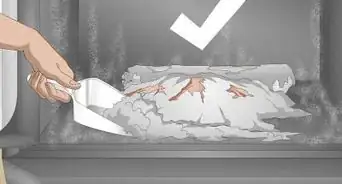
6Clean the surface that you plan on cementing with a stiff-bristled brush. Scrub the area using a dry brush, paying special attention to areas with lots of build-up. Afterwards, use a cloth to lightly wet the surface with water and clean up loose pieces. Clear all rust, dirt and debris from the area prior to application of furnace cement.
- Always remove any paint, oil, or grease prior to furnace cement application, as agitation of these materials can create toxic fumes.[2]


Using a Caulking Gun
-
1Cut the tip of the furnace cement cartridge with your caulking gun. Place the tip of your cartridge into the hole located on the handle of your caulking gun. Hold the tip at a slight angle and pull the trigger.[3]
- Avoid cutting the top too much, as this will make it more likely to leaves splotches of excess cement.
-
2Puncture a hole into the cartridge using the caulking gun's stick. Most caulking guns have a stick attached to the top that can be used to break the seal in your furnace cement cartridge.[4] Place your gun with the stick facing upwards and press the tip of your caulking cartridge down onto it.
- If your gun doesn't have a stick on the handle, a nail or small screwdriver will work.
- Always puncture the hole prior to loading your gun.
-
3Insert the cement cartridge into the caulking gun. While holding the caulking gun's release trigger, pull the gun's plunger back and insert the cartridge. Always put the base in first, and make sure to keep the nozzle to the front of the gun.[5]
- Push the plunger back into place after your cartridge is firmly inserted into the gun.
-
4Rotate the hook attached to the handle to face upwards. Each gun is a bit different, but it's always recommended to keep the hook facing up and its teeth down before you begin caulking.[6] Squeeze the trigger gently to start the flow of caulk and you should be ready to use it.
-
5Pull the trigger of your caulking gun to apply furnace cement. Hold the gun at a 45-degree angle and move it along the gap that you want to seal. Be sure to squeeze the trigger the whole time. Once you can't squeeze anymore, you can release the trigger and it will spring back into its original position. Repeat this process until your gap is filled.
- Pull the hook back after you're done, otherwise the cement will continue to come out of the gun's nozzle.[7]
-
6Push the caulk into the gap you're trying to seal. Instead of dragging the caulk along the gap, try and apply pressure so that you're pushing the caulk into it. This increases the chances of your caulk adhering to the surface (as opposed to pulling).
- The only time to avoid this is when you're caulking flush surfaces —in this case, you'll want to avoid pushing the tip hard.


Applying Cement with a Putty Knife
-
1Stir the cement using your knife or trowel if it isn't premixed. Mix the cement until it is a uniform consistency, which allows for easier application. If your cement is premixed, you can skip this step.
- Only use products with patented formula's that meet or exceed Occupational Safety and Health Administration (OHSA) requirements for minimal silica content.
-
2Apply furnace cement to your putty knife. Before you apply the cement to your appliance, dip your putty knife into your cement bucket or squeeze it out of a cartridge onto the knife. Take care to spread the cement evenly across the knife, giving yourself enough to fill in the cracks in your appliance.
- Don't put too much putty onto your knife—this can lead to an unnecessary mess during application.
-
3Pull the putty knife over the openings with the cement side facing down. Place the tip down against your appliance and pull the knife down slowly, taking care to ensure that cement application is as smooth as possible. Don't apply too much at once — if you need to apply more, you can apply a second coat.[8]
- Gently smooth out any uneven or ridged areas of furnace cement.[9]
- Avoid application to hot surfaces—always wait for them to cool down first.
-
4Remove any excess cement using your putty knife. After applying your second layer of furnace cement, get rid of any excess cement. Smooth over edges by applying pressure using the bottom of your knife.[10]


Using Your Furnace after Cement Application
-
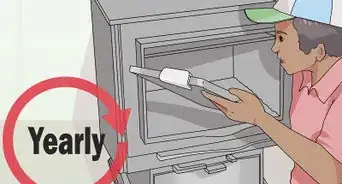
1Open the door to your furnace and let it dry for 1 hour. Air-drying your recently applied furnace cement is necessary to help it properly set.
- Check the label just in case—some products might need to be dried for longer than the standard hour.
-
2Clean up any spills of excess concrete immediately. Use a rag with soap and water to clean up any spills or stains. Avoid using acid-based cleaners.
- After setting, furnace cement products will not be able to be removed from certain surfaces, such as tile, glass, and porcelain.
-
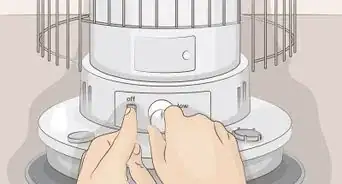
3Heat your furnace gradually when using it for the first time. The first time you use your furnace following furnace cement application, don't turn just turn it on as you normally would. Instead, gradually increase the temperature until it reaches the appropriate level of heat (usually 500 °F (260 °C)). This will minimize the amount of pores in your cement and keep it a consistent texture.
- Check the label of your furnace cement to determine the heat cure temperature, which is the temperature you should stop at when heating your furnace cement for the first time.
- You can go back to full firing after your initial heat curing.


Things You'll Need
Preparing for Application
- Thermistor temperature sensor, thermocouples, or infrared pyrometers
- Pre-mixed furnace cement
- Measuring tape
- Cloth
- Water
- Stiff-bristled brush
- Cleaning products
Using a Caulking Gun
- Furnace cement cartridge
- Caulking gun
- Pin
- Wire snippers
Applying with a Putty Knife
- Cement bucket
- Putty knife
Warnings
- Keep furnace cement out of reach of children and pets.⧼thumbs_response⧽
- Call the Poison Control Center immediately if you accidentally consume furnace cement.⧼thumbs_response⧽
- If you get furnace cement in your eyes, rinse them with water for 15 minutes.⧼thumbs_response⧽
- Wash all furnace cement from your skin using water.⧼thumbs_response⧽


-Step-34.webp)
References
- ↑ https://www.homedepot.com/catalog/pdfImages/e3/e3666fab-6470-4d5a-9b59-06d8d869fd99.pdf
- ↑ https://www.oatey.com/ASSETS/DOCUMENTS/ITEMS/EN/HighHeatFurnaceCement.pdf
- ↑ https://www.prettyhandygirl.com/tool-tutorial-friday-how-to-use-a-caulk-gun/
- ↑ https://www.prettyhandygirl.com/tool-tutorial-friday-how-to-use-a-caulk-gun/
- ↑ https://www.prettyhandygirl.com/tool-tutorial-friday-how-to-use-a-caulk-gun/
- ↑ https://www.prettyhandygirl.com/tool-tutorial-friday-how-to-use-a-caulk-gun/
- ↑ https://www.prettyhandygirl.com/tool-tutorial-friday-how-to-use-a-caulk-gun/
- ↑ https://www.youtube.com/watch?v=rLYl0AOYuAQ
- ↑ https://www.thisoldhouse.com/more/using-putty-knife
About This Article