This article was co-authored by Arthur Sebastian and by wikiHow staff writer, Hannah Madden. Arthur Sebastian is the Owner of Arthur Sebastian Hair Salon in San Francisco, California. Arthur has worked as a hair stylist for over 20 years and received his Cosmetology License in 1998. He believes that the true work of a successful hair stylist comes from passion and a love for hairdressing.
There are 17 references cited in this article, which can be found at the bottom of the page.
This article has been viewed 32,796 times.
If you want to lighten up your hair but you don’t want to spend a ton of money at the salon, you may be thinking about bleaching your hair at home. The most harrowing part of doing a bleach job by yourself is probably trying to reach behind your head to apply it without missing any major spots. Fortunately, you can use a few simple items from your home to set up an area where you can see the back of your head for an even bleach application.
Steps
Sectioning Your Hair
-
1Brush your hair so it’s free of any knots or tangles. Make sure your hair is fully dry before you start. Brush your hair with a hairbrush from the ends up to the roots until your hair is smooth.[1]
- If there are any knots or tangles in your hair, the bleach won’t cover it evenly.
-
2Part your hair with a comb in vertical sections above your ears. Part your hair from the top of your ear upwards on both sides so your hair is split into 3 large sections. You can use a small comb or the pointy end of a hair dye brush to be more precise. [2]Advertisement
-
3Clip the front sections of your hair up to keep them out of the way. Use large hair clips or a few hair ties to pin the front sections of your hair up and away from your face. This will keep you from mixing up your sections of hair as you work on them.[3]
-
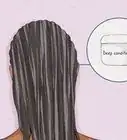
4Pull a 0.5 in (1.3 cm) horizontal section out from the back of your hair. Take this section from the very bottom of the back clump of your hair. Use a small comb or the pointed end of your hair dye brush to make this section more precise. Make sure it lays smooth and flat down your neck.[4]
- Smaller sections will make your bleach application more precise so you don’t miss any spots.
-
5Pin up the rest of your hair with a clip. To leave both of your hands free, use a large clip to put the rest of your hair up on top of your head. If you can work with one hand to apply your bleach, you can also just hold the hair on top of your head.[5]
Tip: Try to use a clip, not a hair tie, to pin up this section of hair. A clip is much easier to take in and out than a hair tie.


Applying the Bleach
-
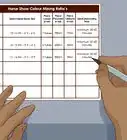
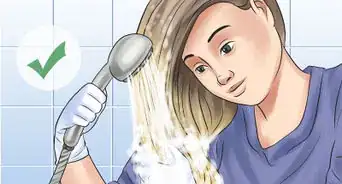
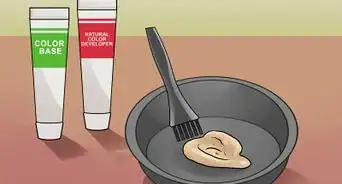
1Mix your bleach and developer together in a plastic bowl. Read the instructions on the bleach powder and developer that you have and mix them together in the correct ratio. Make sure they form a creamy paste that doesn’t have any lumps.[6]
- Most bleach recipes call for a 1:1 ratio of developer and bleach powder, but you should double check just in case.
- The level of developer you use depends on how dark your hair is and how light you want to go. 10 volume developer is the least harsh, 40 volume developer is the most harsh, and 20 and 30 volume developers are in between.
-
2Set up 1 mirror in front of you and 1 mirror behind you. Situate yourself in an area where you can place a standing or wall-mounted mirror behind you and one in front of you. Make sure you can see the back of your head in the mirror behind you.[7]
- Try positioning a standing mirror behind you and using your bathroom mirror as the one in front.
Variation: If you don’t have a large mirror to put behind you, you can also use a hand-held mirror to look at the back of your head every now and then.
-
3Put on gloves and protect your work surface. Bleach is very strong and can irritate or dry out your skin. Protect your hands with rubber, latex, or nitrile gloves the entire time that you are dealing with bleach. Cover the area with an old towel or table cloth in case you drip any bleach, and put on an old shirt that you don’t mind getting bleach on.[8]
- You can find gloves at most home goods or beauty supply stores.
-
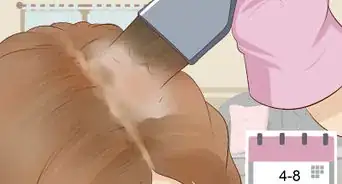
4Wipe the bleach onto the first section of hair with a dye brush. If you are bleaching the entire length of your hair, start at the ends and move up to the roots. If you are just touching up your roots, focus on that area and try not to get bleach on any already-dyed hair. Use a hair dye applicator brush for the most precision.[9]
- Your roots process faster than your ends do, so you should always save them until last.
- The back of your hair is usually darker than the front because it doesn’t get as much sun. It’s important to bleach the back of your head first because it will most likely take longer to lighten.
- Avoiding your already-dyed hair will damage your hair less since you won’t be bleaching it multiple times.
-
5Swipe the bleach onto the roots of the next section. Once the entire first section is done, take your dye brush and swipe some bleach onto the roots that you can see in the part of your hair that is clipped up, or the roots on top of the section that you just bleached. Make sure these roots get fully covered with bleach.[10]
- Doing this now will ensure that your roots get an even coverage so they won’t be splotchy.
-
6Pull out another 0.5 in (1.3 cm) horizontal section from your hair. Unclip the back of your hair and use the tip of your hair dye brush to pull out another section about as thick as the first one. Then, clip your remaining hair back up.[11]
- Keeping your hair clipped up may seem like a pain, but it leaves each section free and clear so you don’t have to worry about stray strands of hair.
-
7Brush the bleach onto the new section. Use the same technique of either saving the roots for last or avoiding your already-dyed hair with your hair dye applicator brush. Then, brush some bleach onto the roots of your clipped up hair.[12]
-
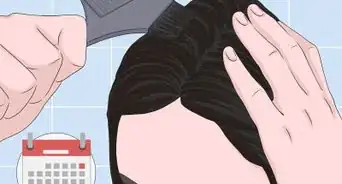
8Keep pulling out new sections until the back of your head is done. Depending on how thick your hair is, this could take between 15 and 30 minutes. Work slowly to make sure you really saturate every piece of your hair with bleach.[13]
- If you go too quickly, you could end up with patches of hair that you missed, which are hard to correct.


Finishing the Bleach Application
-
1Bleach the rest of your hair. Let down the front sections of your hair and work on those piece by piece until your entire head is done. Take a final look all over your head to make sure there aren’t any spots that you missed.[14]
-
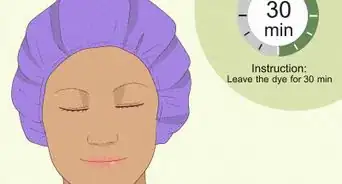
2Rinse off the bleach with cold water after about 20 minutes. Read the instructions on your bottle of bleach to see how long it should sit. Once the bleach has finished processing, rinse out your hair with cold water to remove all of the bleach.[15]
- If your hair is super dark or thick, you may need to leave the bleach on longer.
- Make sure you rinse out all of the bleach so your hair stops lightening.
-
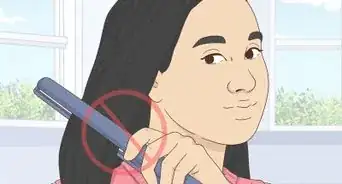
3Let your hair air dry. Since you just dried out your hair with bleach, you should avoid using heat tools, like a hair dryer, on it right away. Allow your hair to air dry until it’s fully dry all the way through so you can see what color your bleached hair is.[16]
- Avoid using other heat styling tools, like a straightener or curling iron, for about 1 week after you bleach your hair.
-
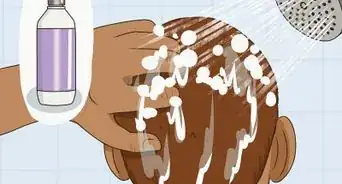
4Add toner to your hair with a dye brush to remove brassiness. Mix together a toner and some 10 volume developer in a plastic bowl. Paint the toner onto your bleached hair to counteract any brassy or yellow colors. Let it sit for about 10 minutes, then rinse it off with cool water.[17]
- You can find toners at most beauty supply stores.
-
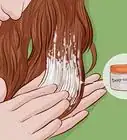
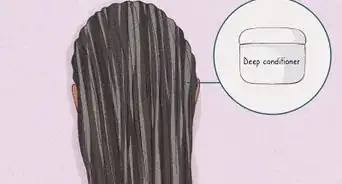
5Use conditioner to add moisture back into your hair. Apply a quarter-sized glob of conditioner to the ends and roots of your hair and let it sit. Rinse it out with cool water after about 5 to 10 minutes to give your hair some moisture and shine.[18]
Warning: Bleaching your hair is always going to damage it at least a little bit. It’s important to counteract this damage by using a conditioner every time you shampoo your hair.


Things You’ll Need
- Brush
- Comb
- Hair clips
- Hair dye applicator brush
- Bleach
- Developer
- Plastic bowl
- 2 mirrors
- Gloves
- Old shirt
- Old towel or table cloth
- Toner
- Conditioner

References
- ↑ https://www.youtube.com/watch?v=NRYOFJPR7LY&feature=youtu.be&t=38
- ↑ https://www.youtube.com/watch?v=NRYOFJPR7LY&feature=youtu.be&t=93
- ↑ https://www.youtube.com/watch?v=NRYOFJPR7LY&feature=youtu.be&t=97
- ↑ https://www.youtube.com/watch?v=XwaI3ghPwNY&feature=youtu.be&t=91
- ↑ https://www.youtube.com/watch?v=NRYOFJPR7LY&feature=youtu.be&t=148
- ↑ https://www.youtube.com/watch?v=NRYOFJPR7LY&feature=youtu.be&t=76
- ↑ https://www.youtube.com/watch?v=NRYOFJPR7LY&feature=youtu.be&t=121
- ↑ https://www.youtube.com/watch?v=PMRPvuO2nSc&feature=youtu.be&t=172
- ↑ https://www.youtube.com/watch?v=XwaI3ghPwNY&feature=youtu.be&t=92
- ↑ https://www.youtube.com/watch?v=NRYOFJPR7LY&feature=youtu.be&t=322
- ↑ https://www.youtube.com/watch?v=NRYOFJPR7LY&feature=youtu.be&t=175
- ↑ https://www.youtube.com/watch?v=NRYOFJPR7LY&feature=youtu.be&t=187
- ↑ https://www.youtube.com/watch?v=XwaI3ghPwNY&feature=youtu.be&t=97
- ↑ https://www.youtube.com/watch?v=NRYOFJPR7LY&feature=youtu.be&t=433
- ↑ https://www.meridian.edu/hair-styling-perm-application-coloring-bleaching-cosmetologists-guide/
- ↑ https://avalon.edu/2014/04/tips-care-bleached-hair/
- ↑ Arthur Sebastian. Professional Hair Stylist. Expert Interview. 29 April 2019.
- ↑ https://www.meridian.edu/hair-styling-perm-application-coloring-bleaching-cosmetologists-guide/
About This Article