This article was co-authored by wikiHow Staff. Our trained team of editors and researchers validate articles for accuracy and comprehensiveness. wikiHow's Content Management Team carefully monitors the work from our editorial staff to ensure that each article is backed by trusted research and meets our high quality standards.
The wikiHow Tech Team also followed the article's instructions and verified that they work.
This article has been viewed 16,674 times.
Learn more...
Tired of getting Facebook friend requests from random strangers, bots, and people you don't want to talk to? You can prevent people you don't know from sending you friend requests by making a quick change to your privacy settings. Limiting your Facebook friend requests to Friends of Friends blocks most unwanted friend requests. This wikiHow article will show you how to control who can follow you and send you friend requests on Facebook.
Steps
On Desktop
-
1Open Facebook in your internet browser. Type www.facebook.com into the address bar, and hit ↵ Enter or ⏎ Return on your keyboard.
- If you're not automatically signed in, enter your email or phone and your password on the top-right corner, and click Log In.
-
2Click the icon on the top-right. This button is located next to the Notifications icon near the upper-right corner of your screen. It will open a drop-down menu.Advertisement
-
3Click Settings on the drop-down menu. This will open your General Account Settings page.
-
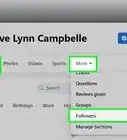
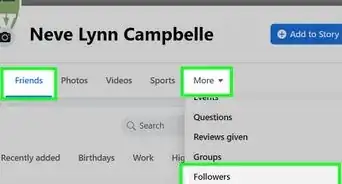
4Click the Privacy tab on the left-menu. This option is listed next to a yellow padlock icon on the left-hand side of the page. It will open Privacy Settings and Tools on the right side.
-
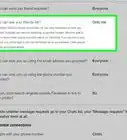
5Click the Edit button next to "Who can send you friend requests?" Here, you can change who can send a request to add you as their friend.
-
6Click the drop-down menu under "Who can send you friend requests?" The drop-down shows your current friend request privacy. It will open your options on a drop-down menu.
- The default setting here is Everyone.
-
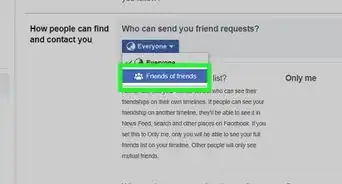
7Select Friends of friends on the drop-down. This will prevent anyone who is not friends with at least one of your friends from randomly adding you, and sending you a request.
- When this option is selected, a user has to be in one of your friends' own friends list in order to send you a request.


On Mobile
-
1Open the Facebook app on your phone or tablet. The Facebook app looks like a white "f" in a blue icon. You can find it on your home screen or your Apps menu.
- If you're not automatically signed in, enter your email or phone, and your password before continuing.
-
2Tap the ☰ button. This will open your navigation menu on a new page.
- On iPhone and iPad, it's located near the bottom-right corner.
- On Android, it's near the top-right corner.
-
3Scroll down and tap Settings & Privacy. This will expand some sub-menu options below the heading.
-
4Tap Settings below Settings & Privacy. This will open your settings and preferences on a new page.
-
5Scroll down and tap Privacy Settings. This option is listed next to a gray padlock icon under the "Privacy" heading.
-
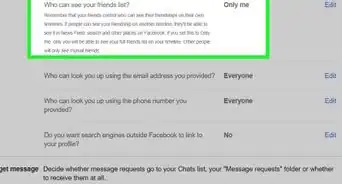
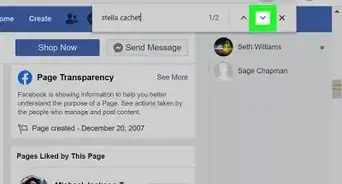
6Scroll down and tap the Who can send you friend requests? box. It's the top option under the "How People Find and Contact You" heading. It will allow you to change who can send you a friend request.
- This will open your options to select who can send you friend requests.
-
7Select Friends of friends on the Friend Requests page. This will prevent anybody who is not friends with at least one of your friends from adding you, and randomly sending you a request.
- When this option is selected, a user has to be in one of your friends' own friends list in order to send you a request.


About This Article