This article was co-authored by Steven Waldman. Steven Waldman is a Professional Hair Stylist and the Director of Technical Training at Hair Cuttery. Steven uses his creative insight and extensive experience to drive educational programming and motivates facilitators and learners to communicate effectively, create and execute strategies to maximize potential, and achieve success. He uses unexpected sources such as art genres, architecture, and cooking to inspire shape, color, and cuts.
There are 8 references cited in this article, which can be found at the bottom of the page.
This article has been viewed 19,293 times.
Styling your hair to create waves can be challenging if you don’t have the right tools. Use a thermal round brush and a blow-dryer to create loose, beachy waves, or brush and braid your hair before going to bed to set loose or tight waves. For short, curly hair, use a medium- or firm-bristled hairbrush to create 360 waves.
Steps
Using a Round Brush and a Blow-Dryer
-
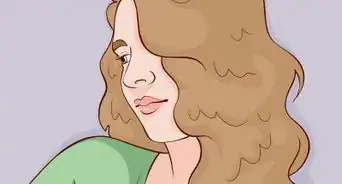
1Create loose waves with a 1 1⁄2 in (3.8 cm) round brush. Choose a thermal ceramic round brush that has a barrel diameter that is 1 1⁄2 in (3.8 cm) or larger if you want a hairstyle akin to beach waves. A brush this size will create wide, subtle waves in your hair.
-
2Make tight waves using a round brush that has a 1 in (2.5 cm) barrel. Create dramatic waves in your hair using a thermal ceramic round brush that has a small barrel diameter. Waves created by smaller barrels can even serve as loose, stacking curls.Advertisement
-
3Use a wide-toothed comb to gently detangle your clean, damp hair. Use a towel to soak up excess water from your washed hair so it is just damp. Gather your hair to one side of your head or break it into manageable sections. Use clips to hold the sections of your hair in place. Begin gently brushing the ends of your hair. Then, comb downwards higher up on your hair until you are brushing from your roots down to the ends of your hair. slowly comb up to your roots.[1]
- Although you can use any towel, your best option is a microfiber towel, which will cause less frizz.
- This will prevent unnecessary tugging at the roots of your hair.
-
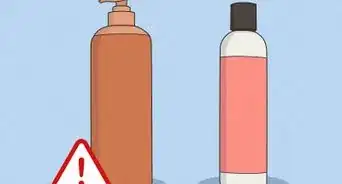
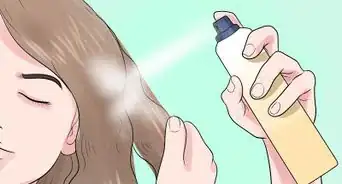
4Apply a heat protection product to your hair to maintain its health. Use a heat protection product like a blow-dry lotion, a leave-in conditioner, or heat protection spray to strengthen your hair follicles. Follow the manufacturer instructions provided on your particular product to find out how much to use and what section of your hair to apply it.[2]
- Typically, all you need to do is rub a pea-sized amount of the lotion or conditioner between your hands and work it in from the ends of your hair to the mid-shaft. Sprays will require you to spray the length of your hair.
-
5Section off the top portion of your hair so you can style the bottom easily. Use the end of a rat-tail comb to create a horizontal line across your scalp from ear to ear. Lift the top section up and clip it out of the way.
- It is easier to brush waves into your hair when you start with the lower sections and work your way to the upper sections. This will give the illusion of layered waves.
-
6Dry your hair about 70% to remove most of the water. It's easiest to dry your hair most of the way before you begin styling it. Run your fingers or a brush through your hair while you dry it to speed up the process.
-
7Use the round brush to pick up a section of hair that is as wide as the barrel. Use the unclipped portion of your hair first, and work in small sections from one side of your head to the other. Only load the brush with a section of hair that is as wide as the barrel, as this will create defined waves. Do not overload the round brush with hair, as it will not style your hair properly and may even tangle it.
- If you have thick hair, work in sections smaller than the barrel to ensure that each section of hair is styled properly.
-
8Blow-dry the hair draped over the round brush to set the curl. Place the brush so it is horizontal alongside your head, and hold it close to your scalp to create volume. Then, use the medium or high heat setting to begin to set the curl in your hair.[3]
- Be careful not to burn your hair or skin while doing this.
-
9Pull the brush away from your head but don’t brush through to the end. As the section of hair dries around the brush, slowly pull the brush away from your head in a swooping motion that resembles the shape of the letter ‘c’. Stop pulling the brush away once you reach the ends of your hair. Continue to blow-dry the section of hair while doing this.
- To avoid burning your hair, make this a fluid and connected motion to when you first set the curl with the blow-dryer.
-
10Twist the hair around the brush horizontally with no heat to finish styling. Turn off the blow-dryer. Then, quickly roll the brush back up to the top of the hair, twisting the hair around the brush.
- Be careful to not wind your hair too tightly around the round brush; otherwise, it might tangle.
-
11Allow the curl to cool while wrapped around the brush. Wait a minute or so for the hair to cool down naturally, or turn your blow-dryer to the cool setting and cool the curl quickly that way. Cooling the curl will create waves that will last longer throughout the day.
-
12Spray the waved hair with hairspray as you unwind it from the round brush. Carefully unwind the section of hair from the round brush. Set the wave with a quick spritz of hairspray. This will hold the shape of the wave for the entire day.[4]
-
13Continue to style small sections of your hair until it's all set in waves. Finish styling the bottom portion of your hair 1 small section at a time. Then, unclip the top portion of your hair and repeat the process until your hair is completely styled. As a result, you should have a head full of loose waves.


Setting Waves by Brushing and Braiding Your Hair
-
1Detangle the ends of your hair using a wide-toothed comb before going to bed. Gather your hair to one side of your head or divide it in half along either of your shoulders. Grip 1–2 in (2.5–5.1 cm) above the ends of your hair, and then gently use the wide-toothed comb to detangle the strands.[5]
- Do this style on damp hair if you want tighter, more defined waves. If your hair is dry, it'll create loose, subtle waves.
-
2Finish brushing with a soft-bristled brush, working from the ends to your scalp. Start by brushing the ends of your hair again. Then, move the comb higher up on your hair and brush downwards. Continue combing your hair until you are brushing from your scalp down to the ends of your hair. This will minimize any unnecessary tugging from tangles. Opt for using a soft-bristled brush over one with plastic bristles, as the plastic bristles can easily weaken or break your hair strands.[6]
- Continue to use the wide-toothed comb to untangle the rest of your hair as needed. The comb will be able to work out any knots in your hair better than the soft-bristled brush will.
-
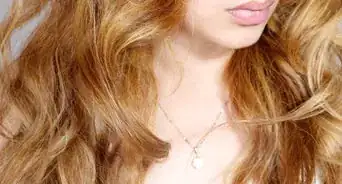
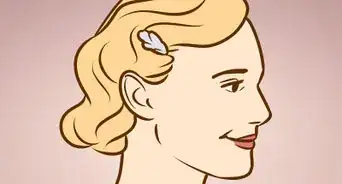
3Create loose waves by putting your brushed hair into a single traditional braid. Gather your hair to one side of your head. Then, divide your hair into 3 equal sections and braid it. Finish by tying off the end of the braid with a hair tie.
- Just make sure to loosely braid your hair so that it is comfortable for you to sleep on.
-
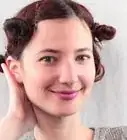
4Use multiple medium or small braids to create tighter, more sculpted waves. The more braids you create, the smaller and denser the waves will look. Start each braid high on your scalp to create a continuous look of the waves, but do not make the braids so tight that they pull on your scalp. Then, secure the end of each braid with a hair tie if your hair typically unravels easily.
- You may not need a hair tie if you have curly or textured hair.
- If you have particularly thick or short hair, then divide your hair vertically down the back of your head to create 2 medium braids along each side of your head.
- For extremely tight waves or crimped hair, section your hair as needed to create small braids that are about 1⁄2 in (1.3 cm) wide.
-
5Sleep on your braided hair overnight to set the waves for the following day. The braids will create waves in your hair as you sleep. Just be careful not to position your head on your pillow so that you are bending the braid at a sharp angle. This might cause your wavy hair to have a noticeable crease in it.[7]
- This method of waving your hair is great if you want to avoid using a blow-dryer to style it.
-
6Unbraid your hair in the morning and be careful not to knot the strands. Remove the hair tie if you used one. Then, carefully unbraid your hair, starting at the bottom and working your way up to the top. Use your fingers to unwind the braided sections of hair, and allow your hair to fall into place naturally.
- If you come across a tangle or small knot while unbraiding your hair, use your fingers to gently comb it out.
- If your hair was damp before you braided it and still seems a bit damp when you wake up, then use the heat from your blow-dryer to dry the braid. Then, set the shape using the cool function on the blow-dryer. Unbraiding damp hair may cause the waves to flatten.
-
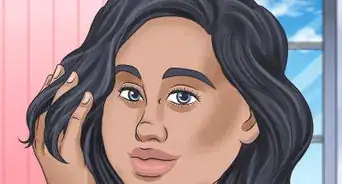
7Separate loose, subtle waves with a wide-tooth comb to fan them out. Gently run your wide-tooth comb through your hair to break up the soft waves. Refrain from using your hairbrush as it may cause your waves to frizz outwards.
-
8Run your fingers through your hair to gently break up tighter waves. Avoid using a hairbrush on small waves or crimped hair, as this will cause the waves to frizz and poof outwards. Instead, use your fingers to break up the wavy sections of hair until you achieve the desired style.[8]
- If needed, use your wide-tooth comb or a hair pick to break up the strands. Just do not comb them fully.
-
9Set your hairstyle with hairspray to maintain the shape for the rest of the day. Once you have your waves positioned into a style you are happy with, spray your hair with hairspray to hold the shape. For extra volume, flip your hair upside-down and spray the underside of your hair.[9]


Obtaining 360 Waves with a Firm-Bristled Hair Brush
-
1Have your hair cut so it is approximately 1 1⁄2 in (3.8 cm) in length. Visit your local barber to trim your hair. This will create a starting point for you to shape the 360 waves into your hair. Don’t worry if your hair is not this long, as you can start forming this hairstyle with shorter hair, but it will take longer to achieve the look.[10]
- This hairstyle works best if you have short, curly hair.
-
2Wash your hair with shampoo and conditioner to remove any oil buildup. Use your normal shampoo and conditioning products to clean your hair. In order to properly set the 360 waves as they grow in, you'll need to limit how often you wash your hair. Take this opportunity to thoroughly clean and condition your hair.[11]
- Make sure to thoroughly rinse out the products from your hair, as the residue from the shampoo or conditioner may make it more difficult to style your hair.
-
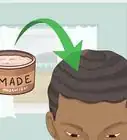
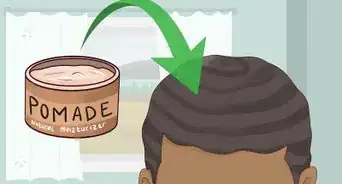
3Apply wave styling cream or wax into your clean hair. Look for products that have shea butter or natural oils and are designed for creating waves. Rub 1 tsp (4.9 mL) of the cream or wax between your hands. Then, use both of your coated hands to work the product into your hair from root to tip. Continue to do this until the product is evenly dispersed throughout your hair. [12]
- Avoid using products that are primarily made with petroleum jelly, as this can cause skin irritation or acne over the time it will take to grow out the waves in your hair.
-
4Soak a small towel in hot water to warm it. Run the towel under hot water until the cloth becomes warm. Then, twist the towel to remove the excess water.[13]
- Continue to squeeze the towel until it is damp and is no longer dripping wet.
-
5Rest the towel on your head for 2 minutes to help set the hair product. Let the warm towel rest on top of your head so that it covers all of your hair for at least 2 minutes. The warmth will help the hair product to further soak into your hair and will make it easier to style.[14]
- After 2 minutes, remove the towel from your head.
-
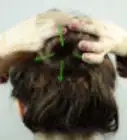
6Brush outwards from your cowlick at the crown of your head to style the waves. Use a medium- or firm-bristled hairbrush to administer even brush strokes. Continue to brush around your cowlick until all of your hair has been brushed. This will create a spiral or wave formation in your hair.[15]
- For the back of your head, brush downwards from your circular cowlick. The back of your head may require more attention than the top or sides of your head, as this section of hair is most likely thicker. Make sure to brush this section of hair thoroughly.
- For the top of your head, start at the front of the cowlick and brush forwards to your hairline by your forehead.
- For the sides of your head, start at the cowlick and angle your brush stroke forward along the side of your head but at a downwards angle to your chin.
-
7Protect your waves while you sleep by wearing a do-rag. Tie a do-rag around your hair to keep it from rubbing against your pillow while you sleep. This will help to better maintain the waves as they grow in.[16]
- If you do not have a do-rag, you can also wear a skullcap or a special wave cap. However, keep in mind that a skullcap will be less effective for maintaining your style.
-
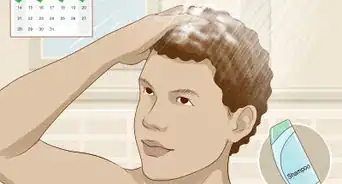
8Refrain from washing your hair for 1-2 weeks to allow the wave to grow out. It will take about 3 weeks of brushing to set the wave in your hair. Avoid using shampoo or conditioner in your hair for at least the first week of styling it, as the chemicals will weaken the structure of the wave pattern. If needed, wear a shower cap to protect your hair from getting overly wet or washing the product out. [17]
- If needed, you can purchase a special wave shampoo and conditioner that will allow you to gently wash your hair without damaging your waves. However, you will need to brush out your hair while in the shower if you choose to do this.[18]
-
9Maintain the wave shape over the next 3 weeks by brushing it daily. Add more wave cream or wax if needed to hold the wave shape in your hair as it grows. Repeat your brushing routine every day, working outwards from your cowlick to strengthen the wave shape.[19]
- Sometimes, it may take longer than 3 weeks to properly set the waves. Continue maintaining the waves until you have achieved your desired look.
- Instead of adding more wave product to your hair, you can simply dampen it with hot water.
-
10Leave the look as is or get a haircut to define the visibility of the waves. Visit your local barber to get your hair trimmed once the wave has grown out. Your barber will carefully cut your hair along your wave to help further define it.[20]


Things You’ll Need
Waves from a Round Brush
- Thermal ceramic round brush
- Blow-dryer
- Large hair clip
- Heat protection hair product
- Hairspray
Braided Waves
- Wide-tooth comb
- Soft-bristled hairbrush
- Hair ties
- Hairspray
360 Waves
- Medium or firm-bristled hairbrush
- Small towel
- Do-rag (optional)
- Styling cream or wax for waves
References
- ↑ https://www.wellandgood.com/good-looks/how-to-brush-hair-according-to-your-texture/slide/2/
- ↑ https://www.cosmopolitan.com/style-beauty/beauty/how-to/a33187/how-to-defrizz-your-hair/
- ↑ https://www.teenvogue.com/gallery/brushing-tips-for-healthy-hair
- ↑ https://www.glamour.com/story/hair-brushing-mistakes-youre-making
- ↑ https://www.wellandgood.com/good-looks/how-to-brush-hair-according-to-your-texture/slide/2/
- ↑ https://www.wellandgood.com/good-looks/how-to-brush-hair-according-to-your-texture/slide/2/
- ↑ https://www.foxnews.com/lifestyle/8-ways-to-get-gorgeous-hair-in-your-sleep
- ↑ https://www.teenvogue.com/gallery/brushing-tips-for-healthy-hair
- ↑ https://www.glamour.com/story/hair-brushing-mistakes-youre-making
- ↑ https://blackdoctor.org/486612/how-to-get-360-waves/
- ↑ https://www.allthingshair.com/en-us/mens-hairstyles/black-mens-hairstyles/creating-360-waves/
- ↑ https://blackdoctor.org/how-to-get-360-waves/2/
- ↑ https://blackdoctor.org/486612/how-to-get-360-waves/
- ↑ https://blackdoctor.org/486612/how-to-get-360-waves/
- ↑ https://www.allthingshair.com/en-us/mens-hairstyles/black-mens-hairstyles/creating-360-waves/
- ↑ https://blackdoctor.org/486612/how-to-get-360-waves/
- ↑ https://www.allthingshair.com/en-us/mens-hairstyles/black-mens-hairstyles/creating-360-waves/
- ↑ https://blackdoctor.org/486612/how-to-get-360-waves/
- ↑ https://blackdoctor.org/486612/how-to-get-360-waves/
- ↑ https://www.allthingshair.com/en-us/mens-hairstyles/black-mens-hairstyles/creating-360-waves/
- ↑ https://www.teenvogue.com/gallery/brushing-tips-for-healthy-hair
- ↑ https://www.wellandgood.com/good-looks/how-to-brush-hair-according-to-your-texture/slide/2/
- ↑ https://www.teenvogue.com/gallery/brushing-tips-for-healthy-hair
About This Article