This article was co-authored by wikiHow staff writer, Darlene Antonelli, MA. Darlene Antonelli is a Technology Writer and Editor for wikiHow. Darlene has experience teaching college courses, writing technology-related articles, and working hands-on in the technology field. She earned an MA in Writing from Rowan University in 2012 and wrote her thesis on online communities and the personalities curated in such communities.
Learn more...
Since all the folders on Mac are light blue, it's pretty easy to get overwhelmed with blue folders and forget where to find information. Fortunately, there are a few different ways that you can change the color of folders so you can keep all your files organized! This wikiHow article shows you a few ways you can change the folder color on a Mac.
Things You Should Know
- Use Preview to change the color of a folder by copying that folder's image and opening it in Preview.
- Next, select the Markup tool then the Adjust Color icon.
- Use the Tint slider to change the colour, then copy and paste that folder image into your folder's "Info" window.
Steps
Using Preview
-
1Right-click the folder you want to change. This may be a bit tricky for beginners, but this process lays out step-by-step what you need to do. By the end of this method, you'll have changed the color of a folder on your Mac.
- Although this process is lengthy, it's the only built-in option that Macs have.
-
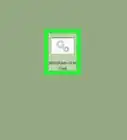
2Click Get Info. A new window with the folder's "Info" will open.Advertisement
-
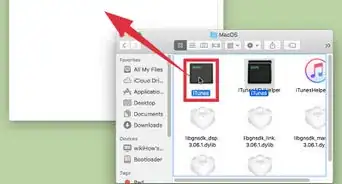
3Select the folder icon. All you need to do is click the folder icon in the top left corner of the window to select it; it'll highlight in a blue box to indicate that it's selected.
-
4Press ⌘ Cmd+C. This copies the image to your clipboard.
- Alternatively, go to Edit > Copy.
-
5Open Preview. You can either click the app icon in your Dock or you can press Cmd + Spacebar to open Spotlight and enter "Preview" to search for the program.
-
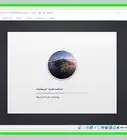
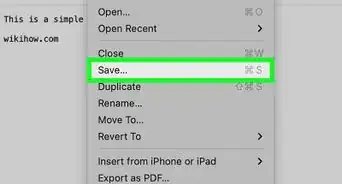
6Press ⌘ Cmd+N. This will open a new window in Preview with the contents of your clipboard.
- Alternatively, go to File > New from Clipboard.
- The folder image will open in Preview.
-
7
-
8Click the Adjust Color icon. If you are running a newer update, this icon looks like three sliders. For Catalina and prior it looks like a prism.
-
9Use the Tint slider to change colors. Although the Tint slider should give you many color options as you drag it left and right, you can use other sliders to adjust the color.
- If you can't get the exact color you want in Preview, you can use different editing software to fine-tune your color options.
- Once you find the color that you want, click X to close that window.
-
10Select the newly colored folder and press ⌘ Cmd+C. Use your mouse to highlight the folder and it'll be selected.
- Alternatively, go to Edit > Copy to copy your selected folder.
-
11Go back to the folder's "Info" window. If you already closed the "Info" window when you opened Preview, simply right-click the folder that you want to edit and select Get Info again.
-
12Click the folder icon. It's the same blue folder icon that you selected earlier.
-
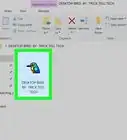
13Press ⌘ Cmd+V. This will paste the copied image from Preview to your folder icon in "Info."
- You'll no longer see a blue folder icon, but will instead see the color that you selected in Preview! You'll also notice the folder's color change in Finder or on your desktop!
- Repeat this process for any other folders you'd like to customize.
- You can also skip the first few steps and open a picture or icon in Preview that you'd like to use instead of a folder icon to further customize your desktop.[1]
- If you ever want the folder to return to the default blue, just right-click the folder, select Get Info, click the folder icon in the "Info" window, and press Cmd + X.


Using Tags
-
1Right-click a folder you want to tag. You can right-click a folder on the desktop or in Finder.
- This method will not change the entire color of your folder. Instead, it will allow you to add multiple colors to a single folder so it's easier to find.
- This is best if you have tags already set up or plan on using one of the default tags, but adding custom tags will take you less than 30 seconds!
-
2Pick a color. This tag will now be applied to that folder. In that case, you can search Spotlight for In Progress and all the folders tagged with "In Progress" will show up.
- If you want to create a custom tag, right-click a folder, select Tags, then create a tag name and color. Select Create New Tag and press Enter on your keyboard to apply it![2]


References
About This Article