This article was co-authored by wikiHow Staff. Our trained team of editors and researchers validate articles for accuracy and comprehensiveness. wikiHow's Content Management Team carefully monitors the work from our editorial staff to ensure that each article is backed by trusted research and meets our high quality standards.
The wikiHow Tech Team also followed the article's instructions and verified that they work.
This article has been viewed 766,496 times.
Learn more...
What if you have white text on a white background? You most likely can't see it. Fortunately, there are a few things you can do that can either change the color of your artboard or user interface. This wikiHow article will teach you how to change the color of the background in Adobe Illustrator.
Steps
Changing the Color of Your User Interface
-
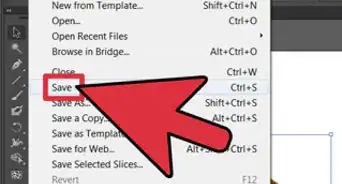
1Open an Adobe Illustrator file. To do so, double-click the yellow app with the letters Ai, then click File in the menu bar at the top of the screen and Open…. Select the file in which you want to change the background color and click Open.
-
2Go to "User Interface" options. If you're using a Windows computer, go to Edit > Preferences > User Interface.
- If you're using a Mac, go to Illustrator CC > Preferences > User Interface.
Advertisement -
3Choose a brightness setting from the offered tiles. This will be the tint of all the elements of the user interface including panels, buttons, and menus.
-
4Choose a canvas color. You can select "Match User Interface Brightness" or opt for a white canvas.[1]
- These settings will not affect any artwork in the drawing space. Any colors picked here will not print out of you print your project.

Changing the Color of Your Artboard
-
1Open an Adobe Illustrator file. To do so, double-click the yellow app with the letters Ai, then click File in the menu bar at the top of the screen and Open…. Select the file in which you want to change the background color and click Open.
-
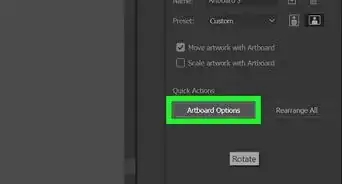
2Click File in the menu bar. It's at the top of your screen with Edit and View.
-
3Click Document Setup…. It's near the bottom of the drop-down.
-
4Check Simulate Colored Paper. It's in the "Transparency" section of the dialog box.
-
5Click the upper color swatch. It's on the right side of the "Transparency" section, just left of the grid image.
-
6Pick a color for your background. Do so by clicking on the color wheel and then adjusting the shade with the slider bar.
- When you're finished, the final color will appear in a swatch in the lower-left corner of the dialog box.
-
7Click the swatch and drag it onto an empty square. The empty squares to the right of the color swatch are spaces where you can save custom colors.
-
8Close the dialog box. On Windows, click the X, and on Mac, click the red dot in the corner of the dialog box.
-
9Click the lower color swatch. It's on the right side of the "Transparency" section, just left of the grid image.
-
10Click the color you just saved. It's in the small square in the lower-right part of the dialog box where you dragged it. The swatch in the lower-left corner of the dialog box will become the same color as the small square.
-
11Close the dialog box. On Windows, click the X, and on Mac, click the red dot in the corner of the dialog box. The swatches and grid image should all be the color you set.
-
12Click OK to close the "Document Setup" dialog box.
-
13Click View in the menu bar.
-
14Click Show Transparency Grid. It's toward the bottom of the drop-down. The background will now be the color you specified.
- Any objects with fill or line colors, including white, that are not the same as the background will be visible.
- Instead of changing the transparent grid colors, you can create a large rectangle that's the same size of your artboard, then change the fill color of that shape.


Community Q&A
-
QuestionHow do I change the symbol color?
 Community AnswerClick away from it and give it a few seconds, or even close your phone and re-open it. Do not click multiple times on the app. If it still does not open on the first click, wait and then click a second time. Clear your apps and try again.


About This Article

1. Open an Adobe Illustrator file.
2. Go to "User Interface" options.
3. Choose a brightness setting from the offered tiles.
4. Choose a canvas color.