This article was co-authored by wikiHow staff writer, Jack Lloyd. Jack Lloyd is a Technology Writer and Editor for wikiHow. He has over two years of experience writing and editing technology-related articles. He is technology enthusiast and an English teacher.
The wikiHow Tech Team also followed the article's instructions and verified that they work.
This article has been viewed 1,631,130 times.
Learn more...
This wikiHow teaches you how to change the time zone on a Linux computer. You can change the timezone on every Linux distribution by using the command line, or you can use the selection menu in the command line for different Linux distributions. If you're using Mint, Ubuntu, or any other distribution with a simple user interface and settings menu, you can also change the time zone settings from there.
Steps
Using the Command Line
-
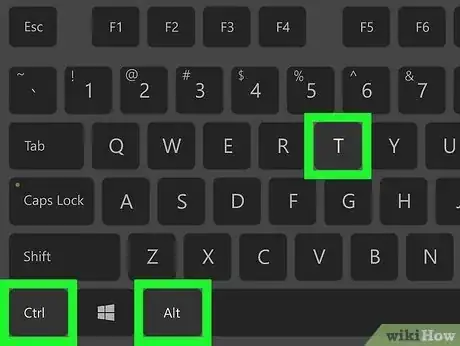
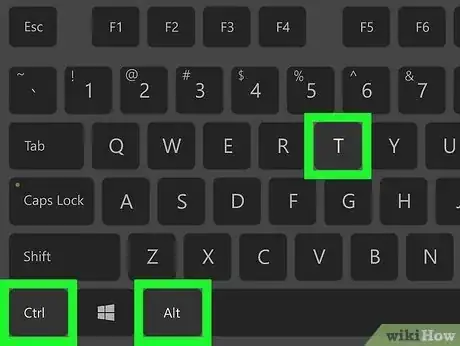
1Open Terminal. Select the Terminal program from your Linux programs, or press Ctrl+Alt+T on your keyboard.
-
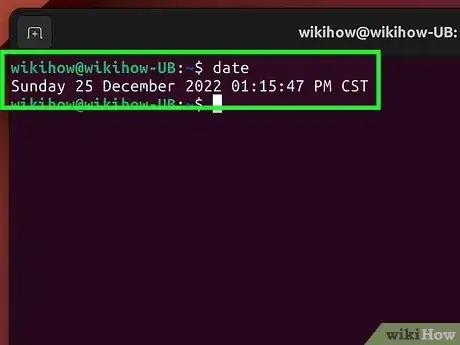
2Check your current time zone. Type date into Terminal and press ↵ Enter. The terminal will display the date in
Weekday Month Day Time TimeZone Yearformat.- For example, you might see something like
Wed Mar 7 07:38:23 EDT 2017wherein "EDT" refers to the current time zone (Eastern Daylight Time).
Advertisement - For example, you might see something like
-
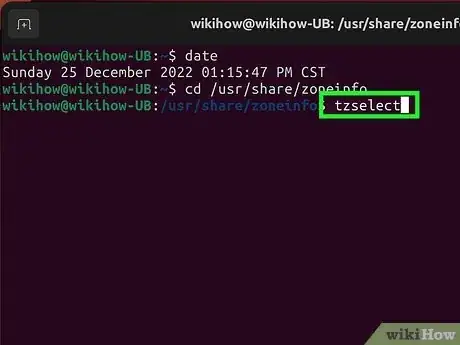
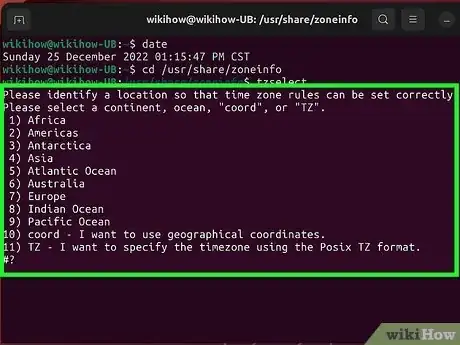
3Check available time zones. Type in cd /usr/share/zoneinfo and press ↵ Enter, then type in tzselect and press ↵ Enter to display a list of locations.
- The /usr/share/zoneinfo directory may vary depending on your Linux distribution.
-
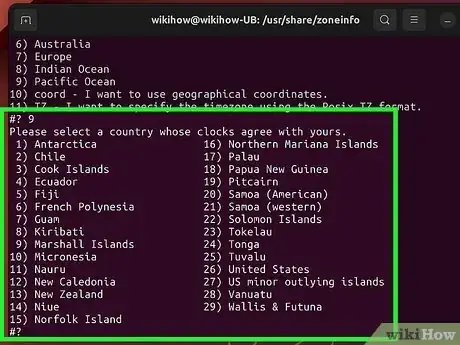
4Select a continent or ocean. Type in a selection number that pertains to your general location, then press ↵ Enter.
-
5Select a country. Type in a selection number from the on-screen list and press ↵ Enter.
-
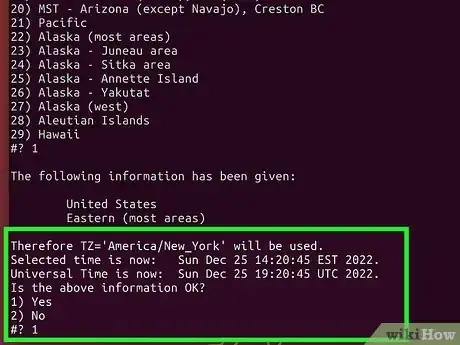
6Select a time zone. Type in a selection number to select the preferred time zone region and press ↵ Enter.
- If your city is not listed in the time zone list, pick a different city from your same time zone.
-
7Confirm the local time. In the following prompt, confirm that the local time is correct by typing 1 and then pressing ↵ Enter.
- If the time isn't correct, type in 2 and press ↵ Enter, then select a new continent and repeat the process.
-
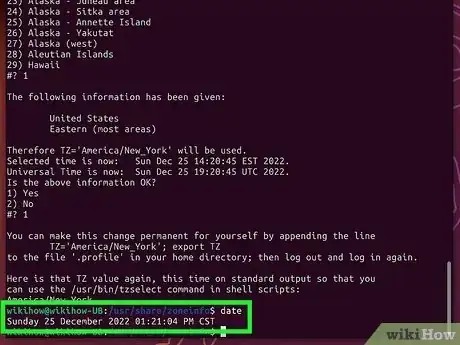
8Verify that your time zone has been set. Run the date command again and check that the time zone corresponds to the one you just changed to. If you see you new time zone listed, you have successfully changed your computer's time zone.
-
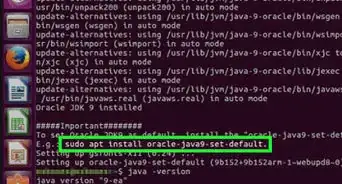
9Set your clock to stay synced with internet time servers if you like. Most modern distributions have NTP already installed. If your Linux distribution does not, you will need to install the NTP server package. Use the following commands to install it, depending on your Linux distribution:
- Ubuntu/Mint/Debian: sudo apt install ntpdate
-
CentOS: sudo yum install ntpdate
sudo /sbin/chkconfig ntpd on -
Fedora/RedHat: sudo yum install ntpdate
sudo chkconfig ntpd on - Enter ntpdate server link && hwclock –w after the installation command, making sure to enter the link to the website in place of server link.
Using the Timezone Selection Menu
-
1Open Terminal. Select the Terminal program from your Linux programs, or press Ctrl+Alt+T on your keyboard.
-
2Enter the time zone menu command. Depending on your Linux distribution, this command will vary:
- Ubuntu and Mint - sudo dpkg-reconfigure tzdata followed by the admin/user password.
- Redhat - redhat-config-date
- CentOS and Fedora - system-config-date
- 'FreeBSD and Slackware - tzselect
-
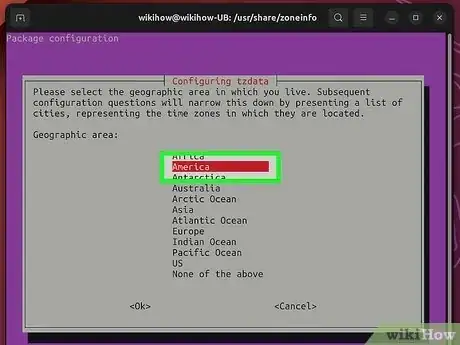
3Select your geographic area. Use the arrow keys to select the geographic area the country is found in, then press ↵ Enter.
-
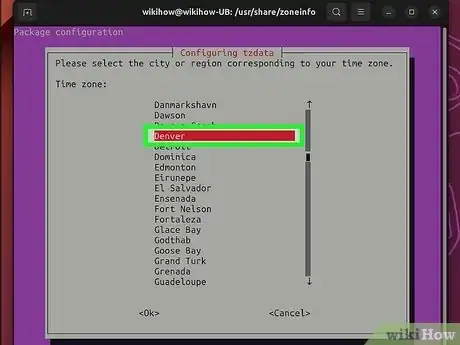
4Select your city/region. Select the city or region corresponding to your time zone, then press ↵ Enter. This will change the time zone on your system.[1]
Using the Graphical User Interface in Ubuntu
-
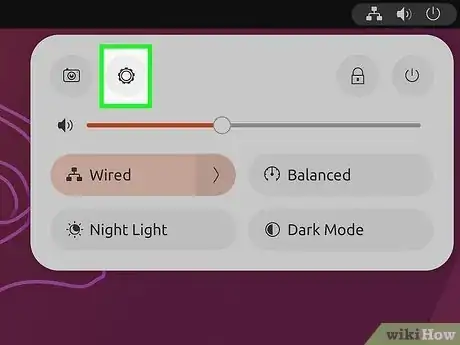
1Click the "System Menu" icon. It's a combined group of Power, Volume and Networking icons in the upper-right corner of the screen. A drop-down menu will appear.[2]
-
2Click the "Settings" icon. This gear-shaped icon is in the upper-left corner of the drop-down menu. Doing so opens the Ubuntu Settings.
-
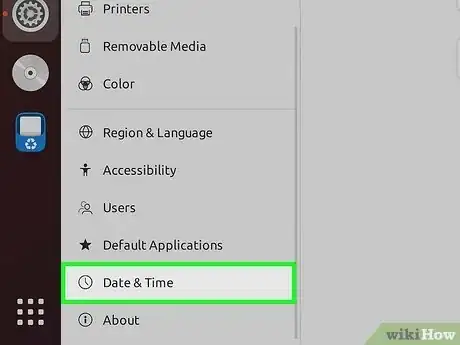
3Click Date & Time. You'll find this tab on the left side of the window.
-
4Turn off Automatic Time Zone. Click the blue "Automatic Time Zone" switch in the middle of the page to do so.
- If the "Automatic Time Zone" switch is grey, skip this step.
-
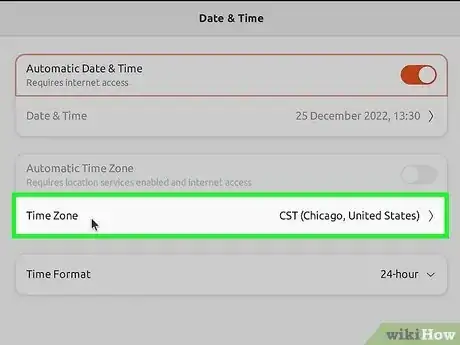
5Click Time Zone. It's near the bottom of the window. Doing so opens the Time Zone menu.
-
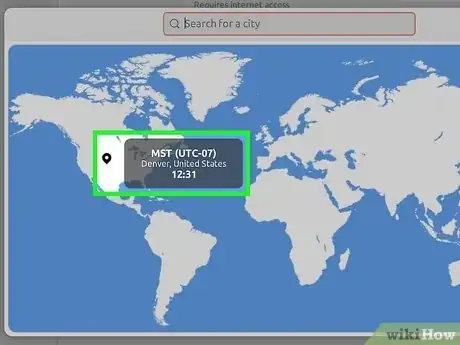
6Select a time zone. Click your approximate location on the world map to do so. You should see the time change to match the selected area's time zone.
-
7Close the window. This will save your settings and update your time zone accordingly.
Using the Graphical User Interface in LinuxMint
-
1Open the Menu. Click Menu in the bottom-left corner of the screen.
-
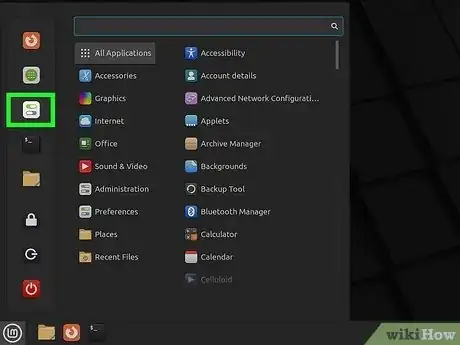
2Click the System Settings icon. It's made of two grey cogs. You'll find it on the left side of the Menu window.
-
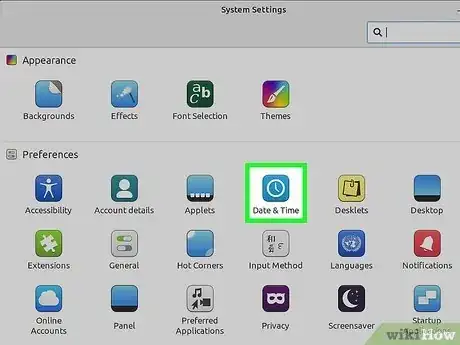
3Click Date & Time. It's in the "Preferences" group of options.
-
4Select a time zone. Click a vertical slice of the map to pick that time zone. You should see the clock on the right side of the page immediately change to reflect the selected time zone's time.
-
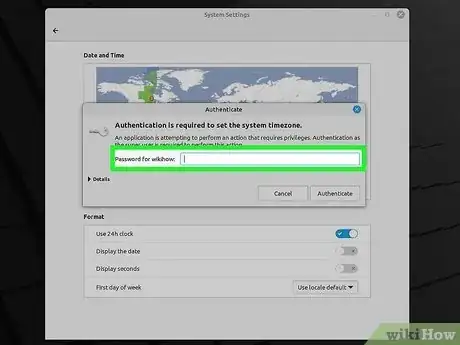
5Enter your user password when prompted. If you have logged in as an Administrator, you may not need to enter password. In case you have logged in as a Standard user, type in the Administrator password. Super user privileges are required to make any changes to time zone settings.
-
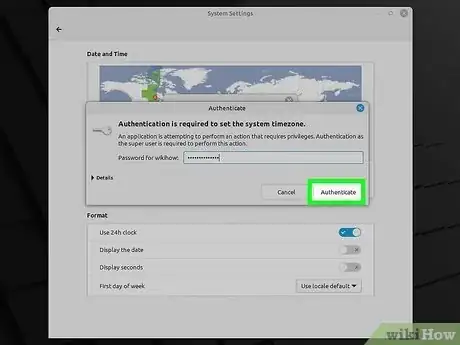
6Click Authenticate. It's at the bottom of the prompt. Doing so unlocks the Date & Time menu.
Warnings
- Some applications (such as PHP) have separate timezone settings from the system timezone.⧼thumbs_response⧽
- On some systems, there is a system utility provided that will prompt for the correct timezone and make the proper changes to the system configuration. For example, Debian provides the "tzsetup" or "tzconfig" utility.⧼thumbs_response⧽
