This article was co-authored by Susan Stocker and by wikiHow staff writer, Christopher M. Osborne, PhD. Susan Stocker runs and owns Susan’s Green Cleaning, the #1 Green Cleaning Company in Seattle. She is well known in the region for outstanding customer service protocols — winning the 2017 Better Business Torch Award for Ethics & Integrity —and her energetic support of green cleaning practices.
This article has been viewed 96,878 times.
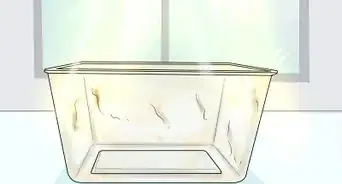
Clear plastic always seems to turn cloudy or yellow over time, which doesn’t look great. The good news is that it’s not hard to clean with a little elbow grease (and maybe something abrasive if it’s really bad—more on that below). This article will walk you through three different methods you can use to get your plastic clean and clear again. We'll also show you how you can prevent clear plastic from getting dingy-looking in the first place.
Steps
Trying Household or Homemade Cleaners
-
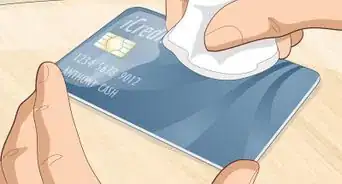
1Surface-clean the item with a gentle soap and a soft cloth. The first step to cleaning any clear plastic item is wiping away dust, dirt, grime, oils, etc. from the surface. Opt for non-abrasive materials so that you don’t scratch the plastic surface.[1]
- Add a small amount of a gentle detergent, such as dish soap, to clean, warm water.
- Use a clean microfiber cloth or soft cotton rag (like an old t-shirt). Paper towels are too abrasive.
- Wet the cloth thoroughly with the soapy water, and gently scrub the surface with a circular cleaning motion.
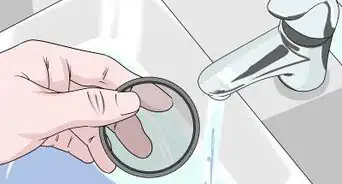
- Rinse the residue away with clean, cool water and dry the plastic with another clean cloth.
-
2Try spray cleaners for surface cleaning as well. Commercial window or multi-surface cleaners can also be used to wipe away surface debris from clear plastic. In some cases, though, they may add further cloudiness and streaks by leaving a film behind. If you’re cleaning a clear plastic windscreen, for instance, test an small area first to evaluate the results.
- Use a non-abrasive cloth like microfiber or soft cotton.
- You can also make your own multi-purpose cleaner by combining clean water and white vinegar (at a 1:1 ratio) in a spray bottle.[2]
Advertisement -
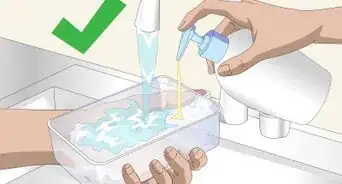
3Add some grit for a deeper clean. Surface cleaning alone will probably not restore the clarity of your plastic item or reduce yellowing. In this case, instead of avoiding abrasion, you may want to use a mild abrasive to scrape away the surface damage done by UV rays and wear and tear.[3]
- Some people find that plain white toothpaste works well; others prefer mixing baking soda with vinegar to make a foamy cleaner with some grit.
- Or, try mixing baking soda and oil soap (such as Murphy’s Oil Soap) into a thick paste equal or slightly thicker in consistency than toothpaste.[4]
-
4Apply your mild abrasive to the clear plastic. In this case, a microfiber or cotton cloth is still fine to use, but you can also enhance the abrasion a bit further by using a woven scouring pad (not steel wool) meant for non-stick or coated cooking pans.[5]
- Clean and rinse the surface first.
- Use a circular cleaning motion with relatively mild pressure. Think more “exfoliating your skin” and less “sanding down a piece of wood.”
- Rinse the cleaner away with clean, cool water.
- Dry the plastic with a clean, soft cloth (with no abrasion this time).
-
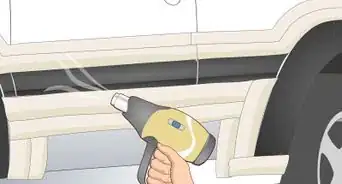
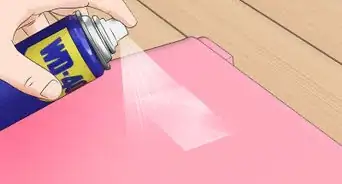
5Consider applying a UV clear-coat spray or commercial protective wax. Scrubbing away the surface cloudiness of your item may, unfortunately, leave it more vulnerable to UV damage in the future. Depending upon the importance and function of the plastic item — such as a car headlamp cover or boat windscreen, for instance — you may want to add surface protection to slow down the deterioration process.[6]
- UV protectants for plastics come in clear-coat sprays and wipe-on waxes. Consider which application and process is best suited to your needs, and follow the product instructions explicitly.[7]


Wet-Sanding Clouded Plastic
-
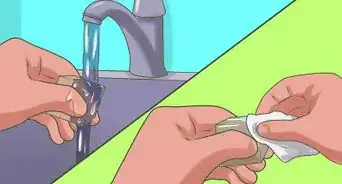
1Use dampened sandpaper on wetted-down clear plastic. Wet-sanding uses decreasing levels of abrasion to scrub away and buff smooth a clouded plastic surface. There are many variations of this method when it comes to cleaning car headlamp covers, since oxidation can cause clouding that may reduce the effective brightness of your headlights.
- Clean the surface of the plastic item first with a gentle soap, soft cloth, and clean water.
- Protect any surrounding surfaces (e.g., car paint or chrome around your headlamp covers) with thick layers of painter’s tape, or even taped-down plastic sheeting.[8]
-
2Scrub in a circular motion with progressively finer grades of sandpaper. Soak the sandpaper in clean water, or spray it down while working. Keep the plastic damp as well. Use firm and even, but not excessive, pressure. Rinse and check the surface for even abrasion when switching sandpaper grades.
-
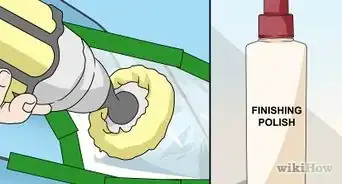
3Apply an abrasive polishing compound to smooth out the plastic. After thoroughly rinsing the item and drying it with a soft, lint-free cloth, apply a commercial polishing compound to fine-tune the abrasion process. Follow the instructions provided with the product, but expect to go very slowly so that you can methodically work the compound over the plastic item.[11]
- Look for abrasive polishing compounds for plastics at auto parts or marine retailers.
- If your plastic item doesn’t require this level of care, you can opt to simply wipe rubbing alcohol over the rinsed plastic in order to remove any lingering dust, oils, or residue.[12]
-
4Apply a UV protective coating to slow down subsequent clouding. Unfortunately, once you’ve done all this work to make your plastic crystal clear, the yellowing and clouding process will begin again immediately. If you want to add some more time before you have to wet-sand the plastic item again, consider applying UV protection to hinder the impact of ultraviolet light.
- For automobile headlamp covers, for instance, you could apply a paste wax intended to provide UV protection.[13]
- Or, you could use a UV protectant clear-coat spray. If so, work slowly (according to the product instructions) and be sure to fully cover any areas (car paint, etc.) that you don’t want the clear-coat to get on.[14]


Using Commercial Cleaners and Protectants
-
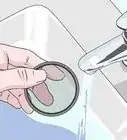
1Wash, rinse, and dry the plastic item. Use a gentle soap, clean water, and a microfiber or other lint-free, non-abrasive cloth. Make sure the plastic item is dry before proceeding.[15]
-
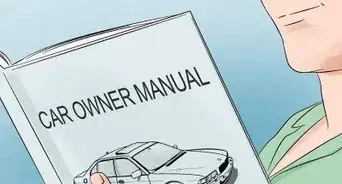
2Check your manufacturer’s recommendations before using a specific commercial cleaner. Especially if you are dealing with pricey clear plastic components (such as on a boat), do your homework before choosing and using a clear plastic cleaner/restorer. Some plastic manufacturers recommend only certain brands, and using others may void any warranty or even cause irreparable damage.[16]
- Consult the manufacturer’s recommendations before trying any do-it-yourself methods as well.
-
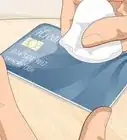
3Apply a commercial clear plastic restorer and cleaner. This type of product is often used on windscreens and other clear plastic components of boats, so see what options are available at marine product retailers. Follow the product’s instructions for use; typically, however, you will use an included foam applicator and buff with a series of clean microfiber cloths.[17]
-
4Mist on and wipe away a commercial clear window wax. Once again, follow the instructions for the specific product. Typically, though, you will apply a light, even spray of the product on the plastic item, then wipe it away in a circular motion with a clean, soft, lint-free cloth.[18]
- This type of product will help provide more lasting UV protection, thereby delaying future clouding or yellowing.


Expert Q&A
Did you know you can get expert answers for this article?
Unlock expert answers by supporting wikiHow
-
QuestionHow can I clean stains on clear plastic organically?
 Susan StockerSusan Stocker runs and owns Susan’s Green Cleaning, the #1 Green Cleaning Company in Seattle. She is well known in the region for outstanding customer service protocols — winning the 2017 Better Business Torch Award for Ethics & Integrity —and her energetic support of green cleaning practices.
Cleaning ProfessionalMix some baking soda in with water to form a thick paste and spread it over the stain. Leave that on for like 24 hours before washing it off to see if that helps. If it doesn't, soak the plastic in a bowl or buck filled with 1-part bleach and 1-part water. Make sure that you use non-chlorine bleach for this. Rinse it off to see if that helps. Keep in mind, if a stain has settled into plastic, you may not be able to get it out all the way.
Support wikiHow by unlocking this expert answer.


References
- ↑ http://www.boatingmag.com/5-steps-restoring-clear-enclosures
- ↑ http://www.bhg.com/homekeeping/house-cleaning/tips/cleaning-with-vinegar/
- ↑ http://www.popularmechanics.com/cars/how-to/a10346/how-to-make-your-headlights-shine-like-new-16649941/
- ↑ https://www.youtube.com/watch?v=9Tf9agmAlns
- ↑ https://www.youtube.com/watch?v=9Tf9agmAlns
- ↑ https://www.youtube.com/watch?v=UEJbKLZ7RmM
- ↑ http://www.boatingmag.com/5-steps-restoring-clear-enclosures
- ↑ https://www.youtube.com/watch?v=UEJbKLZ7RmM
- ↑ https://www.youtube.com/watch?v=UEJbKLZ7RmM
- ↑ http://www.popularmechanics.com/cars/how-to/a10346/how-to-make-your-headlights-shine-like-new-16649941/
- ↑ http://www.popularmechanics.com/cars/how-to/a10346/how-to-make-your-headlights-shine-like-new-16649941/
- ↑ https://www.youtube.com/watch?v=UEJbKLZ7RmM
- ↑ http://www.popularmechanics.com/cars/how-to/a10346/how-to-make-your-headlights-shine-like-new-16649941/
- ↑ https://www.youtube.com/watch?v=UEJbKLZ7RmM
- ↑ http://www.boatingmag.com/5-steps-restoring-clear-enclosures
- ↑ http://www.practical-sailor.com/blog/Ultimate-Guide-to-Caring-for-Clear-Plastic-11288-1.html
- ↑ http://www.boatingmag.com/5-steps-restoring-clear-enclosures
- ↑ http://www.boatingmag.com/5-steps-restoring-clear-enclosures
About This Article

Clear plastic can be hard to keep clean, since it has a tendency to get cloudy or yellowed. For a gentle clean, wipe down the object with a soft cloth dipped in warm, soapy water. For more stubborn stains, use a cleaner with a little grit, like plain white toothpaste or baking soda mixed with vinegar. Gently scrub the surface in a circular motion to scrape away the damaged plastic. To prevent future damage caused by the sun, spray the object with a clear coat UV protectant. Keep reading to learn how to wet-sand clouded plastic!