This article was co-authored by wikiHow staff writer, Nicole Levine, MFA. Nicole Levine is a Technology Writer and Editor for wikiHow. She has more than 20 years of experience creating technical documentation and leading support teams at major web hosting and software companies. Nicole also holds an MFA in Creative Writing from Portland State University and teaches composition, fiction-writing, and zine-making at various institutions.
The wikiHow Tech Team also followed the article's instructions and verified that they work.
This article has been viewed 15,944 times.
Learn more...
You can perform a clean installation of macOS Sierra to give your computer a fresh start. Unlike an upgrade, installing Sierra from scratch can iron out issues like quirky drivers, sluggish performance, and unnecessary hard drive bloat. Because a clean install will erase your hard drive, you’ll want to back up your data before you begin. Learn how to download the macOS Sierra installer, create a bootable installation disk, and make your Mac feel brand new again.
Steps
Preparing to Install Sierra
-
1Make sure macOS Sierra can run on your Mac. Open the Apple menu and select “About this Mac.” You should see something like “MacBook Pro (13-inch, Early 2015) just beneath the operating version number. The following Mac systems are compatible with Sierra:[1]
- iMac (Late 2009 and newer)
- MacBook Air (2010 and newer)
- MacBook (Late 2009 and newer)
- Mac Mini (2010 and newer)
- MacBook Pro (2010 and newer)
- Mac Pro (2010 and newer)
-
2Get a USB drive. Doing a clean install requires creating a bootable installation drive, so you’ll need to have one ready. The drive can be any sort of hard drive (including a flash drive), and should have a minimum of 16GB of disk space.[2]
- The drive will be erased and reformatted by the installer, so be sure to back up your data.
- It’s okay if the drive is not formatted for macOS.
Advertisement -
3Back up your Mac. Doing a clean installation of macOS Sierra will wipe your hard drive. Use the backup method of your choice to preserve your personal files, such as photos and documents.


Creating a Bootable Install Drive
-
1
-
2Click on macOS Sierra. A file named InstallOS.dmg will download.
-
3After the .dmg file has downloaded, open it, then click on InstallOS.pkg, and follow the onscreen instructions.
-
4You will find the installer in the Applications folder.
-
5Plug the USB drive to the computer. You’ll see a hard drive icon appear on the desktop when the drive mounts.
-
6Rename the USB drive. To make the drive easier to work with, name it “bootdrive.”
- Right-click or Ctrl+click the drive icon.
- Select “Rename.”
- Type bootdrive
- Press ⏎ Return
-
7Launch Applications > Utilities > Terminal.app. A black window with white text prompt will appear.
-
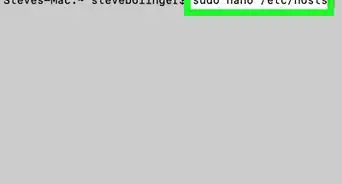
8Copy the following command. Use your mouse to highlight the following (lengthy) command, then press ⌘ Cmd+C to copy.
- sudo /Applications/Install\ macOS\ Sierra.app/Contents/Resources/createinstallmedia --volume /Volumes/bootdrive --applicationpath /Applications/Install\ macOS\ Sierra.app
-
9Return to Terminal and press ⌘ Cmd+V. The long code you copied will appear after the prompt.
-
10Hit ⏎ Return. Now you should see “Password” on the next line in the terminal.
-
11Type the administrator password and press ⏎ Return. When the password is accepted, you’ll see a message asking you to confirm that you want to erase the disk.
-
12Press Y and then ⏎ Return. The bootable version of the Sierra installer will start copying to your USB drive.[3]
- The process will take several minutes and you’ll know it’s complete when you see “Copy Complete” and “Done” in the terminal.
- If you see a pop-up message about Time Machine during the installation, click the “Don’t Use” button.


Installing Sierra from the Boot Drive
-
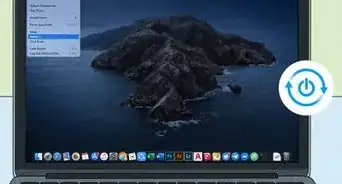
1Click the Apple menu and select “Restart.” A pop-up will appear asking you to confirm that you want to restart the computer.
-
2Click “Restart” on the confirmation window. The computer will power down and restart. Don’t walk away from the computer, though! You’ll need to take action as soon as it turns back on.
-
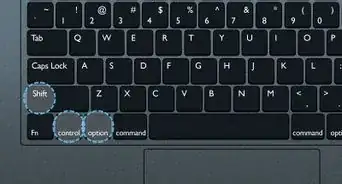
3Hold down ⌥ Option when you hear the reboot tone. After a few seconds you’ll see a list of bootable drives connected to your Mac.[4]
-
4Click “Install macOS Sierra” and press ⏎ Return. The macOS Utilities window will appear, containing a list of options.[5]
-
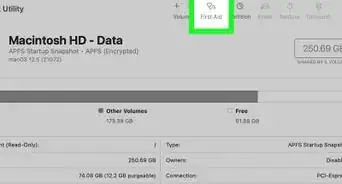
5Select “Disk Utility” and click Continue. Now you’ll see a screen that looks similar to Finder. The left side contains a list of drives connected to the computer.
-
6Click your startup drive on the left pane. You may have to expand the Internal section to find it. When you click the drive, its properties will appear in the center pane.
-
7Click the “Erase” button. It’s located on the top toolbar. After clicking, you’ll see a pop-up asking you to set some parameters.
- Remember, erasing the hard drive is permanent. Make sure you have backups.
-
8Select “Mac OS Extended (Journaled)” in the Formatting dropdown. This is the only parameter you’ll need to change.[6]
-
9Click Erase to confirm. The utility will now format your hard drive, which may take several minutes. You’ll see a confirmation message once the drive has finished formatting.[7]
-
10Close the Disk Utility window. This will bring you back to the macOS Utilities screen.
-
11Select “Install macOS” and click Continue. Now you’ll be prompted to select a drive on which you’ll install Sierra.
-
12Click your freshly-erased hard drive. For most people, it’s the only drive in the computer (and in most cases, it’s called “Macintosh HD”).
-
13Click the “Install” icon. The icon is at the bottom of the window. Once clicked, macOS Sierra will install on your Mac. When the process is complete, your computer will boot to your brand new macOS Sierra desktop.


References
- ↑ http://osxdaily.com/2016/06/14/macos-sierra-compatibility-list/
- ↑ https://macpaw.com/how-to/clean-install-macos-sierra
- ↑ http://www.macrumors.com/how-to/macos-sierra-clean-install/
- ↑ http://www.macworld.com/article/3092900/macs/how-to-create-a-bootable-macos-sierra-installer-drive.html
- ↑ http://osxdaily.com/2016/09/26/clean-install-macos-sierra/
- ↑ http://osxdaily.com/2016/09/26/clean-install-macos-sierra/
- ↑ http://www.macrumors.com/how-to/macos-sierra-clean-install/
- ↑ http://osxdaily.com/2016/09/20/prepare-install-macos-sierra/
About This Article

1. Back up your Mac.
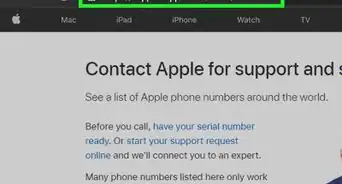
2. Go to https://support.apple.com/en-us/HT208202.
3. Download the installer.
4. Create a bootable USB install drive.
5. Boot from the drive.
6. Open Disk Utility.
7. Format your startup drive.
8. Select your drive and click Install.