This article was co-authored by Chiara Corsaro and by wikiHow staff writer, Nicole Levine, MFA. Chiara Corsaro is the General Manager and Apple Certified Mac & iOS Technician for macVolks, Inc., an Apple Authorized Service Provider located in the San Francisco Bay Area. macVolks, Inc. was founded in 1990, is accredited by the Better Business Bureau (BBB) with an A+ rating, and is part of the Apple Consultants Network (ACN).
The wikiHow Tech Team also followed the article's instructions and verified that they work.
This article has been viewed 644,860 times.
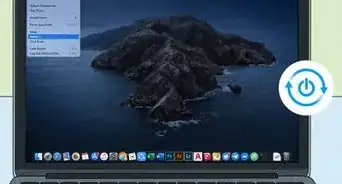
Your Mac comes with a great backup solution called Time Machine that makes it easy to create automatic and manual backups of your files, apps, and settings. This wikiHow tutorial will show you how to back up everything on your Mac to an external hard drive with Time Machine, plus how to back up personal documents and folders to iCloud.
Steps
Backing Up to an External Drive
-
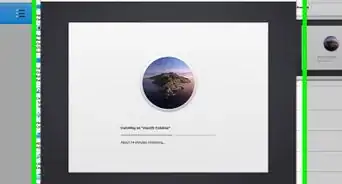
1Connect your Mac to an external hard drive. You can back up to external USB, Thunderbolt, or FireWire drive that's connected to your Mac.
- If the drive is not formatted to be compatible with macOS, you'll be prompted to erase and reformat it before you can back up with Time Machine.[1]
- Time Machine backs up everything that's stored on your Mac, including personal files, preferences, installed apps, and photos. You can easily restore files from Time Machine if you accidentally delete them, or if you experience a system-wide crash.
-
2Click the Time Machine icon in the menu bar. It's the curved arrow containing a clock in the upper-right area of your Mac's screen. This opens the Time Machine menu.
- If you don't see this icon, click the Apple menu and go to System Preferences > Time Machine. Then, you can check the box next to "Show Time Machine in menu bar" at the bottom so the icon is readily available in the future.
Advertisement -
3Click Time Machine Preferences… on the menu. This opens your Time Machine preferences.
-
4Click the Select Backup Disk… button. It's in the right pane of the dialog box.
-
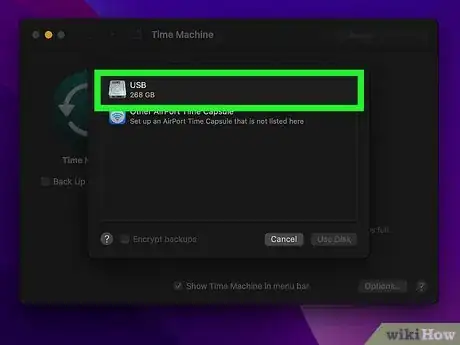
5Select the drive you connected to your Mac. This tells your Time Machine to back up to that drive.
-
6Click the Use Disk button. It's in the lower-right corner of the dialog box.
-
7Check the box next to "Back Up Automatically." It's in the left panel. When this box is checked, Time Machine will automatically back up data every hour. To save time, Time Machine only backs up files that were changed after the last backup.
- Time Machine will keep hourly backups for the past 24 hours, daily backups for a month, and weekly backups for all previous months.
- Older backups are removed automatically when the backup disk is full.
-
8Click the Options… button to configure your backup preferences. It's in the lower-right corner of the window.
-
9Choose which items to back up. By default, all files on your Mac are backed up in Time Machine. If you want to exclude certain files and folders from the backup, click the +, select one or more items, and then click Exclude.[2]
- To remove an item from the Excluded list, click that item, and then click the minus sign - to remove it.
- If you're using a MacBook, you can choose whether Time Machine can make backups when your Mac isn't plugged in to a power source. Check the box next to "Back up while on battery power" if you want Time Machine to create hourly backups on battery power.
-
10Start a manual backup. If you ever want to create an immediate backup without waiting for an automatic backup to start, it's easy:
- Click the Time Machine clock icon in the menu bar.
- Click Back Up Now.
- The time and date of the last backup appears at the top of the menu. If a backup is in progress, you'll see its progress at the top of the menu instead.
Backing Up to iCloud
-
1Open your System Preferences. You'll find it in the Apple menu, which is at the top-left corner of the screen.
- Unlike backing up with Time Machine, backup up files with iCloud only backs up the files you specify, such as documents and the files on your desktop. This is a good solution if you just want to back up personal files to keep another copy in the cloud.
- If you delete a backed-up file from iCloud, you won't be able to recover it. If it's important that you have files you can easily restore if you accidentally delete them, make a Time Machine backup instead.
-
2Click Apple ID. It's the gray-and-white Apple icon.
- If you're using macOS Mojave or earlier, click the iCloud icon instead.[3]
-
3Click the iCloud tab. It's on the left side of the window.
-
4Check the box next to iCloud Drive. It's at the top of the right panel. Now you can store files and documents in iCloud.
- To see how much storage you have in your plan, as well as how much you're currently using, look at the "iCloud Storage" area at the bottom of the screen. All iCloud users get 5 GB of storage automatically.[4]
- If you want to get more storage, you can upgrade to iCloud+. Click the Manage button and select either Change Storage Plan or Buy More Storage to view and select a plan.
-
5Click the Options… button. It's next to iCloud Drive in the right panel.
-
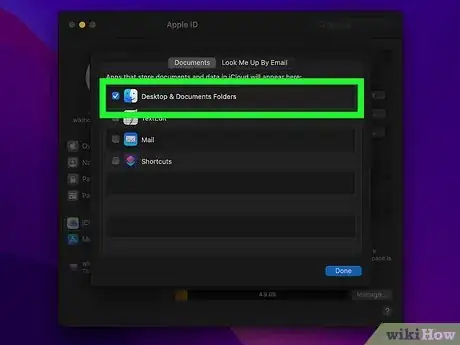
6Check the box next to "Desktop and Documents Folders." This option ensures that the files on your desktop, as well as those in your Documents folder, are stored in iCloud.
- The Desktop and Documents folders will now be backed up to iCloud Drive each time you connect to the internet. The files will also be available on your other devices, as will all new files you add to those folders.
- You'll find your Desktop and Documents folders in the left panel of Finder under "iCloud."
-
7Check the boxes next to other items you want to back up. You can opt to have documents created in any of the listed apps automatically synced to iCloud.
- If there are other files you want to back up to iCloud, you can always add them to a folder on your desktop or in your Documents folder, which will now be backed up to iCloud.
-
8Click Done. The selected files and folders will now be backed up to iCloud Drive each time you connect to the internet.
Expert Q&A
-
QuestionWhat if I don't want to use iCloud or Time Machine?
 Chiara CorsaroChiara Corsaro is the General Manager and Apple Certified Mac & iOS Technician for macVolks, Inc., an Apple Authorized Service Provider located in the San Francisco Bay Area. macVolks, Inc. was founded in 1990, is accredited by the Better Business Bureau (BBB) with an A+ rating, and is part of the Apple Consultants Network (ACN).
Phone & Computer Repair Technician You can always go old school and copy files to a USB drive, CD, or DVD. It's definitely unnecessary, though; Time Machine and iCloud are pretty efficient when it comes to backing up Mac files.
 -
QuestionHow long does it take for Time Machine to back everything up?
 Chiara CorsaroChiara Corsaro is the General Manager and Apple Certified Mac & iOS Technician for macVolks, Inc., an Apple Authorized Service Provider located in the San Francisco Bay Area. macVolks, Inc. was founded in 1990, is accredited by the Better Business Bureau (BBB) with an A+ rating, and is part of the Apple Consultants Network (ACN).
Phone & Computer Repair Technician It usually takes about 1 hour. It depends on how you have things set up and what kind of drive you're using.
 -
QuestionCan I leave the Time Machine drive plugged in?
 Chiara CorsaroChiara Corsaro is the General Manager and Apple Certified Mac & iOS Technician for macVolks, Inc., an Apple Authorized Service Provider located in the San Francisco Bay Area. macVolks, Inc. was founded in 1990, is accredited by the Better Business Bureau (BBB) with an A+ rating, and is part of the Apple Consultants Network (ACN).
Phone & Computer Repair Technician It's not intrinsically problematic, but I wouldn't recommend it. Those drives run on the computer's internal power supply, and they aren't designed to be plugged into a computer for an extended period of time.
References
About This Article
1. Connect your Mac to an external hard drive.
2. Open the Apple menu and select System Preferences.
3. Click Time Machine.
4. Click Select Backup Disk.
5. Select the external hard drive.
6. Click Use Disk.
7. Click Options to set your preferences.


