This article was co-authored by wikiHow Staff. Our trained team of editors and researchers validate articles for accuracy and comprehensiveness. wikiHow's Content Management Team carefully monitors the work from our editorial staff to ensure that each article is backed by trusted research and meets our high quality standards.
This article has been viewed 82,317 times.
Learn more...
Whether you're using negatives to create photographic prints or preserving them for archival purposes, you need to know how to clean them properly and store them safely. Dust and mold are just two things that will cause flaws in photographs or lead to long-term damage. To properly care for your negatives, it's important to effectively tackle easily removable substances, such as dust, and more harmful substances like mold.
Steps
Removing Dust, Watermarks, and Fingerprints
-
1Wear clean cotton or nylon gloves. Gloves will keep additional fingerprints off your negatives. Make sure the gloves are free of lint and dust. This will prevent your negatives from getting scratched during the cleaning process. You can buy these gloves in your local photography supply store.[1]
-
2Use a dry antistatic cloth. Static attracts dust, so it's important to avoid other kinds of cloths. The cloth should be soft and clean. Softness and cleanliness will protect your negatives from scratches. Anti-static cloths are available at photography supply stores.[2]Advertisement
-
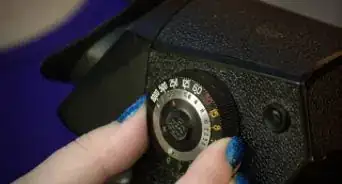
3Clean the negatives. Take the cloth in your dominant hand. Drape it over your palm and fingers. Partially close your hand to form a C. Hold each negative in your non-dominant hand. Gently rub the negative over the cloth until it's free of dust.[3]
-
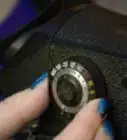
4Spray the negatives with antistatic film cleaner. If the cloth didn't do the trick, spray one squirt of cleaner onto a nonabrasive antistatic cloth. Gently move the cloth over the surface of the negative. Use light back-and-forth strokes until all dust, watermarks, and/or fingerprints are gone. The cleaner will dry immediately. You can buy it at your local photography supply store.[4]
- Antistatic film cleaner emits potent, potentially toxic, fumes. Make sure your workspace is well ventilated. Wear a mask for extra protection.[5]


Removing Dirt, Rust, or Mold
-
1Purchase 98 percent isopropyl alcohol. Avoid regular rubbing alcohol from the medicine cabinet, which will leave streaks on the surface. Make sure the product is free of additives, which could damage your negatives. You can buy a higher concentration at the hardware store or at the gas station.
- If you're shopping at the gas station, 98 percent isopropyl alcohol might be sold as “dry gas.”
-
2Find a well-ventilated space. Isopropyl alcohol in high concentrations emits fumes. Work in a room with an open window. If possible, place a fan in the window so that it faces the outside. This will draw fumes out of your workspace.[6]
-
3Wet a cotton ball or static-free cloth with the alcohol. After putting on your gloves, uncap the alcohol. Place the cotton ball or cloth over the top of the bottle. Turn the bottle upside down for about a second. Return the bottle to an upright position and replace its cap.
-
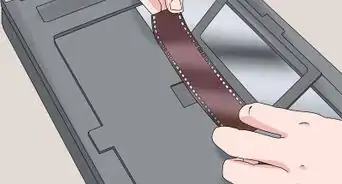
4Wipe the negative. Holding the negative in your dominant hand. Use your other hand to clean the surface. Move in a gentle back-and-forth motion until the gunk is completely gone. Allow the negative to air dry.


Keeping Negatives Clean and Undamaged
-
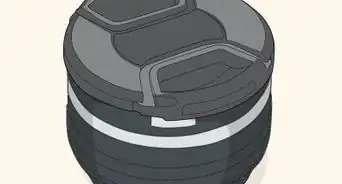
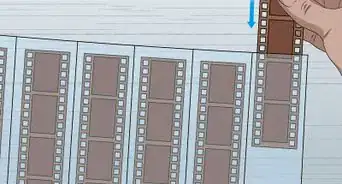
1Place negatives in protective containers. These can be acid-free paper sleeves or polyethylene pocket pages. Once you've sorted your negatives, store them in fire-proof metal slide boxes. You can buy all of these at your local photography supply store.[7]
-
2Store the negatives in a cool location. Heat can discolor and disfigure negatives. Choose a room with an ambient temperature no higher than 70 °F (21 °C). Keep the negatives away from heat sources such as vents, radiators, and windows receiving direct sunlight.
- For contemporary color negatives, the temperature should be no higher than 40 °F (4 °C).[8]
-
3Control the storage room humidity. Humidity can trigger the growth of mold and rust. Too much moisture in the atmosphere can lead to watermarks on the negatives. Don't allow the relative humidity to rise above 30-40 percent. If your negatives are heirlooms or antiques, you should consider investing in a hygrometer, which measures ambient humidity.[9]


Community Q&A
-
QuestionSome of my dad's WWII 35mm negatives have gotten very, very wet. Can I salvage these irreplacable images?
 Community AnswerThe Library of Congress has an informative video and detailed instructions that might help you out. Scroll down about midway to get to the "Photographs and Negatives" subheading. The site also links to pages and PDFs from historical societies and museums. Good luck!
Warnings
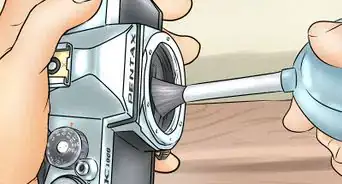
- Avoid using canned air to clean your negatives. Even if you don't shake the can, it can still squirt liquid, which can damage the negative. Canned air also contains chemicals that can damage your negatives beyond repair.[10]⧼thumbs_response⧽
Things You'll Need
- Cotton gloves
- Soft, static-free cloths
- Static-free film cleaner
- 98% isopropyl alcohol
- Protective sleeves
- Metal slide box


References
- ↑ http://www.ebay.com/gds/How-to-Properly-Clean-35mm-Film-Negatives-/10000000178630566/g.html
- ↑ https://www.youtube.com/watch?v=2Z3CpALUO9o
- ↑ https://www.youtube.com/watch?v=2Z3CpALUO9o
- ↑ https://www.youtube.com/watch?v=ZDYakO9ieqU
- ↑ https://www.youtube.com/watch?v=2Z3CpALUO9o
- ↑ http://howtoscan.ca/scanning-tips/clean-negatives-before-scan-alcohol.php
- ↑ https://www.archives.gov/preservation/storage/negatives-transparencies.html
- ↑ https://www.loc.gov/preservation/care/photo.html
- ↑ https://www.loc.gov/preservation/care/photo.html
About This Article

To clean negatives that have accumulated dust, fingerprints, or watermarks, start by putting on clean cotton or nylon gloves to keep additional fingerprints off the negatives. Next, gently wipe the negative with a dry anti-static cloth, which you can get at photography supply stores. If the cloth alone doesn't do the trick, spray one squirt of anti-static film cleaner onto the cloth and wipe the negative again using light back-and-forth strokes until the surface looks clean. If you're dealing with dirt, rust, or mold, try wiping the negatives with a cotton ball dampened with 98 percent isopropyl alcohol. For tips on preventing future dirt and damage, read on!