This article was co-authored by Luigi Oppido and by wikiHow staff writer, Sam Browning. Luigi Oppido is the Owner and Operator of Pleasure Point Computers in Santa Cruz, California. Luigi has over 25 years of experience in general computer repair, data recovery, virus removal, and upgrades. He is also the host of the Computer Man Show! broadcasted on KSQD covering central California for over two years.
This article has been viewed 9,767 times.
While connecting your MacBook to a monitor can feel intimidating, it’s actually relatively simple. Once you have found the right cables and adapters, all you have to do is customize your display settings and you are ready to start using your monitor. This wikiHow article will teach you how to set up and use an external monitor with your MacBook.
Steps
Connecting Your MacBook to the Monitor
-
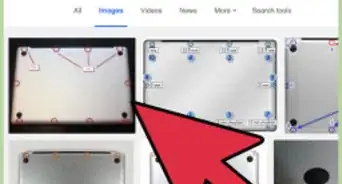
1Identify your MacBook’s video ports. Depending on the year your MacBook was manufactured, it will have different video ports. Visit https://support.apple.com/guide/mac-help/about-video-ports-cpmh0014/12.0/mac/12.0 for a chart containing drawings, icons, and descriptions of the possible ports and note which one your computer has.
- If you have a newer MacBook, you may be able to quickly identify your ports by clicking the Apple icon at the top left of your screen, then choosing About This Mac. On the line starting with “MacBook Pro”, look for any information about the ports on your computer.
-
2Identify your monitor’s video input ports. As with MacBooks, different monitors will have different video ports. When looking for ports, be sure to use the ones that say something like In or Input. This means they accept video input from other sources, allowing you to input video from your MacBook. Some of the most common ports are listed below.[1]
- HDMI ports look like trapezoids.
- DisplayPort ports look like a rectangle with a corner cut off.
- USB-C ports are small and ovular.
- VGA ports have 15 small holes with a larger screw hole on each end. They're often blue in color.[2]
- DVI ports have 24 small holes with a slit on one side.
Advertisement -
3Purchase a connecting cable and any necessary adapters. If your MacBook does not have the same type of video ports as your monitor, you will likely need an adapter. Adapters can be bought directly from the Apple Store or any number of technology retailers.
- To determine what type of adapter you need, compare the ports on your MacBook and monitor. For example, if your MacBook has USB-C ports while your monitor has HDMI ports, try searching for a USB-C to HDMI adapter.
-
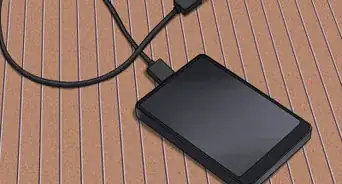
4Plug the cable or adapter into your MacBook. Be sure that the cable or adapter is fully plugged in. Otherwise, you may have issues with your MacBook’s screen not displaying properly on your monitor.
-
5Connect the other end of the cable to your monitor. Some monitors will have both an In and an Out port for a certain cable type, so be sure to plug the cable into the port labeled In.
-
6Plug the monitor into power and turn it on. You should now see your MacBook’s screen on the monitor!
- If your monitor is not displaying your MacBook’s screen, be sure that you have selected the right video input. You should be able to change your monitor’s input by pressing a button on the bottom or the side of the monitor, selecting Input, then selecting the option with the same name as the port you are using.
- If your connecting cable and adapter are fully plugged in and you have checked your monitor’s input, but you still are not seeing your MacBook’s screen, your MacBook might not be detecting the monitor. For any operating system before Monterey, try opening System Preferences, choosing Displays, then selecting Detect Displays (you may have to hold down the Option key for this button to appear).
- HDMI cords create an instant digital connection.[3]
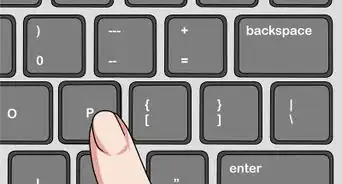
- Make sure the VGA port is turned on if you're using a VGA connection. There's usually a symbol on one of the "F" keys resembling 2 boxes with a slash between them. Hit the function key and then the corresponding "F" button to turn the port on.[4]


Adjusting Your Display Settings
-
1Open System Preferences. This app can be opened by clicking the Apple icon in the top left of your screen, then clicking System Preferences.
-
2Click Displays. This menu is represented by a monitor with a blue screen. Once clicked, you should see a variety of options for altering your display settings.
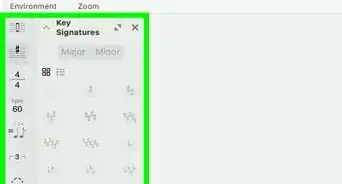
-
3Choose to extend or mirror your display on your monitor. Extending your display allows you to use your monitor as an entirely separate desktop, while mirroring your display will duplicate your MacBook’s screen on your monitor.
- To switch between these settings, press Display Settings…, then select your monitor from the sidebar.
- Next, find the “Use as…” menu and choose either Extended display or Mirror for Built-in Retina Display.
-
4Rearrange your displays. For the easiest and most intuitive setup, try arranging your displays as they are arranged on your desk. To move a display, simply drag and drop it to the desired location.
- You can determine what display you are looking at by hovering your mouse over it and reading the name that appears.
-
5Set your primary display. This can be done by clicking and dragging the white bar at the top of one of your displays to the desired display. Your primary screen will have your dock, top menu bar, and so on.
- If you want to use your laptop as your primary display, you do not need to change anything.


Using Your MacBook with the Lid Closed
-
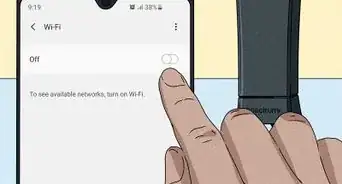
1Connect an external keyboard and mouse to your laptop. Your keyboard or mouse can be wired or wireless.[5]
-
2Plug your charger in. This will allow your MacBook to stay on with the lid closed.
-
3Open System Preferences. This app can be opened by clicking the Apple icon in the top left of your screen, then clicking System Preferences.
-
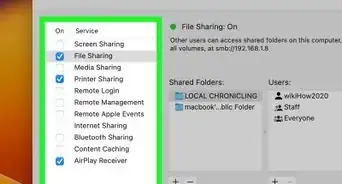
4Mirror your display to your monitor. Select Displays, then click Display Settings and select your monitor from the sidebar. Next, choose Mirror for Built-In Retina Display from the “Use as…” menu.
- If you are using an older version of macOS, go to Displays, choose the Arrangement tab, then check the box marked Mirror Displays.
-
5Change your energy saving settings. Return to the default System Preferences screen, then choose Battery. Select the Power Adapter tab, then check Prevent your Mac from automatically sleeping when the display is off.
-
6Close your MacBook lid. You should now be able to use your monitor while your MacBook is shut!


Expert Q&A
-
QuestionWhat do I do if my VGA port is not working?
 Luigi OppidoLuigi Oppido is the Owner and Operator of Pleasure Point Computers in Santa Cruz, California. Luigi has over 25 years of experience in general computer repair, data recovery, virus removal, and upgrades. He is also the host of the Computer Man Show! broadcasted on KSQD covering central California for over two years.
Computer & Tech SpecialistWait a few seconds after pressing the button that enables your VGA port. It takes several seconds for it to boot up. -
QuestionIs there any difference between VGA and HDMI?Luigi OppidoLuigi Oppido is the Owner and Operator of Pleasure Point Computers in Santa Cruz, California. Luigi has over 25 years of experience in general computer repair, data recovery, virus removal, and upgrades. He is also the host of the Computer Man Show! broadcasted on KSQD covering central California for over two years.
Computer & Tech SpecialistDefinitely! VGA ports provide an analog connection, and need to be enabled in order to work correctly. HDMI ports, on the other hand, are digital, and create an instant connection.


References
- ↑ https://www.xenarc.com/images/CKEDIT/1423%20x%20805%20%20Common%20Video%20Display%20Interfaces%20for%20Rugged%20Touchscreen%20Monitors%20Manufactaured%20By%20Xenarc%20Technologies-01.png
- ↑ Luigi Oppido. Computer & Tech Specialist. Expert Interview. 31 July 2019.
- ↑ Luigi Oppido. Computer & Tech Specialist. Expert Interview. 31 July 2019.
- ↑ Luigi Oppido. Computer & Tech Specialist. Expert Interview. 31 July 2019.
- ↑ https://support.apple.com/en-us/HT202351
About This Article

1. Identify the video ports on your MacBook and monitor.
2. Purchase the appropriate cable and adapter (if necessary).
3. Connect the cable and adapter to your MacBook as well as the In video port on your monitor.
4. Open System Preferences and click Displays.
5. Rearrange your displays by dragging and dropping them (optional).
6. Go into your Display Settings and choose to mirror or extend your MacBook's display.