X
This article was co-authored by wikiHow staff writer, Jack Lloyd. Jack Lloyd is a Technology Writer and Editor for wikiHow. He has over two years of experience writing and editing technology-related articles. He is technology enthusiast and an English teacher.
This article has been viewed 28,000 times.
Learn more...
If you find yourself in need of stencils, decorative outlines, or a background-free cut-out of an image, don't fret! You can easily create a cut-out from your favorite JPEG using Silhouette--a free photo editing service for both Mac and PC--after downloading the relevant software.
Steps
Part 1
Part 1 of 2:
Downloading Silhouette Software
-
1Navigate to Silhouette's download site. Silhouette America is a suite of software made specifically for photo editing; you can use this software to create a cut-out image from a standard JPEG- or GIF-format photo.
-
2Find the "Silhouette Studio" option. This should be on the left side of your screen; you'll be downloading the "Basic" edition of Silhouette, which is free to use.[1]Advertisement
-
3Select your platform from the drop-down menu. From here, you can select either "Mac" or "Windows". You'll need a computer that's running at least OS X 10.7 or Windows 7.
- Click "Download" when you're ready.
-
4Open the Silhouette setup. Depending on where you chose to download your file to, you may have to navigate to the file's download location to do so.
-
5Follow the on-screen instructions for installation. Silhouette will prompt you to choose an installation location.
- For ease of access, leave the "Open Silhouette when installation is complete" and "Create a desktop shortcut" options checked.
-
6Double-click the Silhouette Studio icon. If Silhouette didn't open automatically, this will begin running the program.
-
7Click the "Design" option. This will be on the left side of the options wheel upon starting up Silhouette. You are now ready to import a JPEG and begin creating your cut-out!


Advertisement
Part 2
Part 2 of 2:
Converting Your JPEG
-
1Click and drag your JPEG into the Silhouette window. This is easiest if your Silhouette window isn't at full size.[2]
- You can also convert GIF and PNG file formats with Silhouette.
-
2Resize your file if you need to. You can do this by clicking the image in Silhouette to select it, then clicking and dragging one of the small squares on the outline around the image.
- Resizing your file will reduce its quality.
-
3Click the "Trace" button. This is in the toolbar on the top-right side of your screen; it resembles a butterfly inside of a square.[3]
-
4Click "Select Trace Area". This option is at the top of the "Trace" menu on the right-hand side of your screen.
-
5Click and drag your cursor over your trace area. This should be the part of the JPEG from which you wish to create a silhouette. After releasing the mouse, you should see a yellow outline around your target area.[4]
-
6Click the checkbox next to "High Pass Filter". This will disable this option, which will refine the quality of your outline.[5]
- If you're attempting to isolate a complex, high-quality image cut-out, you don't need to disable the High Pass Filter option.
-
7Click and drag the "Threshold" option to the right. This will further emphasize the quality of your outline. Since this setting will vary depending on your image's complexity, feel free to experiment with different settings before making your final cut.
-
8Click "Trace Outer Edge". This will create a slim outline of the outer part of your selected area.
- You can also click "Trace and Detach" to cut out your selected area.
-
9Click your original JPEG and tap Delete. This will clear out your JPEG background or remaining material, leaving just your outline.[6]
- You can also click and drag your JPEG off of the Silhouette work window; this should leave an outline.
- If you used "Trace and Detach", this will remove all aspects of your JPEG except for the section you selected.
-
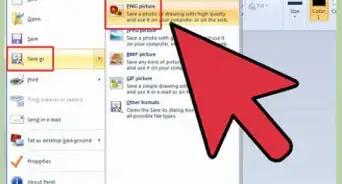
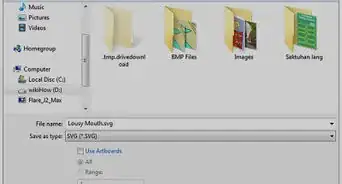
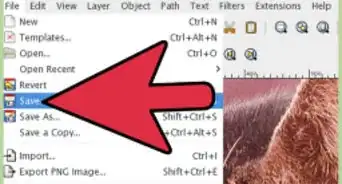
10Click "File", then "Save As". This option is in the top right corner of your Silhouette window. After saving your project, you can print it, edit it further, or send it to a friend. You have successfully created a Silhouette cut-out of an image!


Advertisement
Warnings
- Make sure you save your work before exiting Silhouette!⧼thumbs_response⧽
Advertisement

References
- ↑ http://www.silhouetteschoolblog.com/
- ↑ http://www.silhouetteamerica.com/printer-friendly/faq/using-external-images
- ↑ http://www.silhouetteschoolblog.com/2014/04/how-to-turn-any-jpeg-into-silhouette.html
- ↑ http://www.silhouetteschoolblog.com/2014/01/how-to-cut-jpeg-with-silhouette-studio.html
- ↑ https://www.youtube.com/watch?v=8kJxhnvx3yk
- ↑ http://www.dreamalittlebigger.com/post/make-cut-files-out-of-gif-jpeg-files-in-silhouette-studio.html
About This Article
Jack Lloyd
wikiHow Technology Writer
This article was co-authored by wikiHow staff writer, Jack Lloyd. Jack Lloyd is a Technology Writer and Editor for wikiHow. He has over two years of experience writing and editing technology-related articles. He is technology enthusiast and an English teacher. This article has been viewed 28,000 times.
How helpful is this?
Co-authors: 2
Updated: March 29, 2019
Views: 28,000
Categories: Image Conversion
Advertisement