This article was co-authored by wikiHow staff writer, Megaera Lorenz, PhD. Megaera Lorenz is an Egyptologist and Writer with over 20 years of experience in public education. In 2017, she graduated with her PhD in Egyptology from The University of Chicago, where she served for several years as a content advisor and program facilitator for the Oriental Institute Museum’s Public Education office. She has also developed and taught Egyptology courses at The University of Chicago and Loyola University Chicago.
There are 8 references cited in this article, which can be found at the bottom of the page.
This article has been viewed 5,844 times.
Learn more...
It’s frustrating to snap a photo that’s almost perfect, only to find that the focus is a little bit off. Fortunately, it’s becoming easier than ever to sharpen a blurry photo with photo editing software. In this article, we’ll explain how to unblur an image using some of the sharpening tools in Photoshop and GIMP. We’ll also recommend some more user-friendly apps, websites, and desktop tools you can try if you want to automatically sharpen an image without going through a lot of steps.
Steps
Smart Sharpening (Photoshop)
-
1Set the zoom to 100% so you can see the image clearly. Before you adjust the sharpness of your image in Photoshop, set the view to full size. This will give you a more accurate sense of how well your adjustments are working.[1] To zoom in:[2]
- Double click on the Zoom tool (which looks like a magnifying glass) in the toolbar.
- You can also open the View menu, then select either Actual Pixels or 100% depending on which version of Photoshop you’re using.
- Alternatively, click the zoom level in the status bar at the bottom of the document window and type in 100%, then hit ⏎ Return or ↵ Enter.
-
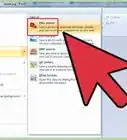
2Select Smart Sharpen from the Filter menu. Open the Filter menu at the top of the screen, then select Sharpen, then Smart Sharpen. This will open a new dialog box.[3]Advertisement
-
3Adjust the sliders for the desired results. In the Smart Sharpen dialog box, you’ll see several controls that you can adjust to make your image look as good as possible. Experiment with the following until you get your image looking the way you want it to:[4]
- Amount changes how much contrast there is between the pixels along any edges in the image. The higher the amount of contrast, the sharper the edges will look.
- Radius determines how many pixels around an edge in your image will be affected by the sharpening. The sharpening effect will be more obvious if you choose a higher radius number.
- Reduce Noise lets you minimize camera grain, which can become a lot more obvious when you sharpen an image.
-
4Pick the type of blur you want to remove. The Remove dropdown menu lets you select the type of blur in the image, which can make Photoshop’s built-in sharpening tools more effective. For example, if your image is blurry because the lens wasn’t focused right, pick Lens Blur. For a photo that’s blurry because of movement, choose Motion Blur.[5]
- If you’re trying to get rid of motion blur, you’ll need to adjust the Angle in the text field next to the Remove menu. The Angle tool helps remove motion blur by indicating the direction of the motion.[6]
-
5Adjust Shadows and Highlights for more detailed sharpening. These controls let you adjust the amount of sharpening specifically in light and dark areas of the photo, which may be useful if you get strong halo effects in those areas. Depending on which version of Photoshop you’re using, you may need to click the Advanced button at the top of the dialog box to see the Shadows and Highlights tab. Otherwise, look for these controls under the main Smart Sharpen controls.[7]
- The Fade Amount slider specifically targets the amount of contrast in the highlights and shadows of the image.
- Tonal Width adjusts the range of dark or light tones that are affected by the sharpening process. If you use a smaller number, then your adjustments will be restricted to just the lightest and darkest areas of the picture.
- Radius controls how much of the area around each pixel is taken into account to determine whether it falls in a shadow or highlight.
-
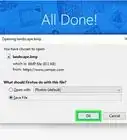
6Select OK when you’re done. When you’ve adjusted the image the way you like, click OK to apply your changes.[8]


Unsharp Mask (Photoshop)
-
1Select the layer you want to sharpen. Despite its name, the unsharp mask is a tool that sharpens images instead of blurring them. You can sharpen the whole image or just part of it using this method. If your image has multiple layers, go to the Layers Panel and select the layer you want to sharpen.[9]
- If you don’t see the Layers Panel, open the Window menu at the top of the screen, then select Layers to open it.
- Make sure the Layers tab is selected at the top of the panel, not Channels or Paths.
- The Unsharp Mask creates a stronger sharpening effect than Smart Sharpen. It works by detecting pixels that look different from the pixels around them and increasing the contrast between them.
-
2Convert the layer into a Smart Object. Click the Menu button at the top right corner of the Layers Panel. It looks like a stack of horizontal lines with a down arrow next to it. Select Convert to Smart Object from the menu.[10]
- This will make it easier for you to make edits to the unsharp mask later if you need to.
-
3Draw a selection if you want to sharpen just part of the image. You can apply the unsharp mask to the whole layer or just part of it.[11] If you want to sharpen selectively, click the Lasso Tool and use it to select the part of the image you want to sharpen.
-
4Open Unsharp Mask in the Filter menu. Open the Filter menu at the top of the screen, then select Sharpen, then Unsharp Mask. This will open a new dialog box.[12]
- You should see a window with a preview of your image in the Unsharp Mask control panel. If you don’t see a preview, make sure the Preview option is checked in the dialog box.
- You should be able to see the effects of the mask on the image in the main document window as well as the preview box. You can click and hold the image in the preview box to see it without the mask.
-
5Move the Radius slider to adjust the width of the effect. The Radius slider controls how many pixels around an edge in your image are affected by the Unsharp Mask. For a high-resolution image, a low number such as 1 or 2 usually works best.[13]
- The right radius number also depends on whether you want to print the image or not. Higher radius values are a lot less noticeable in print than on screen.
-
6Drag the Amount slider to adjust the contrast. More contrast will create a stronger sharpening effect. If you’re planning to print the image, try setting the contrast between 150% and 200%.[14]
-
7Use the Threshold slider to determine which pixels are sharpened. Threshold controls how different a pixel must be from the surrounding pixels to be counted as an “edge pixel.” Only edge pixels will be affected by the Unsharp Mask. You may need to experiment with different threshold levels to find what works best for your image.[15]
- In general, values between 2 and 20 work best to avoid unwanted over-sharpening effects.[16]
-
8Change the blend mode to Luminosity to prevent color shifting. Since the Unsharp Mask works by increasing contrast between pixels, it may distort the colors in your image. To prevent this, open the Blend Mode menu, which is in the second row of tools at the top of the Layers Panel, to the left of Opacity. Change the Blend Mode from Normal to Luminosity.[17]


Selective Sharpening with an Edge Mask (Photoshop)
-
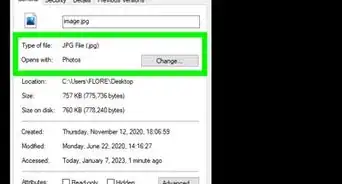
1Create an edge mask from your image. Using an edge mask will help you sharpen just the important edges in your image for a better-looking final result. For instance, this is a useful technique if you want to sharpen the facial features in a portrait without over-sharpening the texture of the subject’s skin. Try this method for creating an edge mask in Photoshop:[18]
- Open the Channels panel. If it isn’t already open, go to the Windows menu and select Channels.[19]
- Select the channel with the highest contrast. This is usually the red or green channel. Click the eye button next to the other channels to hide them.
- Duplicate the selected channel using the Channels Panel Menu in the top right corner. Enter a new name for the duplicate channel.
- With the new duplicate channel selected, open the Filter menu, then select Stylize, then Find Edges.
- Next, open the Image menu, select Adjustments, and choose Invert. This will invert the colors of the image.
- To thicken the edges of the mask, open Filter, choose Other, then select Maximum. Enter a low number (e.g., 1 or 2).
- Reduce noise in the image by opening Filter, then Noise, then Median. Choose a low radius number, such as 1 or 2, then click OK.
- Open Image, go to Adjustment, then open Levels. Choose a high black point to help eliminate random pixels outside the true edges of your image.
- In the Filter menu, choose Blur, then add Gaussian Blur to soften the edges of the mask and make it look more natural.
-
2Ctrl-click the duplicate channel to select it. Or, if you’re using a Mac, ⌘ Command-click it instead. This will create a selection for your edge mask.[20]
-
3Open the Layers Panel. If the Layers Panel isn’t already open, display it by going to Window and choosing Layers.[21]
-
4Select the image layer. In the Layers Panel, select the layer that contains the image you are working with. Make sure you can still see the selection you created from the edge mask in the image window.[22]
-
5Invert the selection in the Select menu. Open Select, then choose Inverse. This will invert the selection you created.[23]
-
6Select the Unsharp Mask from the Filter menu. With the edge mask still selected, open the Filter menu, then choose Sharpen. Select Unsharp Mask.[24]
-
7Adjust the controls to get the desired effect. Use the controls in the Unsharp Mask panel to adjust the sharpness of the selection however you like. For instance:[25]
- Adjust Radius to control the width of the sharpening effect around the edges of the selection.
- Move the Adjust slider to set the level of contrast between the pixels.
- Slide the Threshold control to set how different a pixel must be from the surrounding pixels to be affected by the Unsharp Mask.
-
8Select the RGB channel and deselect your selection. To see the final results of the selective sharpening, go back to the Channels Panel and select the RGB channel. Use Ctrl-click (in Windows) or ⌘ Command-click (on a Mac) to deselect the mask.[26]


Smart Sharpening (GIMP)
-
1Do any other desired edits first. GIMP is a free alternative to Photoshop that has many of the same tools, including the Unsharp Mask. If you want to change the image size or make any other edits, do that first before sharpening your image in GIMP.[27]
- If you sharpen the image before doing other edits, the final results won’t look as good.
-
2Duplicate the image with Ctrl+D. Before you sharpen the picture, select it and press Ctrl+D. You can also duplicate the image by right-clicking it, then selecting Image and Duplicate from the context menu.[28]
-
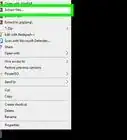
3Select Mode from the Image menu. Right-click the duplicate image and select Image from the popup menu. From there, select Mode.[29]
-
4Choose Decompose. In the Mode menu, choose Decompose. This will open the Decompose dialog box.[30]
-
5Select LAB and check As Layers. Click the LAB radio button in the Decompose dialog box. Make sure the As Layers option is checked. When you’re done, click OK.[31]
- If you’re using an older version of GIMP, you may not see the LAB option. In this case, select HSV instead.
- Some versions of GIMP may not have the As Layers option. The process will still work if you don’t select this option, but the channels will open in separate windows instead of in one window with layers.
-
6Hide the A and B channels. Click the eye buttons next to the A and B layers in the Layers, Channels, & Paths window. This will hide those channels so that only the L channel is visible.[32]
-
7Select Edge Detect in the Filters menu. Right-click the duplicate image and select Filters from the context menu. Then, choose Edge Detect.[33]
-
8Click Edge. Select Edge from the Edge Detect menu. This will launch a new dialog box.[34]
-
9Experiment with the edge parameters. The Parameter Settings affect the width of the edges in your image. Experiment with higher or lower values using the Amount slider until you get the result you want.[35]
- Under the Amount slider you’ll see a series of radio buttons, with Smear selected by default. Leave Smear selected.[36]
- In some versions of GIMP, you may see additional Parameter Settings, including a variety of presets (such as Sobel, Gradient, and Differential).
-
10Set the image to grayscale. Right-click the image and select Image, then Mode. In the Mode menu, choose Grayscale.[37]
-
11Adjust the black and white levels. Right-click the image, select Image, then select Colors. In the Colors menu, choose Levels to launch the Levels dialog box. Set the black point high and the white point low to get rid of any random white pixels or unwanted extra edges in your image.[38]
- In some versions of GIMP, there is a separate Colors menu in the menu bar at the top of the screen.
-
12Apply gaussian blur to soften the edges. Open the Filters menu, then select Blur. Choose Gaussian Blur. Set both the vertical and horizontal radius somewhere between 3 and 10 pixels.[39]
- You may need to adjust black and white levels again after applying the gaussian blur.
-
13Create a new layer called “Sharpening Mask”. Open the Layers dialog box on your LAB image and select the LAB Image in the dropdown menu at the top of the box. Then, select the Channels tab. Click the New Channel button at the bottom left corner of the dialog box (this button looks like a single page with a corner folded over). Name the new channel Sharpening Mask.[40]
- If you used HSV instead of LAB, select Value from the dropdown menu instead of the LAB Image.
-
14Copy and paste the edge mask into the LAB window. Click the duplicate image where you applied the edge filter and go to the Select menu, then click Select All. Copy your selection and paste it into the original LAB image that you created.[41]
- Make sure that the <n>Sharpening Mask layer is selected when you do this.
- Once you’ve pasted the selection into the new layer, click the Anchor button at the bottom of the Layers Panel to anchor the selection so you don’t accidentally move it.
-
15Select the sharpening mask and click Channel to Selection. In the Layers Panel, make sure you have the Sharpening Mask channel selected in the Channels Tab. Then, click the Channel to Selection button at the bottom of the panel. It looks like a circle with a dotted outline.[42]
- You should see a selection of the edges of your image appear in the main image window.
- It might be helpful to click the Eye Button next to the Sharpening Mask layer to make it invisible so you can see your image and selection better.
-
16Click on the Layers tab and make sure the L-channel is selected. In the Layers, Channels & Paths panel, click the Layers tab. Select the Luminosity or L layer, and make sure no other layers are selected.[43]
- If you’re working in HSV instead of LAB, select the Background Layer of the Value window.
-
17Apply an unsharp mask. Open the Filters menu, then select Enhance. In the Enhance menu, select Unsharp Mask. You will need to experiment with the controls to see what works best for your image.[44]
- In general, you’ll probably find that low numbers in the Radius, Amount, and Threshold settings give the best results. For instance, try setting all of these between 0 and 2.
-
18Deselect the selection. Right-click the image and choose Select from the context menu, then click None. Zoom in on your image to make sure that it looks the way you want it too.[45]
-
19Re-compose your image to see the final results. Right-click the image and select Image in the context menu. Select Mode, then Compose. In the Compose Options dialog box, be sure to check that you have selected the correct option (either LAB or HSV, depending on what you selected when you decomposed the image) and that the L, A, and B or H, S, and V thumbnails on the right are matched up to the correct components. Then, click OK.[46]
- You should now see a new image with all the channels combined to show the original colors.
- When you’re done, zoom in on the image to examine it and make sure it looks the way you want it to.


Other Unblurring Tools
-
1Try a free online unblurring tool. If you’re looking for a quick and easy way to sharpen your image, there are several online tools you can try. Some popular options include:
- The Adobe Express Unblur tool: https://www.adobe.com/express/feature/image/unblur. You’ll need an Adobe account to use this feature.
- Pixelied’s free browser-based unblurring tool: https://pixelied.com/features/unblur-image
- VanceAI’s Image Sharpener, which uses AI technology to correct a variety of different types of blurring: https://vanceai.com/sharpen-ai/
-
2Download an image sharpening app. There are several apps for mobile devices that you can use for quick, user-friendly image sharpening. Many of these apps are completely free to use or allow you to use the unblurring feature for free. Some of these apps use AI-based technology to sharpen your photos. Try apps such as:
- Remini (also available as a browser-based tool): https://app.remini.ai
- EnhanceFox (available in Google Play and the Apple App Store): https://www.risingcabbage.com/
- Snapseed (also available as a desktop app): https://snapseed.online/
- Adobe Lightroom (also available for desktop): https://lightroom.adobe.com/
- Photoshop Express: https://helpx.adobe.com/photoshop-express/get-started-ios.html
-
3Experiment with desktop programs. In addition to GIMP, there are a variety of other desktop-based photo editing programs that allow you to sharpen images. Some of these alternatives are quite simple and user-friendly if you’re interested in a less complicated unblurring process. Try software such as:
- Unshake (free to use): http://www.zen147963.zen.co.uk/Unshake/Download.html
- Robust Deblurring Software from the Chinese University of Hong Kong (offers a free version, but image sizes and features are limited): http://www.cse.cuhk.edu.hk/~leojia/projects/robust_deblur/deblurring.htm
- SmartDeblur (offers a free trial): http://smartdeblur.net/
- inPixio Photo Focus (paid software, for Windows only): https://www.inpixio.com/photo-focus/


References
- ↑ https://helpx.adobe.com/photoshop/using/adjusting-image-sharpness-blur.html
- ↑ https://helpx.adobe.com/photoshop/using/viewing-images.html#zoom_in_or_out
- ↑ https://helpx.adobe.com/photoshop/using/adjusting-image-sharpness-blur.html
- ↑ https://helpx.adobe.com/photoshop/using/adjusting-image-sharpness-blur.html
- ↑ https://helpx.adobe.com/photoshop/using/adjusting-image-sharpness-blur.html
- ↑ https://helpx.adobe.com/photoshop/using/adjusting-image-sharpness-blur.html
- ↑ https://helpx.adobe.com/photoshop/using/adjusting-image-sharpness-blur.html
- ↑ https://helpx.adobe.com/photoshop/using/adjusting-image-sharpness-blur.html
- ↑ https://helpx.adobe.com/photoshop/using/adjusting-image-sharpness-blur.html
- ↑ https://www.adobe.com/creativecloud/photography/discover/unsharp-masking.html
- ↑ https://helpx.adobe.com/photoshop/using/adjusting-image-sharpness-blur.html
- ↑ https://helpx.adobe.com/photoshop/using/adjusting-image-sharpness-blur.html
- ↑ https://helpx.adobe.com/photoshop/using/adjusting-image-sharpness-blur.html
- ↑ https://helpx.adobe.com/photoshop/using/adjusting-image-sharpness-blur.html
- ↑ https://www.adobe.com/creativecloud/photography/discover/unsharp-masking.html
- ↑ https://helpx.adobe.com/photoshop/using/adjusting-image-sharpness-blur.html
- ↑ https://www.adobe.com/creativecloud/photography/discover/unsharp-masking.html
- ↑ https://helpx.adobe.com/photoshop/using/adjusting-image-sharpness-blur.html
- ↑ https://helpx.adobe.com/photoshop/using/channel-basics.html
- ↑ https://helpx.adobe.com/photoshop/using/adjusting-image-sharpness-blur.html
- ↑ https://helpx.adobe.com/photoshop/using/layer-basics.html
- ↑ https://helpx.adobe.com/photoshop/using/adjusting-image-sharpness-blur.html
- ↑ https://helpx.adobe.com/photoshop/using/adjusting-image-sharpness-blur.html
- ↑ https://helpx.adobe.com/photoshop/using/adjusting-image-sharpness-blur.html
- ↑ https://helpx.adobe.com/photoshop/using/adjusting-image-sharpness-blur.html
- ↑ https://helpx.adobe.com/photoshop/using/adjusting-image-sharpness-blur.html
- ↑ https://www.gimp.org/tutorials/Smart_Sharpening/
- ↑ https://www.gimp.org/tutorials/Smart_Sharpening/
- ↑ https://www.gimp.org/tutorials/Smart_Sharpening/
- ↑ https://www.gimp.org/tutorials/Smart_Sharpening/
- ↑ https://www.gimp.org/tutorials/Smart_Sharpening/
- ↑ https://www.gimp.org/tutorials/Smart_Sharpening/
- ↑ https://www.gimp.org/tutorials/Smart_Sharpening/
- ↑ https://www.gimp.org/tutorials/Smart_Sharpening/
- ↑ https://www.gimp.org/tutorials/Smart_Sharpening/
- ↑ https://docs.gimp.org/2.6/en/plug-in-edge.html
- ↑ https://www.gimp.org/tutorials/Smart_Sharpening/
- ↑ https://www.gimp.org/tutorials/Smart_Sharpening/
- ↑ https://www.gimp.org/tutorials/Smart_Sharpening/
- ↑ https://www.gimp.org/tutorials/Smart_Sharpening/
- ↑ https://www.gimp.org/tutorials/Smart_Sharpening/
- ↑ https://www.gimp.org/tutorials/Smart_Sharpening/
- ↑ https://www.gimp.org/tutorials/Smart_Sharpening/
- ↑ https://www.gimp.org/tutorials/Smart_Sharpening/
- ↑ https://www.gimp.org/tutorials/Smart_Sharpening/
- ↑ https://www.gimp.org/tutorials/Smart_Sharpening/
- ↑ https://helpx.adobe.com/photoshop/using/reduce-camera-shake-induced-blurring.html
About This Article