This article was written by Sharon Lee and by wikiHow staff writer, Travis Boylls. Sharon Lee is a Success Strategist and the Owner of Fearless Pursuits. With over seven years of experience, she specializes in helping others gain clarity on their goals, build confidence, and remain accountable towards their goals. Sharon offers advice to others through life coaching, career coaching, and small business coaching. Sharon holds a Strategic Intervention Coach Certification from Robbins-Madanes Training and has additional training from Erickson Coaching International.
The wikiHow Tech Team also followed the article's instructions and verified that they work.
This article has been viewed 20,667 times.
This wikiHow teaches you how to create ads on Facebook. You can use Facebook ads to boost a post, promote a Facebook page or external website, as well as create a form to help you get leads. Before you create a Facebook ad, you need to create a new ad campaign from Facebook's ad manager page.
Steps
Using Quick Creation
-
1Navigate to https://www.facebook.com and log in. You can use any web browser on PC or Mac.
- If you are not automatically logged in to Facebook, log in using your email or phone number and password.
-
2Click Create. It's at the top of your Facebook page on the right side. This displays a drop-down menu.Advertisement
-
3Click Ad. It's in the drop-down menu below "Create". This opens the Facebook Ad Manager.
-
4Click Switch to Quick Creation. It's the white button in the upper-right corner of the Facebook Ad Manager page.
-
5Type a campaign name. Use the text box at the top of the form to type the name of your ad campaign.
- If you already have an existing campaign, you can click the drop-down menu in the upper-left corner of the form and select Use Existing Campaign.
-
6Select a buying type. Use the drop-down menu next to "Buying Type" to select an ad-buying strategy for your campaign. Your options are as follows:[1]
- Reach and frequency: This option allows you to buy campaigns in advance and gives you more control over your frequency settings (this option may not be available for all campaigns).
- Auction: This option gives you more choice, efficiency, and flexibility, but with less predictable results.
-
7Select a campaign objective. Use the drop-down menu next to "Campaign Objective" to select an objective for your campaign. Your options are as follows:
- Brand awareness: Select this option to reach people who are more likely to be interested in your brand.
- Reach: Select this option to have your ad viewed by the highest number of people.
- Traffic: Select this option to direct people to a Facebook page or website.
- Engagement: Select this option to promote a Facebook post, event, offer, or just to get more likes.
- App installs: Select this option if you are an app developer to promote your app.
- Video views: Select this option to promote video content.
- Lead generation: Select this option to create a form that allows you to get contact information from people who are interested in your brand or business.
- Messages: Select this option to drive more messages to your business through Messenger or WhatsApp.,
- Conversions: Select this option to encourage people to complete specific actions on your website, app, or in Messenger.
- Catalog Sales: Select this option to create an ad that shows items from your catalog.
- Store traffic: Select this option to promote your physical store by showing ads to people in the area.
-
8Turn on "Create Split Test" (optional). If you wish to create more than one campaign and test your ad sets against each other, click the toggle switch next to "Create Split Test".
-
9Turn on "Campaign Budget Optimization" (optional). If you wish to optimize your budget across all ad sets, click the toggle switch next to "Campaign Budget Optimization".
-
10Type a name for your Ad Set. Use the text box next to "Ad Set Name" to type the name of your ad set.
- If you want to use an existing ad set, click the drop-down menu that says "Create New Ad Set" and select Use Existing Ad Set. Then select the ad set you want to use. You can also select "Skip Ad Set".
-
11Type a name for your ad. Use the box next to "Ad Name" to type a name for your ad.
- You can also select "Skip Ad" in the drop-down menu that says "Create New Ad".
-
12Click Save to Draft. It's the blue button in the lower-right corner of the page.
-
13Set a campaign spending limit (optional). To create a campaign spending limit, click Set a Limit next to "Campaign Spending Limit" and then enter the dollar amount you want to limit your campaign spending to in the box. The spending limit must be at least $100.
-
14Set a budget (optional). If you have "Campaign Budget Optimization" turned on, you can use the drop-down menu next to "Campaign Budget" to select Daily Budget or Lifetime Budget. Then type the total budget in the box next to the drop-down menu.
-
15Click Publish. It's the green button in the lower-right corner.
-
16Select a payment method. You can pay for your ad using a credit or debit card, Paypal account, or online banking account. Click the radial button next to the payment method you prefer to use.
- If you are paying with a credit or debit card, enter the card number, expiration date, security code, and zip code in the spaces provided.
-
17Click Continue. This saves your ad information. There is a review process the ad needs to go through before your ad runs.
- If you selected Paypal or online banking as your payment method, you will need to provide the email address associated with your Paypal account, or select your bank and sign in with your online banking username and password.


Using Guided Creation
-
1Navigate to https://www.facebook.com/adsmanager using a web browser. You can use any web browser on PC or Mac. This is Facebook's ad manager page.
- You can also log into your Facebook page and click Create. Then select Ad in the drop-down menu.
-
2Click I accept. It's the blue button in the lower-right corner. This indicates that you agree to Facebook's nondiscriminatory ad policy. You only have to agree to this the first time you log into Facebook's ad manager.
-
3Click the Campaigns tab. It's the second tab on the page.
-
4Click Create. It's the green button in the upper-left corner above the list of campaigns.
-
5Click Create Complete Campaigns. It's the first box on the left. This option walks you through the process of creating a Facebook ad campaign and your first ad.
- Alternatively, you can click Create Campaign Shells and follow the instructions to create a basic campaign that allows you to create ads at a later date.
-
6Select a campaign objective. There are a variety of objectives for you to choose from. Click the one that is right for you. Your options include the following;
- Brand awareness: Select this option to reach people who are more likely to be interested in your brand.
- Reach: Select this option to have your ad viewed by the highest number of people.
- Traffic: Select this option to direct people to a Facebook page or website.
- Engagement: Select this option to promote a Facebook post, event, offer, or just to get more likes.
- App installs: Select this option if you are an app developer to promote your app.
- Video views: Select this option to promote video content.
- Lead generation: Select this option to create a form that allows you to get contact information from people who are interested in your brand or business.
- Messages: Select this option to drive more messages to your business through Messenger or WhatsApp.,
- Conversions: Select this option to encourage people to complete specific actions on your website, app, or in Messenger.
- Catalog Sales: Select this option to create an ad that shows items from your catalog.
- Store traffic: Select this option to promote your physical store by showing ads to people in the area.
-
7Scroll down and type a campaign name. By default, your ad campaign is named after the objective you select. If you want to name it something else, type it in the box next to "Campaign Name".
- If you wish to create more than one campaign and test your ad sets against each other, click the toggle switch next to "Create Split Test".
- If you wish to optimize your budget across all ad sets, click the toggle switch next to "Campaign Budget Optimization".
-
8Click Set Up Ad Account. It's the blue button at the bottom of the page.
-
9Select the country your account resides in. Use the drop-down menu at the top of the page to select what country you are creating an ad campaign for.
-
10Select a Currency. Use the second drop-down menu at the top of the page to select what currency you want to use.
-
11Select a time zone and click Continue. Use the third drop-down menu on the page to select what time zone you are in. Then click the blue button that says Continue in the lower-right corner of the page.
-
12Type an ad set name (optional). If you wish to rename your ad set, use the box labeled "Ad Set Name" at the top of the page to type a new name. By default, your ad set default will target people by age and by the country you live in.
-
13Click Create New to create a new audience. It's below the text bar that says "Custom Audience".
- If you already have a Custom or Lookalike audience, you can click the text box and then select it from the list.
-
14Click Custom Audience or Lookalike Audience. Select "Custom Audience" to reach people who have already interacted with your business. Select "Lookalike Audience" to reach people with similar interests to people who have interacted with your business.
- If you select "Lookalike Audience", you will need to select an existing audience and data source, as well as a location, and what percentage of the population you want to reach in the area.
-
15Select a source. This is the source used to create your audience. You can use Facebook sources or your own business sources. Your options are as follows:
- Web traffic: Select this option to create an audience from people who visited your website.
- App activity: Select this option to create an audience based on people who launched your app or did specific activities in your app.
- Customer File: Select this option to create an audience based on your own customer information.
- Offline activity: Select this option to create an audience based on offline interactions with your business, such as phone calls, or in-store customers.
- Video: Select this option to create an audience based on people who watched your Facebook or Instagram videos.
- Instagram business profile: Select this option to create an audience based on people who interacted with your Instagram profile or Instagram ads.
- Lead form: Select this option to create an audience based on leads you got using Lead generation within the Facebook Ad Manger.
- Events: Select this option to create an audience based on people who interacted with one of your Facebook events.
- Instant Experience: Select this option to create an audience based on people who opened your Instant Experience on Facebook or Instagram.
- Facebook page: Select this option to create an audience based on people who follow or interact with your Facebook page.
-
16Define your audience location. Use the drop-down menu next to the section that says "Locations" to select one of the following: "Everyone in this location", "People who live in this location", "People recently in this location", or "People traveling in this location".
-
17Add additional locations (optional). If you want to add more locations, type the name of the location in the text box below the list of locations and press ↵ Enter. You can type the name of a country, city, state, or zip code.
-
18Select a target audience age. There are two drop-down menus next to "Age". Use the first one to select the minimum age you want to target with your ad campaign (i.e 18). Use the second drop-down menu to select the oldest age group you want to target with your ad campaign (i.e 50).
-
19Select a target gender for your age group. You can select "Men", "Women", or "All".
-
20Type the languages you want to target. Use the text box next to "Languages" to type the language you want to target with your ad campaign. You can add multiple languages.
-
21Add a target demographic, interest, or behaviors. If you want to include more detailed targeting to your ad campaign, use the text box next to "Detailed Targeting" to type the names of demographics, interests, or behaviors.
- To exclude certain demographics, interests, or behaviors from your detailed targeting, click Exclude people below the "Detailed Targeting" text box and then use the new text box to type the names of the demographics, interests, or behaviors you want to exclude.
-
22Select a connection type. Use the drop-down menu next to "Connections" to select a connection type. You can choose to include or exclude people (and their friends) who like your page, people who use your app, or people who responded to an event you created.
-
23Click Save This Audience and confirm your target audience. After you entered all your target audience details, click Save This Audience below the audience section of the form. Then click the blue button that says Save in the pop-up to save your details.
-
24Select your ad placements. To allow Facebook to optimize your Facebook ad placement, select Optimize for Per Cost Result. If you want to select where your ad placement goes, click Edit Placements and then click the checkbox next to places you do not want your ad to appear.
- You can also select if you want the ad to appear on mobile, or desktop, or both.
-
25Set a budget. Use the drop-down menu next to "Budget and Schedule" and select Daily Budget or Lifetime Budget. Then type the total budget in the box next to the drop-down menu.
-
26Set a schedule for your ad. To start your ad today and have it run continuously, click the radial button next to Run my ad set continuously starting today. To schedule a specific start and end date, click the radial button next to "Set a start and end date". Then click the calendar icon next to "Start" and "End" and click a start and end date. Then type the time you want the ad to start and end in the boxes next to the start and end date.
-
27Click Continue. This saves the ad campaign and starts the ad creation process.
-
28Type an ad name. If you wish to name your ad something other than the default name, use the text box at the top of the page to type the name of your ad.
-
29Select a Facebook page and/or Instagram account. Use the drop-down menu below "Facebook Page" and "Instagram account" to select a Facebook page or Instagram account associated with your ad.
- You can also click Create a Facebook page or Add an Instagram account page to create a new business Facebook page or add an existing Instagram account.
-
30Choose an ad format. You can choose one of two ad formats: a single image or video, or a carousel. A carousel contains multiple scrollable images or videos.
-
31Select "Image" or "Video/Slideshow". This allows you to upload videos and images for your ad depending on what format you selected.
- If you selected "Carousel", click one of the numbered boxes to select which scrollable video or image you want to edit.
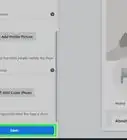
- If you selected "Single Image", click Add more images to upload images to use for your ad.
- Click Browse Library to select photos you've already uploaded to your pages.
- Click Free Stock Images to select public images to use for your ad.
- To create a slideshow, click "Video/Slideshow" and then click Create Slideshow. Then select images you want to use for your slideshow.
- Click Use Template and then select a style you want to use for your ad.
-
32Type the text for your add. Use the box labeled "Text" to type the text or ad copy text. This can be a briefs sales pitch or a call to action.
-
33Add a website URL (optional). If you want to add a URL to an external website, click the checkbox next to Add a website URL and then complete the following steps.
- Add the URL for your website in the box labeled "Website URL".
- Type how you want the link text to appear in your ad in the second text box.
- Type a headline in the box labeled "Headline".
- Type a newsfeed description in the box.
- Use the drop-down menu to select a call to action.
-
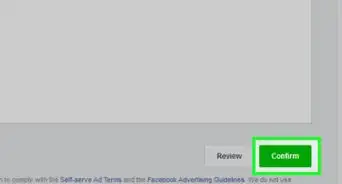
34Click Confirm. It's the green button at the bottom of the page. This saves the ad campaign.
-
35Select a payment method. You can pay for your ad using a credit or debit card, Paypal account, or online banking account. Click the radial button next to the payment method you prefer to use.
- If you are paying with a credit or debit card, enter the card number, expiration date, security code, and zip code in the spaces provided.
-
36Click Continue. This saves your ad information. There is a review process the ad needs to go through before your ad runs.
- If you selected Paypal or online banking as your payment method, you will need to provide the email address associated with your Paypal account, or select your bank and sign in with your online banking username and password.


Expert Q&A
-
QuestionWhat are some of the best ways to build an audience using social media ads?
 Sharon LeeSharon Lee is a Success Strategist and the Owner of Fearless Pursuits. With over seven years of experience, she specializes in helping others gain clarity on their goals, build confidence, and remain accountable towards their goals. Sharon offers advice to others through life coaching, career coaching, and small business coaching. Sharon holds a Strategic Intervention Coach Certification from Robbins-Madanes Training and has additional training from Erickson Coaching International.
Success StrategistEven though algorithms always change, there is one constant about social media—connection. Ultimately, people want connection. If you create friendly content, upbeat videos, and calls to action that inspire others, you'll hook your audience. Another great tactic that helps you stand out is to provide free content, like a webinar that has a ton of value even though it doesn't cost anything. When people get a sense of who you are and what you have to offer before you ask for any money, you might start building a loyal customer (and fan) base right away.


About This Article

1. Go to https://www.facebook.com/ and log in.
2. Click Create at the top of the page.
3. Click Ad in the drop-down menu.
4. Click Switch to Quick Creation in the upper-right corner.
5. Type a campaign name.
6. Use the drop-down menu next to "Buying Type" to select an ad buying strategy.
7. Use the drop-down menu next o "Campaign Objective" to select a campaign objective.
8. Type a name for your ad set.
9. Type a name for your ad.
10. Click Save to Draft.
11. Click Publish.
12. Select a payment method.
13. Enter your payment method information.
14. Click Continue.