X
This article was co-authored by wikiHow staff writer, Jack Lloyd. Jack Lloyd is a Technology Writer and Editor for wikiHow. He has over two years of experience writing and editing technology-related articles. He is technology enthusiast and an English teacher.
This article has been viewed 104,939 times.
Learn more...
This wikiHow teaches you how to create a screencast on your computer or mobile platform. Screencasts are simply screen recordings which are intended to instruct or demonstrate an on-screen process or item.
Steps
Method 1
Method 1 of 4:
On Windows
-
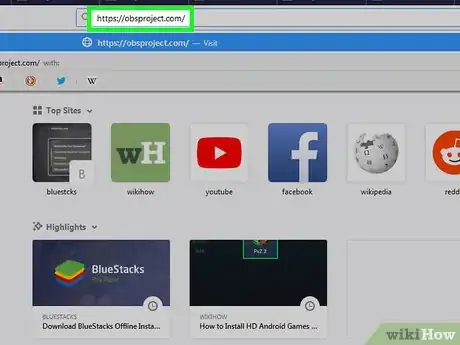
1Download and install OBS Studio. Open Broadcast Software (OBS) Studio is a free program that can be used to record and save videos of your computer's on-screen content.
- Go to https://obsproject.com/ in your computer's web browser.
- Click Windows near the top of the page.
- Double-click the setup file.
- Click Next.
- Click I Agree.
- Click Next.
- Click Install.
-
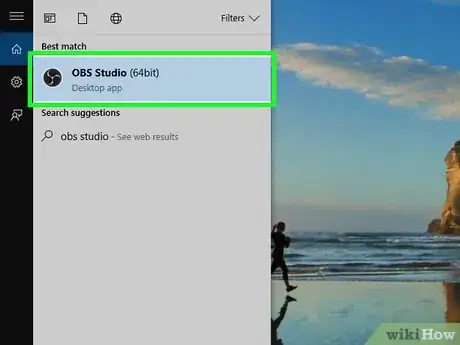
2Open OBS Studio. Once OBS Studio finishes installing, click Finish to close the setup and open OBS Studio.
- If you want to open OBS Studio at any other point, just type obs into Start, then click OBS Studio in the results.
Advertisement -
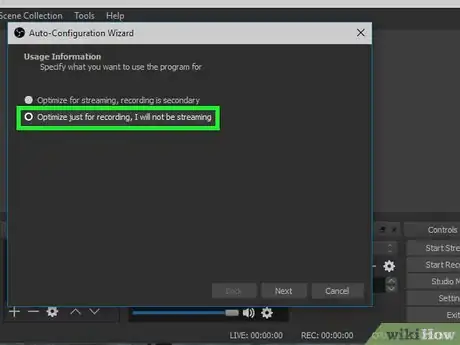
3Run the auto-configuration wizard. Click Yes when asked if you want to run the wizard, then do the following:
- Check the "Optimize just for recording..." box, then click Next.
- Click Next.
- Click Apply Settings.
-
4Set OBS Studio to save its recordings as MP4 files. This will ensure that any computer can view the final file:
- Click Settings in the lower-right side of the window.
- Click Output on the left side of the pop-up window.
- Click the "Recording Format" drop-down box.
- Click MP4.
- Click OK.
-
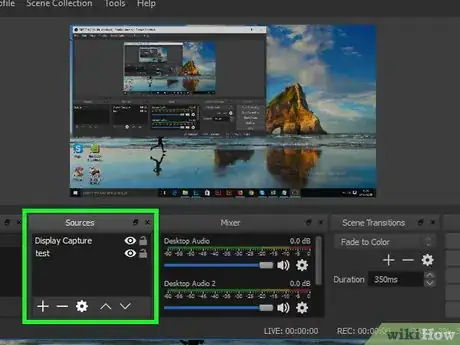
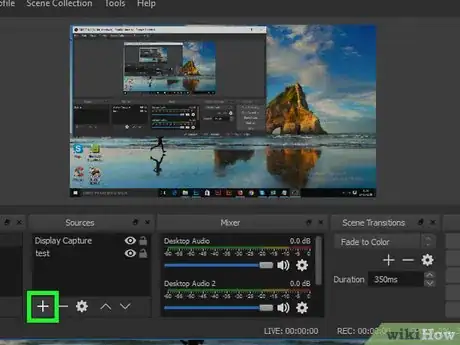
5Locate the "Sources" pane. It's in the lower-left side of the window, just right of the "Scenes" pane.
-
6Click +. This is below the "Sources" pane. A pop-up window will appear.
-
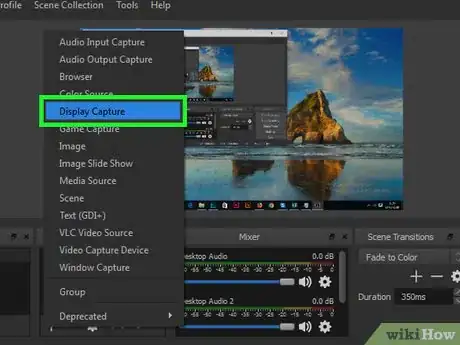
7Click Display Capture. It's in the pop-up window.
-
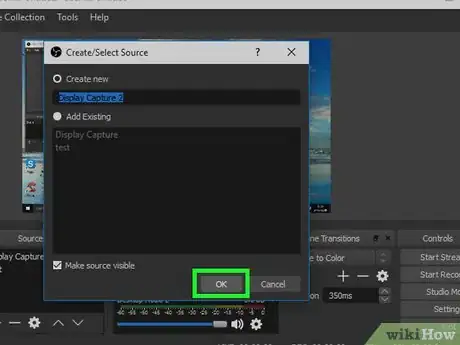
8Click OK. This option is at the bottom of the window.
- You can type a new name into the text box at the top of this window before clicking OK if you want your settings to be named something other than "Display Capture".
-
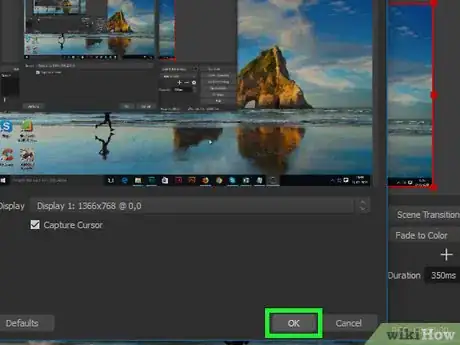
9Click OK. It's at the bottom of the window.
- If you don't want your mouse cursor to show up in your recording, make sure you uncheck the "Capture Cursor" checkbox before clicking OK.
-
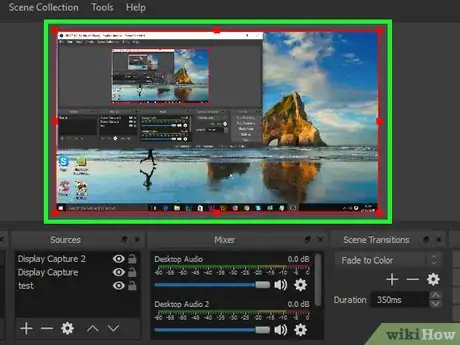
10Wait for your desktop to appear. After clicking OK, you should see your screen's contents appear in the window that's in the middle of the OBS Studio window.
- If your desktop doesn't appear and you just see a black box in the middle of the OBS Studio window, check the "Fix common errors in OBS Studio" step at the end of this method.
-
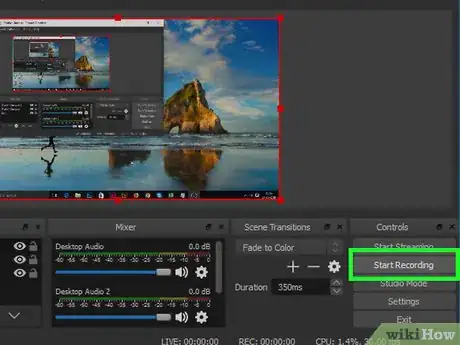
11Click Start Recording. It's in the lower-right side of the window. Your recording will begin.
- If you see an error that says "Failed to start recording" pop up, check the "Fix common errors in OBS Studio" step at the end of this method.
-
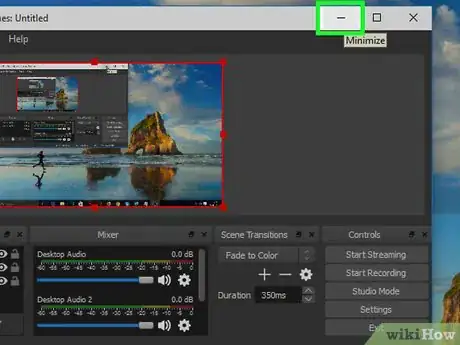
12Perform your screencast's steps. Minimize the OBS Studio window, then go through the steps you want to record.
-
13Click Stop Recording when you're done. It's in the lower-right side of the OBS Studio window. This will stop the recording and save it as a video file.
-
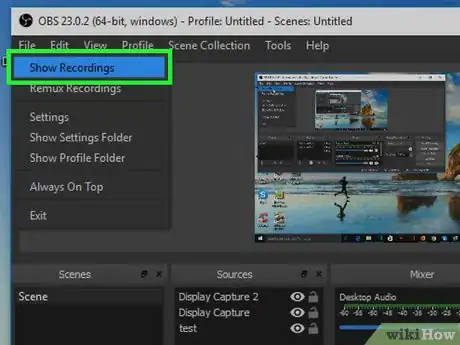
14View the video file. Click File in the top-left corner of the OBS Studio window, then click Show Recordings in the resulting drop-down menu. This will cause your recording's save location folder to open.
-
15Fix common errors in OBS Studio. If you encountered either of the two errors mentioned in this method, you can fix them by doing the following:
- Black screen — You may see this option if you use an NVIDIA graphics card. To fix this error, close OBS Studio, right-click the OBS Studio app icon, select Run with graphics processor, and click Integrated graphics.
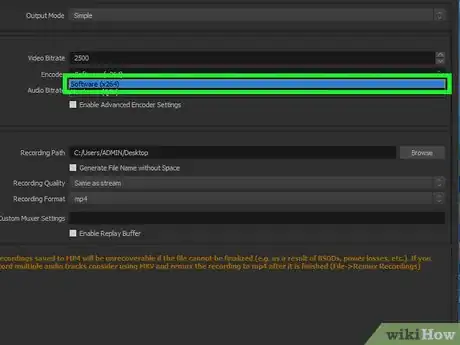
- Failed to start recording — Click Settings in the lower-right side of the window, click the Output tab, change both "Encoder" menus to read Software (x264), and click OK.
Advertisement
Method 2
Method 2 of 4:
On Mac
-
1Open QuickTime. Click or double-click the QuickTime app icon, which resembles a blue "Q".
- If QuickTime isn't in your Mac's Dock, you'll find it in the Applications folder.
-
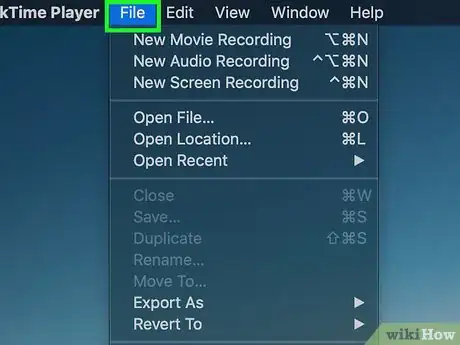
2Click File. This is in the upper-left side of the screen. A drop-down menu will appear.
-
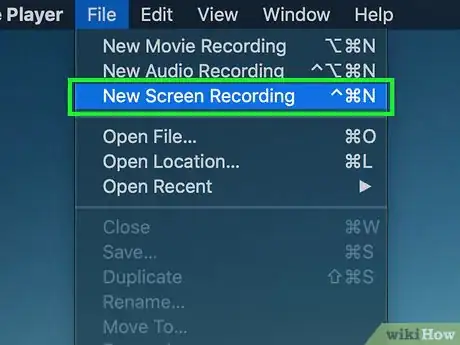
3Click New Screen Recording. It's in the File drop-down menu. The recording bar will appear.[1]
-
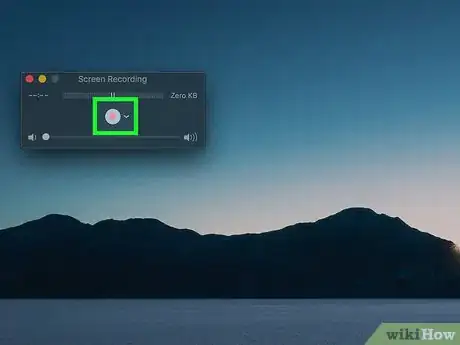
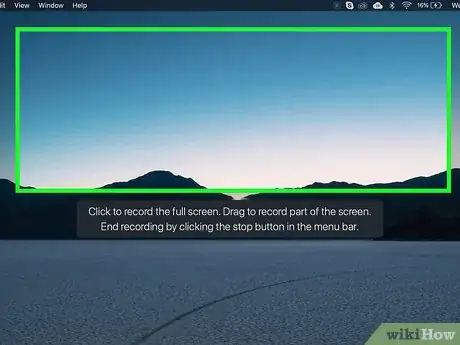
4Click the "Record" button. This button is a circular red and silver option in the middle of the recording bar.
-
5Click anywhere on the screen. Doing so indicates that you want to record the entire screen and begins the screen recording.
-
6Perform your screencast's steps. Go through the on-screen steps you want to record.
-
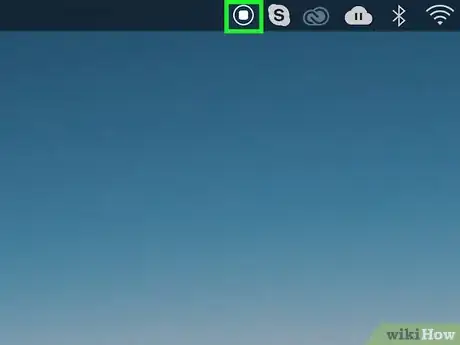
7Click the "Stop" menu item. It's the square in the upper-right side of the screen. Doing so stops your screen recording.
-
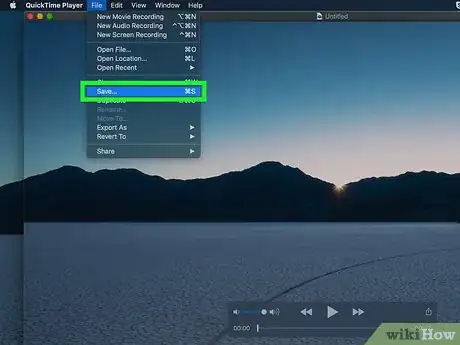
8Save your screen recording. Click File, click Save..., enter a name for your recording, select a save location, and click Save. Your screen recording will be saved as a video file in your selected location.
Advertisement
Method 3
Method 3 of 4:
On iPhone
-
1
-
2
-
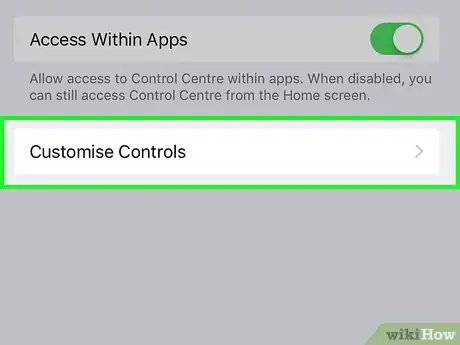
3Tap Customize Controls. This option is at the bottom of the Control Center page.
-
4
-
5
-
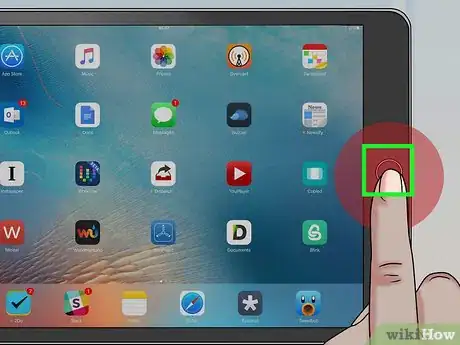
6Press the Home button. It's the circular button below the bottom of the screen. This will minimize the Settings app.
- On an iPhone X, swipe up from just above the bottom of the screen.
-
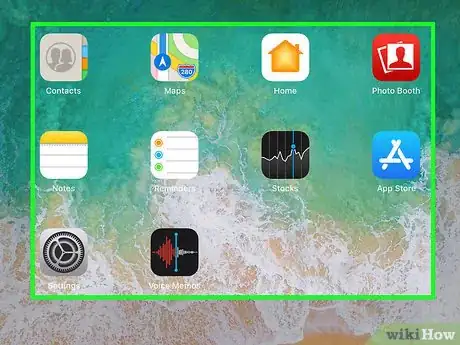
7Swipe up from the bottom of the screen. This will open the Control Center, though you may have to swipe up a couple of times before the Control Center will open properly.
- On an iPhone X, you'll swipe down from the upper-right corner of the screen.
-
8
-
9Perform your screencast's steps. Go through the steps you want to record on your iPhone, then proceed when you're done.
- You have three seconds after tapping the Screen Recording icon to minimize Control Center if you don't want it to be in the screen recording.
-
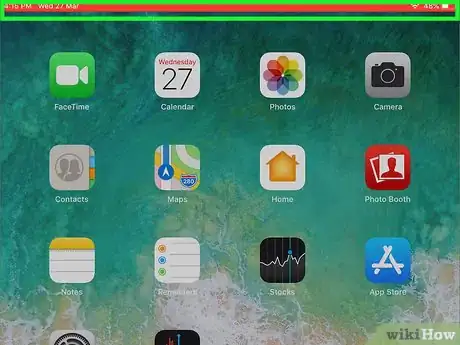
10Tap the red recording bar. It's at the top of the screen.
-
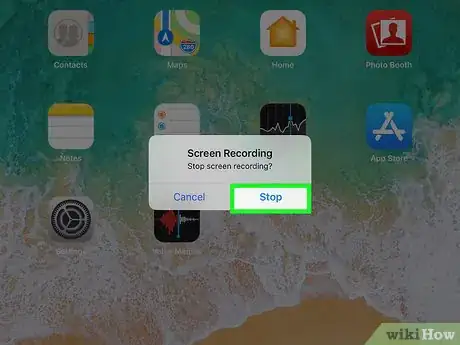
11Tap Stop when prompted. Doing so will stop the recording and save it as a video file in your Photos app.
-
12
Advertisement
Method 4
Method 4 of 4:
On Android
-
1Install DU Recorder. DU Recorder is a free screen recorder that can record in resolutions of up to 1440p. To download it, do the following:
- Open the Google Play Store.
- Tap the search bar.
- Type in du recorder.
- Tap DU Recorder - Screen Recorder, Video Editor, Live in the search results bar.
- Tap INSTALL.
-
2Open DU Recorder. Either tap OPEN in the Google Play Store or tap the DU Recorder app icon in your Android's App Drawer.
-
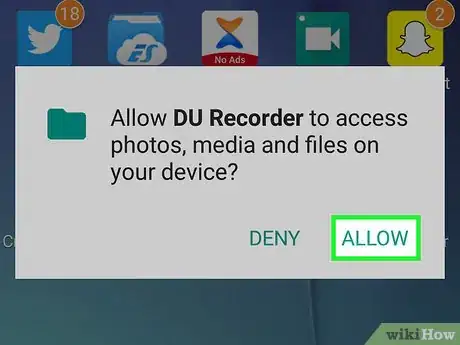
3Tap ALLOW when prompted. This will allow DU Recorder to save files to your photos' folder.
-
4Tap Use notification to record. It's at the bottom of the screen. Doing so saves your settings and takes you to the recording screen.
-
5Swipe through the tutorial. Swipe from right to left once, allow the animation to play, and then wait for the bar at the top of the window to disappear. You should eventually see an orange bar with five tabs at the top of the screen.
-
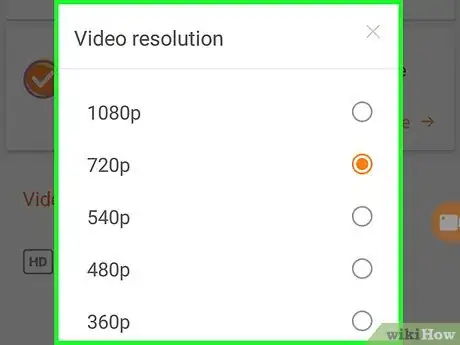
6Change your video resolution if necessary. You can increase (or decrease) your recording quality from the default 720p by doing the following:
- Tap the "Settings" gear icon at the top of the screen.
- Tap Video resolution.
- Select a video resolution in the menu.
- Tap the left-most tab at the top of the screen to return to the recording screen.
-
7Swipe down from the top of the screen. Doing so prompts a drop-down menu to appear.
-
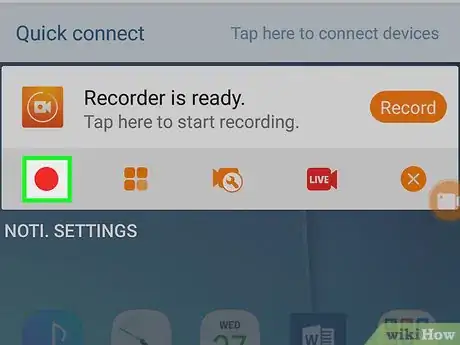
8Tap the "Record" icon. It's a red circle in the "DU Recorder" section of the drop-down menu.
-
9Tap ALLOW when prompted. This will allow DU Recorder to record audio.
- You can tap DENY if you don't want DU Recorder to record audio from your Android's microphone.
-
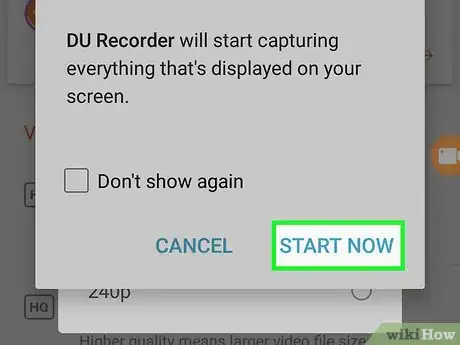
10Tap OK when prompted, then tap START NOW. This will prompt DU Recorder to begin recording.
- You can check the "Don't show again" box before tapping START NOW to avoid the warning in the future.
-
11Perform your screencast's steps. Go through the steps you want to record on your Android, then proceed when you're done.
-
12Swipe down from the top of the screen. The drop-down menu will reappear.
-
13Tap the "Stop" button. It's a red box in the "DU Recorder" section. This prompts a pop-up window with your screen recording's thumbnail in it.
-
14Tap the X icon. This is in the top-right corner of the pop-up window. Doing so saves your recording to your Android's default Photos app.
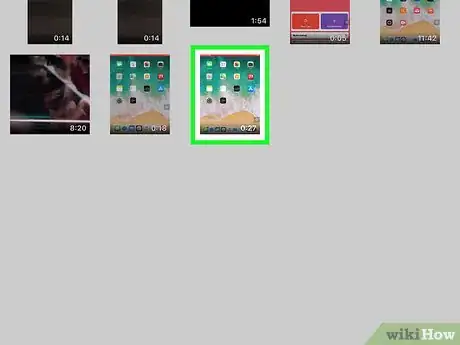
- You can view the screen recording in the Photos app.
Advertisement
Warnings
- Avoid typing out your instructions while recording your screen.⧼thumbs_response⧽
Advertisement
About This Article
Advertisement
