X
This article was co-authored by Michelle Bebbington. Michelle Bebbington is a Professional Hair Stylist and the Owner of The Living Room Hair and Skin based in Great Falls, Montana. With over 20 years of experience, she specializes in hair education, coloring, and styling.
This article has been viewed 138,376 times.
Crimped hair is a fun, sassy, and unique way to wear your hair. While similar to wavy or curled hair, crimped hair creates a more zig-zagged, sharp pattern that sets it apart. Using a crimper or a straightener to create this look can be damaging and time consuming. Luckily, however, there are other ways to achieve this trendy look.
Steps
Part 1
Part 1 of 3:
Prepping Your Hair
-
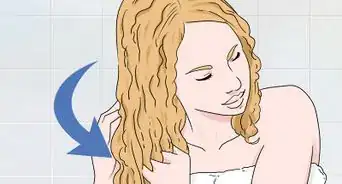
1Get your hair damp. You can do this technique fresh out of the shower, or just use a spray bottle to wet your hair. Towel dry your hair using a patting motion so that your hair is damp, not wet. Apply any leave-in conditioners or oils that you normally use on wet hair.
- If you want to avoid the mess of getting your entire head wet, you can use a spray bottle to dampen each section of hair as you go along.[1]
-
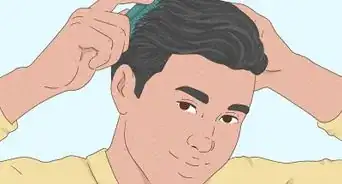
2Brush your hair out. It will be easiest to create the braids if your hair is smooth and tangle-free. Braiding freshly combed hair will also minimize frizz. Run a wide-tooth comb through your hair, creating a part wherever you desire.
- Once your hair has dried, you cannot brush out your hair again. It's important to have it parted where you want it, because brushing your hair once it is set could create frizz.[2]
Advertisement -
3Section off your hair. The number of sections you need to create will depend on the thickness and length of your hair as well as the look you are going for. If you have very thin hair, you may only create two or three braids. If you have very thick hair or short hair, you might create up to ten. The smaller your sections, the tighter your crimps will be. Conversely, if you take big thick sections of hair you will create looser, less dramatic crimped waves.[3]
- Clip hair out of the way until you are ready to braid it. This will make the process much easier.

Advertisement
Part 2
Part 2 of 3:
Braiding Your Hair
-
1Braid your hair to the very tip. Start from the root and begin braiding. If you are unfamiliar with the braiding technique, learn all about it here! If you want tight, defined crimps, make sure you are creating very tight braids. As you move down the hair, pause to pull and tighten the three strands sporadically. If you want looser, less defined crimps, hold the three strands of hair loosely as you braid them, worrying less about tightening up the braid as you go down.[4]
- Make sure that you braid as far as you can to the tip of the strands. Whatever hair is left unbraided will remain straight. If you have a full head of tight crimped hair and stick straight ends, you may look a little funny.
- If you think your braids might come undone, use elastics at the end to secure them.
-
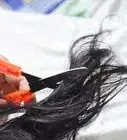
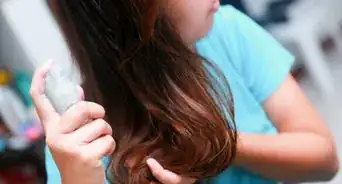
2Apply hair spray or hair gel over the braids. This will ensure that your crimped hair will hold its shape nicely as it dries. If you’re using a hair spray, just mist it lightly over the braid from the roots to the tip. If you’d like to use a hair gel, rub it into the palm of your hands and then lightly stroke it down each braid.[5]
- You can also apply a little product to a section right before you braid it. Experiment with different techniques to see which one gets you the results you want.
-
3Sleep on your braids. The braids take a lot longer to dry than normal hair, because the moisture becomes trapped in the crevices of the twisted hair. Because it will take hours, it is best to just create the braids before heading off to bed. You certainly don’t have to sleep, but your hair needs to stay in these braids until it’s completely dry!
- If you’re short on time, you can speed up the process by running a blow dryer over your braids. Just remember to apply a heat protectant spray on your hair beforehand if you are going to be doing this.

Advertisement
Part 3
Part 3 of 3:
Styling Crimped Hair
-
1Make sure your braids are dry by pressing them with your fingertips. Make sure you feel all of your braids, especially the ones that may have been pressed into your pillow as you slept. When you’re certain that the outside of each braid is dry, gently thread your finger through the braid so you can ensure the inner part of your braid is dry as well.
- If there are a few damp spots, you can wait a bit longer or use your hair dryer to remove the final bits of moisture.
-
2Undo your braids. Once you are certain that there are no damp spots left, remove your hair tie and gently undo the braid. Once every single braid has been undone, gently shake out your hair. When you first remove your braids, they may look a bit “chunky” due to the sectioning of each braid. By shaking out your hair, you can help to blend the sections back together.
-
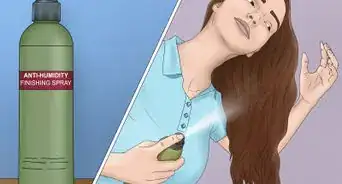
3Style your hair by running your fingers through it. Whatever you do, do not brush your hair after removing the braids. This will undo the zig zag crimps, and make your hair poof out. Instead, comb through your hair gently with your fingertips, playing around with your tresses until your hair has settled how you like it. Spray it with hairspray to ensure it lasts all day, and enjoy your beautifully crimped hair![6]
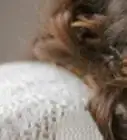
- Play around with different hairstyles. Throwing a headband onto crimped hair can look super cute, and crimped hair can also create a beautiful, voluminous ponytail. Get creative!
Advertisement

References
- ↑ https://www.youtube.com/watch?v=7euqk2uH_Lc
- ↑ https://www.youtube.com/watch?v=7euqk2uH_Lc
- ↑ https://www.youtube.com/watch?v=7euqk2uH_Lc
- ↑ https://www.youtube.com/watch?v=7euqk2uH_Lc
- ↑ https://www.youtube.com/watch?v=7euqk2uH_Lc
- ↑ http://www.xovain.com/hair/crimping-with-braids
- Videos provided by TheBeautyWithinYou
About This Article

Michelle Bebbington
Professional Hair Stylist
This article was co-authored by Michelle Bebbington. Michelle Bebbington is a Professional Hair Stylist and the Owner of The Living Room Hair and Skin based in Great Falls, Montana. With over 20 years of experience, she specializes in hair education, coloring, and styling. This article has been viewed 138,376 times.
How helpful is this?
Co-authors: 29
Updated: November 11, 2022
Views: 138,376
Categories: Wavy Hair
Advertisement