This article was co-authored by Kristin Pulaski and by wikiHow staff writer, Jessica Gibson. Kristin Pulaski is a Professional Nail Artist and the Founder of Paintbucket, a self-owned and operated nail salon based in Williamsburg, Brooklyn. She has over five years of experience running Paintbucket and is licensed as a nail technician. Paintbucket offers nail art manicures, pedicures, and soft gel extensions along with customized packages for wedding and bridal parties. She holds a BA in Managerial Science from Manhattan College.
There are 7 references cited in this article, which can be found at the bottom of the page.
This article has been viewed 95,051 times.
If you're just starting out doing nail art, you might want to learn unique techniques that aren't too challenging. There are several simple but stylish designs you can do using toothpicks. While it may help to find toothpicks that have one blunt end and one sharp end, you can do most basic designs using a common toothpick. Try a new style or two and gain confidence in your new found skills!
Steps
Painting Your Nail Base
-
1Remove any old nail polish. Dip a cotton ball in acetone nail polish remover and place it directly on any nails that have old nail polish. Wait a few seconds and rub off the remaining polish.
-
2Shape your nails. Take the time to cut and trim your nails before you begin painting. Remember to file the nails so that they're completely smooth.[3] Avoid filing your nails after you've painted them because this can cause the paint to peel.[4]
- Longer nails will be easier to work with since you'll have more space for designs. If your nails are shorter, choose simple designs that won't take up too much nail space.
Advertisement -
3Apply a clear base coat. A base coat will protect your nails from becoming stained by dark nail polishes. It will also even out the ridges in your nails. This will help the nail polish go on smoother and more evenly.[5]
- Many base coats are designed for specific nail types. For example, you might choose a strengthening base coat or a base coat for dry or brittle nails.
-
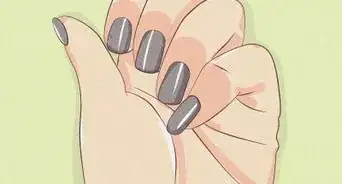
4Apply a coat of color. Decide what color you'd like to paint over the entire nail. Don't limit yourself to basic nail colors like reds and pinks. For a striking look, you could start with a white base and add a variety of bright colors. Or, you could work with a black base coat and use light colored dots that really stand out. Many stylists recommend applying two coats of color, waiting 2 minutes in between applications.[6] [7]
- Consider what colors you'd like to use for your dot design. Make sure you select colors that will show up against the base color your painted. For example, it may be hard to see dark red dots against a burgundy base.
-
5Prepare your dotting tool. You can purchase a dotting tool at a beauty supply store. Look for a short toothpick-like tool that has one sharp end and one blunt end. Or, you can use a toothpick. Just cut off one end with a pair of scissors so that the end becomes blunt. Take care not to cut yourself.
- If you don't have a toothpick or dotting tool, you can use a bobby pin. Bend the bobby pin open so that you can easily use the ends as dotting tools.
Making Designs
-
1Try a French manicure using dots. Paint your nails a nude color and let them dry completely. Take the blunt end of your toothpick and dip it in white nail polish. Instead of painting the tips of your nails white, use the toothpick to make many white dots along the tips of your nails.
- You can play around with the size of the dots, as well as the colors of the manicure. Try using a bold color for the base or use dark polish for the dot tips.
-
2Apply a polka dot pattern. If you want to practice making dots using your toothpick, practice by covering your nails with polka dots. Dip the blunt end of your dotting tool into your nail polish and immediately dot it onto your nail. Don't wipe the side of the toothpick against the nail polish bottle or the dot will come out unevenly. Try to apply the polka dots evenly around your nails.
- If you're having trouble with detail, you can apply the dots randomly. Have fun using different colors and making different sized dots.
-
3Make a simple flower. Dip the blunt end of your dotting tool into your design color. Create four or five dots in a close circle on your nail. Don't wipe the sides of the dotting tool or you'll end up with uneven dots. If you like, you can place a dot in the center (and use a different color for extra style).[8]
- Keep in mind that the color your choose will end up being your flower color.
-
4Create a detailed flower. Use the sharp end of your toothpick and drag from the middle of a dot towards the center. Repeat this for each dot so that you end up with swirled flower petals.
- You can also take the sharp end of your dotting tool and dip it in a green, brown, or black. Draw a vine or stem coming off of each flower.
-
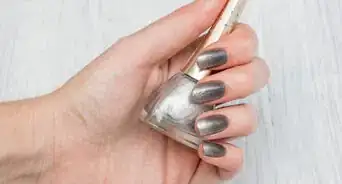
5Try a swirling design. After you've applied a base color and allowed it to dry, apply another coat of color. This time, use a different color that will contrast with the base color. Before the new coat of paint dries, take the sharp end of your toothpick and drag it through the paint. Create swirls and a design that shows the paint color underneath.[9]
- For example, paint a base of black and apply a silver coat over that. While most of the nail will appear silver, the swirls you create will appear black.
-
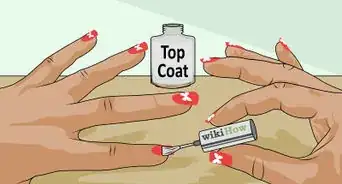
6Apply a topcoat. Use a clear top coat to seal in your nail polish design. Not only will a topcoat extend the life of your design, it will also keep the paint from chipping off. A topcoat will also keep your nails looking shiny and glossy.[10]
- You can find topcoats that are quick drying. These can help your designs set quickly so they don't smudge.
Community Q&A
-
QuestionHow do I make nail art if I don't know how to draw?
 Community AnswerYou can use stencils, or just make simple designs. It doesn't have to be perfect to be art.
 -
QuestionCan I use clear nail polish as a top coat
 LILIANY MATOSCommunity AnswerYes. Clear nail polish makes a great top coat because it's thicker, so it protects the designs better.
References
- ↑ Kristin Pulaski. Salon Owner & Nail Specialist. Expert Interview. 19 May 2020.
- ↑ http://www.essie.com/essie-expertise/essie-tips.aspx
- ↑ Kristin Pulaski. Salon Owner & Nail Specialist. Expert Interview. 19 May 2020.
- ↑ http://www.marieclaire.co.uk/blogs/547469/become-your-very-own-nail-expert.html
- ↑ http://www.essie.com/essie-expertise/essie-tips.aspx
- ↑ Kristin Pulaski. Salon Owner & Nail Specialist. Expert Interview. 19 May 2020.
- ↑ http://www.marieclaire.com/beauty/a11563/top-nail-secrets/
- ↑ http://www.nailsmag.com/demosteps/96246/dotted-flower
- ↑ http://www.nailsmag.com/article/94498/9-easiest-nail-art-designs-to-master-bonus-4-difficult-designs-that-are-worth-t?page=2

