X
This article was co-authored by Ashley Adams. Ashley Adams is a Licensed Cosmetologist and Hair Stylist in Illinois. She completed her Cosmetology education at John Amico School of Hair Design in 2016.
This article has been viewed 29,672 times.
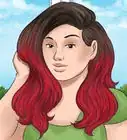
Ombre highlights add depth and dimension to your hair without the maintenance of regular highlights. The process is similar to that of a standard ombre dye job, except that you won't be bleaching every strand of hair. This staggered effect will result in beautiful, low-maintenance ombre highlights.
Steps
Part 1
Part 1 of 4:
Preparing the Bleach
-
1Start with brushed, dry hair. You can wash your hair beforehand if you want to, but make sure that it is completely dry and neatly brushed. This method will work the best on virgin hair, but you can try it on hair that has been previously dyed. Keep in mind that the results may not be the same.[1]
- If working with hair that has been previously dyed, it may be best to consult a professional hair stylist.
- If your hair is damaged, brittle, and riddled with split ends, get your hair to a healthy condition first by getting a trim and doing several weekly deep conditioning treatments.
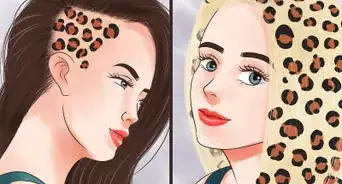
- If you have curly or frizzy hair, consider straightening it first to make it more manageable.
-
2Protect your skin, clothing, and workspace. Coat your ears and the skin around your hairline with petroleum jelly, then put on a pair of plastic hair dyeing gloves. Wrap an old towel around your shoulders, then cover your work surface with plastic bags or newspaper.
- If you don't have an old towel, you can use a plastic dyeing cape or even an old, button-up shirt.
Advertisement -
3Choose a developer suitable for your hair. If you have blond to brown hair, anything between a 10 and 20 volume should work. If you have dark brown or black hair, a 20 volume developer will work better.
- There's a misconception that, the darker the hair, the higher the volume developer should be, but that's dangerous.
- If you are careful about the application and leave the product on long enough, it's possible to achieve platinum results on the darkest of hair. It just depends on the person's ability to lift, and there's no predetermined amount that can really work, unless the hair has been bleached before and you know how it will react.
- Do not use 30 and 40 volumes on your hair unless you really know what you're doing. because you could end up causing a lot of damage to your hair.
- Remember this: the slower the lift, the healthier the hair will be in the end.
-
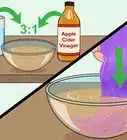
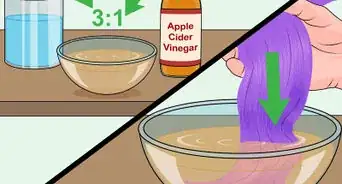
4Mix the bleach and developer in a non-metal bowl. Refer to the bleach kit's instructions as you scoop the appropriate amount developer into a non-metal bowl. Then, add in the appropriate amount of bleach powder. Stir the 2 together until they are evenly combined. The mixture will have a thick, creamy consistency.
- Typically, a 1:1 ratio of bleach and developer should be mixed together.
- Don't be alarmed if the mixture looks blue or purple. This is typical of bleach.
- For example, if you have black hair, you could prepare a 30 volume or a 20 volume bleach.


Advertisement
Part 2
Part 2 of 4:
Sectioning Your Hair
-
1Gather all of your hair up, save for the bottommost layer. Part your hair across the back of your nape. Pull everything up into a high bun at the top of your head, and leave the hair at your nape loose. You will be applying bleach to your hair in layers, rather than plucking strands out at random.
- If you want the highlights to start higher, make the horizontal part at about ear level instead.
- You will be repeating this section a few times when you bleach your hair.
-
2Part the section in half, just like making pigtails. You don't have to be super-neat at this point; simply part your hair into 2 equal-sized sections. Drape the left half over your left shoulder, and the right half over your right.
-
3Choose a section to bleach, then split it in half horizontally. Take the left or right section. Weave the handle of a rattail comb through it so that you split it into an upper layer and a lower layer. You will only be bleaching the upper half of the strand and leaving the lower half alone.
- Think of splitting your hair like splitting a subway sandwich. You want an upper half and a lower half.
- Weaving the comb through the section, rather than splitting the hair horizontally straight in half, should make the highlights look more natural.
-
4Place a piece of foil under the upper layer of the strand. Cut a piece of foil a little shorter than your hair. Place it under the upper layer of the strand. Adjust the foil so that the midlengths and ends of your hair are resting on it; don't worry about the roots.
- The lower layer from your hair section should be under the foil. You won't be bleaching the lower layer.


Advertisement
Part 3
Part 3 of 4:
Applying the Bleach
-
1Apply the bleach to your hair with a tinting brush, starting from the middle. Use a tinting brush to apply some bleach to the strand of hair that's on the foil. Start applying the bleach from the middle of the strand, and work your way down to the ends. Use more bleach on the ends of your hair, and less bleach in the middle.
- You won't be bleaching the lower section. This is what will create a highlight rather than an all-over ombre.
-
2Blend the bleach towards the roots. You can do this with a clean tinting brush or with a toothbrush. How far up you blend the bleach us up to you. You can blend it all the way up to your roots, or you can blend it up just two-thirds of the way.
- This blending step is important. It will prevent any harsh lines and help create the ombre.
- Use a light, feathery touch. You want the bleach to get softer the closer you get to your roots.
- Use a combination of vertical and horizontal strokes so that there aren't any harsh lines.
-
3Wrap the foil around the bleached section of hair. Fold the bottom edge of the foil one-half to two-thirds of the way up. Fold it a second time to lock your hair in. Next, fold the left and right side edges of the foil over to cover the bleached section completely.
- The foil will prevent the bleach from transferring to the unbleached potions of your hair.
- Do not include the unbleached, lower layer in the foil packet. Pretend that it doesn't exist.
-
4Repeat the process for the other section. Weave the handle of your rattail comb through the second strand that's draped over your other shoulder. Slide a piece of foil under the upper strand, and apply the bleach to the mid lengths-down. Blend the bleach in towards your roots, then fold the foil around the bleached hair.
-
5Let down another layer of hair, and repeat the process. Undo your bun, and let down another layer of hair. Pull the rest of your hair up into a bun. Split the second layer into 2 to 3 sections, and highlight them using the same method as you did the first layer.
- Remember to split each section into an upper and lower layer, like a subway sandwich. Only bleach the upper layer, not the lower.
-
6Continue to highlight your hair, but work quickly. Once you finish a layer of hair, let down another layer from your bun. Apply the bleach to 1 to 2 in (2.5 to 5.1 cm) wide sections of hair. Remember to split each section in half, like a subway sandwich, and to apply the bleach only to the upper layer. Work quickly, otherwise the lower layers may end up too light.
- If you want a more natural look, blend the bleach closer to your roots once you reach the strands around your face.
-
7Finish with a higher-volume batch of bleach if necessary. If you run out of bleach and/or the application process is taking a lot of time, make a second batch of bleach that contains a developer with a slightly higher volume than the first. Low-volume bleach acts slower while high-volume bleach acts very quickly, so applying in this way may prevent the hair you bleach first from turning out lighter than the rest.
- For example, if you used 10 volume developers in your first batch, use 20 in your second one.


Advertisement
Part 4
Part 4 of 4:
Developing and Rinsing the Bleach
-
1Allow the bleach to develop. How long this takes depends on the type of developer you used, your hair type, and how light you want the highlights to be. Peek under the foil wraps every 5 minutes or so to judge the process. As soon as your hair reaches your desired lightness, you are ready to move on.[2]
- Most bleaching kits include a developing time in the instructions. Use this as a guide; your hair may lighten much faster than what the package says!
- Expect to wait around 25 minutes for the bleach to process. Do not let the bleach sit longer than 45 minutes in your hair, or you will fry it.
- Cover your hair with a shower cap and blast it with a blow dryer to help speed up the process.
-
2Put the gloves back on, then remove the foil wrappers. If you removed the plastic dyeing gloves, put them back on first. Carefully remove the foil wrappers from your hair. Do not brush your hair out, otherwise you risk blending the bleach into the undyed portions.
-
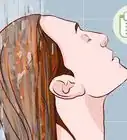
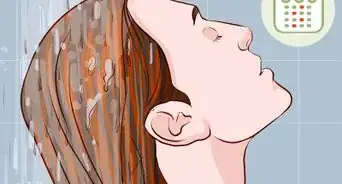
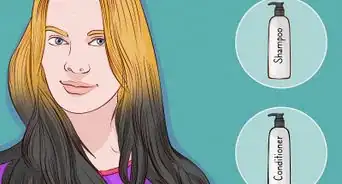
3Rinse the bleach out with water and shampoo. You can do this in the shower or in a sink, but make sure that the water doesn't get into your eyes. Rinse the bleach out first, then follow up immediately with shampoo. Rinse the shampoo out as well.
- Use the coldest water temperature that you can withstand. Bleaching is damaging enough on its own, and hot water will only make it worse.
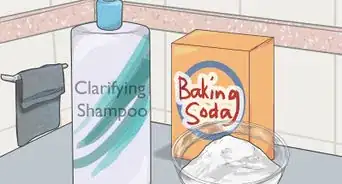
- If your bleached hair looks yellow, wash it with a purple shampoo after rinsing out the bleach in order to remove the brassiness of the color.
-
4Apply conditioner meant for chemically-treated hair, then rinse it out. Choose a deep-conditioning conditioner or hair mask meant for chemically-treated hair. Apply it to your wet hair, wait 5 to 10 minutes, then rinse it out with cool water.[3]
- If you are using a hair mask, double-check the label. Some recommend that you leave it in longer than 10 minutes.
-
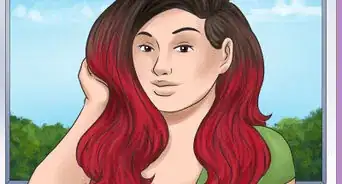
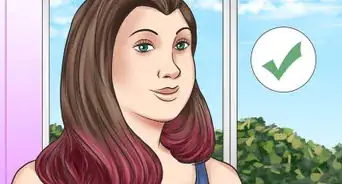
5Dry and style your hair, as desired. It would be best to let your hair air-dry, but you can use a blow-dryer as well. Once your hair is dry, you will be able to see the true extent of the highlights.
-
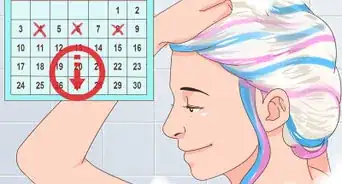
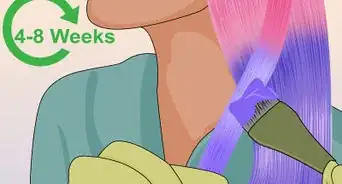
6Dye your roots a darker color if you want more contrast. Section off your hair, just like before, and apply the dye to your roots. Blend the dye towards the bleached parts with a tinting brush or a toothbrush. Let the dye develop, then rinse it out with cool water and a color safe conditioner.
- Wrap foil around the sections at the roots; do not fold the bottom edge of the foil like you did when highlighting your hair.
- Use a dye that is 1 to 2 shades darker than your natural hair color.
- How long you let the dye develop depends on the brand of dye that you are using. Check the package for complete developing times, but expect to wait 20 to 25 minutes.


Advertisement
Expert Q&A
-
QuestionHow do you keep bleached hair healthy?
 Bianca CoxBianca Cox is a Hair Stylist, Licensed Cosmetologist, Owner of The Hair Throne, and Co-Owner of Bianchi Salon. Her salons pride themselves on their modernity, individuality, art, and professional services. You can check out The Hair Throne and more of Bianca's hairstyling on Instagram @hairthrone and on her personal Instagram @biancajcox.
Professional Hair StylistVisit your hair salon and get a "dusting," or a micro-trim where the split ends get cut away. If you're big on highlighting your hair, you definitely want to get a dusting once every 3 months, which keeps the ends really strong. It also helps to wash your hair with sulfate-free shampoo and to use weekly hair masks. -
QuestionHow to do blonde ombre highlights on brown (brunette) hair?
 Community AnswerBleach first and then dye from there. Bleaching gives you a clean slate to work on and won't alter the colors.
Advertisement
Things You'll Need
- Old towel, dyeing cape, or button-up shirt
- Petroleum jelly
- Hair bleaching kit (bleach and developer)
- Non-metal dyeing bowl
- Tinting brush
- Clean toothbrush or second tinting brush
- Aluminum foil
- Rattail comb
- Hair clip(s)
- Shampoo and conditioner (color safe)
-Hair-at-Home-Step-16-Version-5.webp)

References
- ↑ https://avedainstitutessouth.edu/ombre-highlights/
- ↑ https://avedainstitutessouth.edu/ombre-highlights/
- ↑ https://avedainstitutessouth.edu/ombre-highlights/
- ↑ https://avedainstitutessouth.edu/ombre-highlights/
- ↑ http://www.refinery29.com/hair-highlights#slide-10
- ↑ http://stylecaster.com/beauty/balayage-ombre-highlights-technique
About This Article

Ashley Adams
Professional Hair Stylist
This article was co-authored by Ashley Adams. Ashley Adams is a Licensed Cosmetologist and Hair Stylist in Illinois. She completed her Cosmetology education at John Amico School of Hair Design in 2016. This article has been viewed 29,672 times.
Co-authors: 8
Updated: March 30, 2023
Views: 29,672
Categories: Dyeing Hair Mixed Colors | Highlighting Hair
Advertisement