This article was co-authored by Christine George. Christine George is a Master Hairstylist, Colorist, and Owner of Luxe Parlour, a premier boutique salon based in the Los Angeles, California area. Christine has over 23 years of hair styling and coloring experience. She specializes in customized haircuts, premium color services, balayage expertise, classic highlights, and color correction. She received her cosmetology degree from the Newberry School of Beauty.
There are 18 references cited in this article, which can be found at the bottom of the page.
This article has been viewed 29,744 times.
Unicorn hair can mean different things to different people. For some people, it is any shade of unnatural hair, such as pink or green. For most people, however, it is a specific combination of pink, purple, and blue strands that sets it apart from other multicolored hair schemes, such as mermaid or sherbet. The process is much simpler compared to other multicolor hair trends. Best of all, there is a temporary option too!
Steps
Choosing the Dye and Colors
-
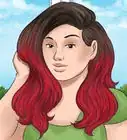
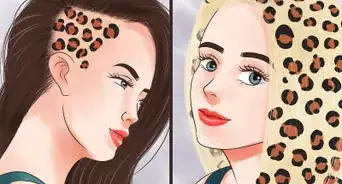
1Stick with pastel pink, purple, and blue for a traditional unicorn look. These are the traditional unicorn dye hair colors, but some people prefer a teal or aquamarine shade instead of blue.[1]
-
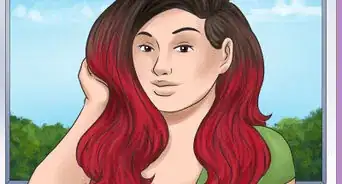
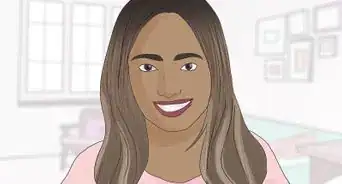
2Try colors that suit your skin tone for a less-traditional look. Pastel pink, purple, and blue are the most popular unicorn colors, but that doesn't mean that they will look good on everyone. If you want something that looks good on you, consider altering the shades to better suit your skin tone. For example:[2]
- Cool, fair skin: choose warm shades, such as pale pink, peach, or tangerine.
- Warm, fair skin: choose cool shades, such as lavender, robin's egg blue, or aqua.
- Cool, medium skin: stick with a deep, jewel tone, such as amethyst or ruby.
- Warm, medium skin: stick with a saturated shade, such as aquamarine, emerald, or sapphire.
- Cool, dark skin: try a pastel shade, such as lilac.
- Warm, dark skin: try a darker shade, such as plum.
Advertisement -
3Choose hair chalk or eye shadow for a temporary option. Not only does this wash out in 1 or 2 washes, but it works on dark-colored hair as well. This means that you do not have to bleach your hair first. It is also easy to apply.
- You can even use a temporary hair dye, which is more like a liquid hair chalk.
- This is a great option if your school or work does not allow unnatural hair colors.
-
4Get a professional hair dye if you want a permanent option. Unicorn hair takes a lot of time and effort to apply, so some people want to make it permanent. Hair dye is a great option, but you will need to bleach your hair first if it is any darker than blond. You can get this dye from a beauty supply store.
- This tutorial will assume that you will be bleaching your hair to obtain the traditional pink, purple, and blue unicorn look, but it will include other options as well.
- There are some vegan hair dyes that do not require any bleaching. Look for labels such as "For Dark Hair" or "Does Not Require Bleaching."
- If your dye comes in a tube, you'll likely need a 10 or 20 volume developer. If you are using a punk brand, such as Manic Panic, then you won't need a developer.
-
5Plan to bleach your hair if you are dyeing it the traditional palette. If your hair is any darker than blonde, you will need to bleach your hair first. If you don't bleach your hair, the colors won't show up very well, if at all. If you are concerned about damaging your hair in the bleaching process, consider getting the process done by a professional hair stylist.[3] [4]
- If you are using hair chalk or eye shadow, you don't need to bleach your hair. Click here to continue instead.
- Your hair must be healthy before you bleach it. If it feels dry or brittle, don't bleach it. Choose the temporary dye option instead.[5]


Bleaching Your Hair
-
1Protect your skin, clothes, and workspace. Cover your counter and floor with newspaper or plastic bags. Put on an old shirt or drape an old towel over your shoulders. Coat your hairline and ear tips with petroleum jelly, then pull on a pair of plastic dyeing gloves.
- Make sure that your hair is healthy. For best results, deep condition it the night before you bleach it.[6]
-
2Prepare your bleach in a non-metal bowl using 10 to 30 volume developer. Purchase a good quality hair bleaching kit that contains bleach and developer. Prepare the bleach in a non-metal bowl according to the kit's instructions.[7]
- If you are starting with light brown hair, try a 10 volume developer.
- If your hair is medium brown, a 20 volume developer might work best for you.
- If you have dark brown or black hair, use 30 volume with care; it is very strong.
-
3Apply the bleach to dry hair with a tinting brush starting from the ends. If you need to, divide your hair into 4 sections first. Working quickly, use a tinting brush to apply the bleach all over your hair, starting from the ends and mid-lengths first. Then, go back through your hair, and apply the bleach to the roots.[8]
- Never apply bleach starting from the roots. This will cause it to process too fast and may destroy your hair.
- You can divide your hair into 4 sections first, but you don't have to.
-
4Cover your hair with a shower cap and allow the bleach to process. How long this takes depends on how dark your hair was to begin with and what volume developer you are using. Look at your hair every 5 minutes; once it reaches a pale blond color, you are ready to wash it out.[9]
- Expect to wait anywhere from 30 to 45 minutes. Never leave bleach in your hair for longer than 45 minutes, or you'll destroy your hair.
- Everyone's hair reacts differently to bleach. Your friend's hair may bleach a lot slower than yours.
-
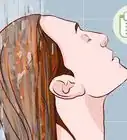
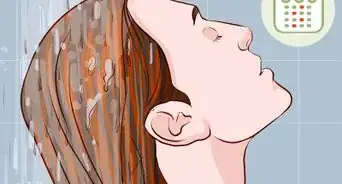
5Wash the bleach out with cool water and shampoo. Rinse the bleach out with cool water first, then apply some shampoo to your hair. Lather your hair up, then rinse the shampoo out. If you want to, you can apply conditioner, but it's best to wait until after the toner.
- Allow your hair to air dry naturally.
-
6Repeat the bleaching process, if needed. It would be best to wait a full 24 hours before you do this, otherwise you'll end up over-processing your hair. Keep in mind that if you have dark brown or black hair, it would be nearly impossible to get it to a platinum blonde color; you will have to settle for darker unicorn hair.[10]
- If the initial bleaching process made your hair too dry, do not bleach it again. Simply settle for darker unicorn hair.
-
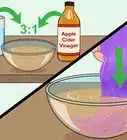
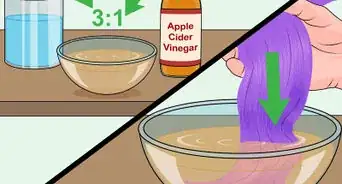
7Tone your hair, if your hair ended up with brassy tones. Purchase a hair toner or purple toning shampoo, then apply it to your hair according to the instructions on the bottle. Some need to be used on dry hair while others should be used on wet.
- Some hair toners need to be mixed with a developer or white conditioner. Read the instructions to find out.
- Most hair toners need to sit in your hair for 20 to 30 minutes.[11]
- Purple toning shampoos typically need to sit in your hair for 10 to 15 minutes.[12]
- If you have platinum or pale yellow hair, you do not need to tone it.
-
8Treat your hair with a deep-conditioning mask. While not absolutely necessary, this is highly recommended. Purchase a deep-conditioning mask meant for damaged, dry, or color-treated hair. Apply it all over your hair, then tuck your hair under a shower cap. Wait for the time recommended on the label, then rinse it out.
- Some deep conditioners need to sit for only 5 minutes, while others need to sit for 10 to 15 minutes.


Using Permanent Dye
-
1Protect your skin, clothes, and counter from stains. Put on an old shirt that you don't mind staining, or cover your shoulders with an old towel. Pull on a pair of plastic or rubber dyeing gloves, and cover your counter with newspaper or plastic.
- If you plan on dyeing your hair all the way up to the roots, apply some petroleum jelly to the skin around your ears and hairline.
- It's best if you wait 24 hours before dyeing your hair, especially if it feels dry.
-
2Mix your dye colors in separate, non-metal containers. If you are using dye that came in a tube, you should mix it with developer. If you are using a punk dye, such as Manic Panic, consider mixing it with white conditioner or a diluter to get the exact shade you want.[13]
- Stir each color with a separate plastic spoon or tinting brush. This will prevent color transfer.
- Different brands may have different mixing instructions, so be sure to follow those carefully.
-
3Divide your hair in half, like creating a half-up ponytail. Use your thumbs you part your hair at about ear level. Gather everything above your thumbs, and pull it into a bun on top of your head. Secure the bun with a hair clip or hair tie.
- You don't absolutely have to do this, but it will help keep yourself more organized. It is highly recommended for those with thick hair.
-
4Use a tinting brush to apply some dye to a 1 in (2.5 cm) wide strand of hair. Gather a 1 in (2.5 cm) wide strand of hair from the left or right side of your head. Use a tinting brush to apply your desired color to the strand. Use your gloved fingers to work the dye into the hair to ensure that it is completely saturated.[14]
- For an all-over dye job, apply the dye to the entire strand, starting from the roots.[15]
- For an ombre look, start applying the dye about halfway down the hair shaft.
-
5Apply the next color to the next 1 in (2.5 cm) section of hair. Let go of the 1 in (2.5 cm) section of hair you just dyed. Pick up another 1 in (2.5 cm) wide section from right next to it. Choose your next color, and use a clean tinting brush to apply that color to your hair.
- Again, be sure to work the dye into your hair.
-
6Continue to apply the dye to your hair in 1 in (2.5 cm) sections. Once you applied the third color, go back to your first color, and continue the pattern. After you finish the first row of hair, let down another row of hair, and continue to apply the dye.
- You do not have to wrap the previous sections with plastic wrap. Some color transfer is perfectly fine for the unicorn look.
- You can apply more than 1 color to a section of hair. Be sure to blend the 2 colors together by rubbing them with your fingers.[16]
-
7Leave the dye in your hair for the time recommended on the package. This can take anywhere from 25 to 30 minutes to as long as 2 hours. Some dyes need to be rinsed out as soon as they are done processing, but some dyes can be left longer for a more intense hue.[17]
- Read the instructions that came with your dye. They will tell you how long the dye should be left in your hair.
-
8Rinse the dye from your hair with cool water until the water runs clear. You can have someone help you do this over a sink, or you can do it yourself in the shower. Do not use any shampoo--not even sulfate-free or color-safe shampoo. Simply rinse your hair with cool to lukewarm water until the water runs clear.[18]
-
9Follow up with some conditioner. If your hair feels soft, you can wash your hair with regular conditioner--simply leave it on for 2 to 3 minutes before rinsing it out. If your hair feels dry, however, it might be a better idea to apply a deep conditioning mask instead.
- You should continue to use cool to lukewarm water for this step.
- Read the instructions on the container of deep conditioner. Some deep conditioners need to sit in your hair for only 5 minutes, while others need to sit for 10 to 15 minutes.


Using Temporary Chalk Dye
-
1Shake the bottle of chalk dye. Choose a color to start with: pink, purple, or blue. Shake the bottle to help mix up the dye inside, then open it.[19]
- This method is meant to add streaks of color to your hair; it is not recommended for an all-over dye job.
-
2Pull your hair into a half-up bun, if desired. Use your thumbs to part your hair horizontally at about ear level. Gather everything above your ears into a bun, and secure it with a hair clip or hair tie.
- You don't have to do this step, but it will help keep you organized, especially if you have long or thick hair.
-
3Grab a 1 in (2.5 cm) wide strand of hair. There is no exact way to do this, since you are only adding streaks of color to your hair. Simply pluck a 1 in (2.5 cm) wide section from your hair at random.[20]
- If you are using hair chalk or eye shadow, dampen the hair section first.
-
4Apply the dye to the hair section with your fingers. Squirt some of your desired dye onto your fingers, then rub your fingers against the 1 in (2.5 cm) section of hair. You can apply the dye starting a few inches/centimeters from the roots, or you can apply it to just the ends.
- If you are using hair chalk or eyeshadow, rub the chalk/shadow across the top and underside of the hair section.[21]
-
5Continue to apply more colors to more sections of hair. Drop the section you just finished coloring, and pick up the next. Choose your next color, and apply it to that section as well. You can even add 1 color to the top half of strand and another on the bottom for an ombre look.[22]
- Wipe your gloves clean between colors to prevent color transfer.
-
6Dry your hair with a hairdryer on a cool setting. This will help lock the color into your hair.[23] If you are using hair chalk or eye shadow, mist your hair with a heat protectant first, then set it with a flat iron or curling iron instead.[24]
-
7Brush your hair to make it soft again. Chalk dye, whether it came in liquid or solid form, will cause your hair to clump together. This can look unnatural, so run a brush or comb through your hair to make it soft again.[25]
- You should do this step if you used hair chalk or eye shadow too.
-
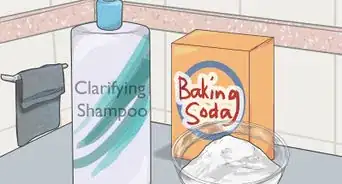
8Wash your hair with shampoo when you no longer want unicorn hair. Most temporary dyes should come right out, but some may require 2 to 3 washes. Alternatively, you can wash your hair with a clarifying shampoo.
- Since most cleansing shampoos contain drying sulfates, it would be a good idea to follow up with conditioner.


Maintaining Your Hair
-
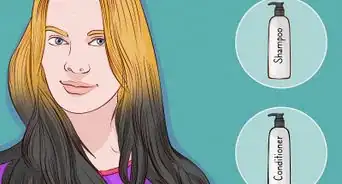
1Use color-safe shampoo and conditioner. If possible, use shampoo and conditioner specially formulated for dyed hair. If you cannot find any, stick with sulfate-free shampoo and conditioner.[26]
- The label should say whether or not it is sulfate-free, but double-check the ingredient label.
-
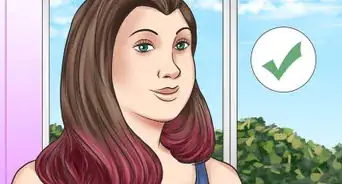
2Wash your hair with cool water. The water does not have to be freezing, but it should be the coldest temperature that you can stand. Anything between cool and lukewarm is safe.[27]
- Don't use hot water, or the dye will fade. It will also make your hair dry and frizzy.
-
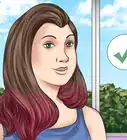
3Limit your exposure to sunlight, seawater, and chlorine. All of these can cause your hair color to fade. Cover your hair with a hat whenever you step outside, and use a swim cap whenever you go swimming in the pool or ocean.[28]
- If you don't like to wear hats, try hoods or scarves. You can also spray your hair with a UV protection spray.
-
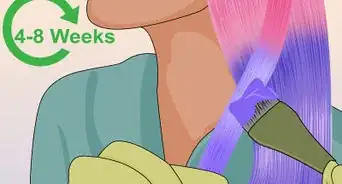
4Reduce washing your hair to 2 to 3 times per week maximum. It would be even better if you reduced it to once or twice a week.[29] If your hair has a tendency to get oily, consider using a dry shampoo between washes.


Expert Q&A
-
QuestionHow can you repair damaged, bleached hair?
 Christine GeorgeChristine George is a Master Hairstylist, Colorist, and Owner of Luxe Parlour, a premier boutique salon based in the Los Angeles, California area. Christine has over 23 years of hair styling and coloring experience. She specializes in customized haircuts, premium color services, balayage expertise, classic highlights, and color correction. She received her cosmetology degree from the Newberry School of Beauty.
Master Hair Stylist & ColoristThe best way to repair bleach damaged areas is to purchase a restorative treatment. You should do these treatments at least once a week, if not twice a week depending on the extent of the damage. These treatments can build back the bonds of your hair, as what's happening when you bleach your hair is that the bonds break.
Things You'll Need
- Pink dye
- Purple dye
- Blue dye
- Developer or diluter
- Bleach
- 3 to 4 tinting brushes
- 3 to 4 non-metal bowls
- Plastic dyeing gloves
- Old shirt or towel
-Hair-at-Home-Step-16-Version-5.webp)

References
- ↑ https://www.youtube.com/watch?v=rfyH4s1ulqI&feature=youtu.be&t=1m20s
- ↑ https://www.matrix.com/blog/everything-you-need-to-know-about-the-unicorn-hair-color-trend
- ↑ Christine George. Master Hair Stylist & Colorist. Expert Interview. 10 January 2020.
- ↑ https://www.youtube.com/watch?v=rfyH4s1ulqI&feature=youtu.be&t=45s
- ↑ https://www.matrix.com/blog/everything-you-need-to-know-about-the-unicorn-hair-color-trend
- ↑ https://www.realsimple.com/beauty-fashion/hair/how-to-bleach-hair
- ↑ https://www.refinery29.com/how-to-bleach-hair#slide-6
- ↑ https://www.refinery29.com/how-to-bleach-hair#slide-6
- ↑ https://www.refinery29.com/how-to-bleach-hair#slide-6
- ↑ https://www.refinery29.com/how-to-bleach-hair#slide-6
- ↑ https://www.refinery29.com/how-to-bleach-hair#slide-7
- ↑ https://www.refinery29.com/how-to-bleach-hair#slide-8
- ↑ https://www.youtube.com/watch?v=rfyH4s1ulqI&feature=youtu.be&t=1m245s
- ↑ https://www.youtube.com/watch?v=rfyH4s1ulqI&feature=youtu.be&t=1m57s
- ↑ https://theculturetrip.com/north-america/usa/articles/unicorn-hair-is-pure-magic-heres-a-diy-guide/
- ↑ https://www.youtube.com/watch?v=rfyH4s1ulqI&feature=youtu.be&t=3m6s
- ↑ https://theculturetrip.com/north-america/usa/articles/unicorn-hair-is-pure-magic-heres-a-diy-guide/
- ↑ https://theculturetrip.com/north-america/usa/articles/unicorn-hair-is-pure-magic-heres-a-diy-guide/
- ↑ https://www.youtube.com/watch?v=zyEMLoRi4_E&feature=youtu.be&t=20s
- ↑ https://www.youtube.com/watch?v=zyEMLoRi4_E&feature=youtu.be&t=1m16s
- ↑ https://www.wellandgood.com/good-looks/how-to-get-unicorn-hair-color-without-permanent-dye/
- ↑ https://www.youtube.com/watch?v=zyEMLoRi4_E&feature=youtu.be&t=1m22s
- ↑ https://www.youtube.com/watch?v=zyEMLoRi4_E&feature=youtu.be&t=1m47s
- ↑ https://www.wellandgood.com/good-looks/how-to-get-unicorn-hair-color-without-permanent-dye/
- ↑ https://www.youtube.com/watch?v=zyEMLoRi4_E&feature=youtu.be&t=2m6s
- ↑ https://www.matrix.com/blog/everything-you-need-to-know-about-the-unicorn-hair-color-trend
- ↑ https://www.matrix.com/blog/everything-you-need-to-know-about-the-unicorn-hair-color-trend
- ↑ https://www.matrix.com/blog/everything-you-need-to-know-about-the-unicorn-hair-color-trend
- ↑ Christine George. Master Hair Stylist & Colorist. Expert Interview. 10 January 2020.
- ↑ Christine George. Master Hair Stylist & Colorist. Expert Interview. 10 January 2020.
About This Article