This article was co-authored by Martin Nepton. Martin Nepton is a Professional Hair Stylist and Colorist at Bang Bang LA in Los Angeles, California. With over 11 years of experience, Martin specializes in helping clients express their Queer identity through hair. Martin offers personalized haircuts and color and style services with non-gender prices based on hair length. Martin holds a BA from the University of Québec at Montréal and is a Licensed Hair Stylist in California.
There are 7 references cited in this article, which can be found at the bottom of the page.
This article has been viewed 328,980 times.
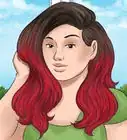
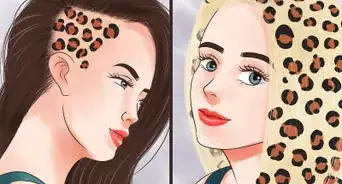
Two-toned hair seems to be all the rage, and it works on just about any hair length. It’s also easy to achieve at home. With so many colors and styles to choose from, the toughest issue you’ll face is picking your look. Ombre, dip-dyeing and dyed layers are three easy styles that allow for many possible color combinations. Whether you choose two natural colors or two pastels, you’re bound to get stunning results!
Steps
Creating the Ombre Look
-
1Separate your hair. Brush or comb your hair into two loose pigtails. This will make it easier to wrap in foil after you apply the bleach and the dye. Tie an elastic band on each segment to mark the bottom 2/3 of your hair.
-
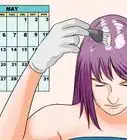
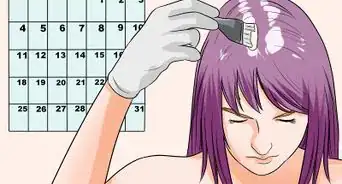
2Bleach the area below the elastic bands. If you have dark hair, you may want to consider bleaching your hair, especially if the hair colors you’re going for are significantly lighter than your current hair color. Using an applicator brush and dye bowl or an applicator bottle, apply the bleach in gentle downward strokes.
- If you have blonde or light red hair and are dyeing your hair darker colors, you can skip this step.
- If you’re hoping to get brown or burgundy colors, you may be able to achieve them without using bleach, even if your hair is dark. Simply use a dye that comes with a developer.
Advertisement -
3Apply the foil. You’ll need several pieces of foil for this step. Wrap each separated section. Allow the bleach to process for the amount of time that the product recommends. This can be anywhere between 10 and 45 minutes. Unfold one piece of foil to check the progress.
- Don't let the bleach process for a longer time period than the instructions recommend.
-
4Remove the foil. Gently unwrap each piece of foil. Give them a good rinse to remove the bleach. Toss them in the recycling bin.
-
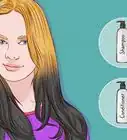
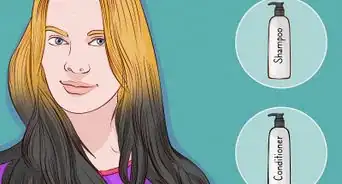
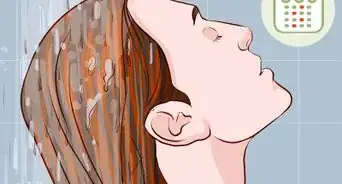
5Wash and dry your hair. Use a hydrating shampoo and conditioner. This will remove the bleach from your hair. Blow dry your hair. Otherwise, it won’t absorb the dye.
- If you notice that the bleach has caused some yellowness or brassiness, opt for a purple toning shampoo. This should give you a more even foundation for the dyeing process.
-
6Divide your hair. Brush your hair into two loose pigtails. Tie an elastic band just above the top of the bleached section on each side.
-
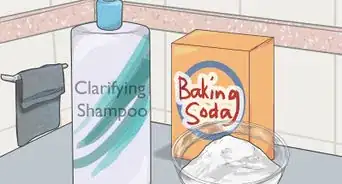
7Open the first dye kit. This should be the lighter color. Pour the dye into a dye bowl or applicator bottle. If the dye is separated into powder and liquid, mix the ingredients until you don’t see any powder particles. Make sure every last bit of powder gets stirred into the mixture.
-
8Apply the first color. Use a dye bowl with the enclosed applicator brush or use an applicator bottle to dye the entire bleached section of your hair. Paint the dye in slow downward strokes on the entire bleached section of your hair. Using vertical strokes rather than horizontal strokes should prevent the formation of a stark line.
-
9Mark the next section of your hair. Fold a piece of foil over the bottom 1/3 or 1/4 of your hair. Secure it with an elastic band. This will prevent the darker color from bleeding too much into the lighter section.
-
10Open the second color. This should be the darker color. Repeat the steps you took with the first color. You will need a separate applicator brush and a dye bowl, or an applicator bottle, if it is not included in the kit.
-
11Apply the second color. Use the applicator brush or bottle to coat your hair from the top of the lighter color to the beginning of the foil. Move in gentle downward sweeps. Blend the colors at their meeting point by giving each lock a gentle twist.[1]
-
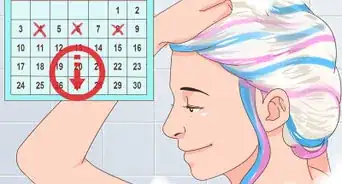
12Let both colors set in. Follow the instructions on the box. Set a timer for the recommended amount of time. This is usually about an hour.[2]
-
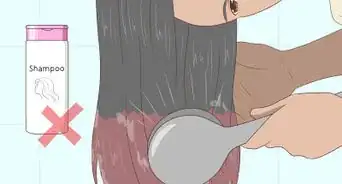
13Rinse with a vinegar mixture. Mix one part apple cider vinegar and three parts water in a spray bottle. Spritz the dyed part of your hair. Make sure the spray covers the entire colored section. This helps the color to last longer.[3]
- Use the rinse every time you wash your hair.
-
14Finish with a color-safe conditioner. Follow the vinegar rinse up with some color-safe conditioner. Apply the conditioner to your hair and then rinse it out well to help lock in the color and also remove the vinegar smell from your hair.


Creating the Dip-Dye Look
-
1Separate your hair. Brush or comb your hair into two to three sections on each side. This will make it easier to wrap in foil after you apply the bleach and the dye. Tie an elastic band on each segment to mark the tips of your hair. How many inches or centimeters you want to color is up to you, but it typically looks best to dye more if your hair is long and less if your hair is short.
- For example, if your hair is shoulder length, 1–2 inches (2.5–5.1 cm) may be suitable, but 5 inches (13 cm) or more may be best for mid-back length hair.
-
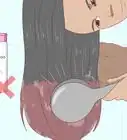
2Bleach the tips of your hair. If you have dark hair and want to dye your tips a much lighter color, consider using bleach. Using an applicator brush and a dye bowl or an applicator bottle, apply the bleach in gentle downward strokes.
- If you have blonde or light red hair and are dyeing your hair darker colors, you can skip this step.
- If your hair is darker and you want your tips to be a brown or burgundy color, then you may be able to achieve your desired color with a developer instead of bleach.
-
3Apply the foil. You’ll need several pieces of foil for this step. Wrap each separated section. Allow the bleach to process for the amount of time that the product recommends. This should take 10-45 minutes. Unfold one piece of oil to check the progress.
- Don’t leave the bleach on your hair for more time than the product recommends.
-
4Remove the foil. Gently unwrap each piece of foil. Give them a good rinse to remove the bleach. Toss them in the recycling bin.
-
5Wash and dry your hair. Use a hydrating shampoo and conditioner. This will remove the bleach from your hair. Blow dry your hair. Otherwise, it won’t absorb the dye.
- If your hair has a yellowish or brassy tint, use purple shampoo before proceeding with normal shampoo.
-
6Open the first dye kit. Pour the dye into a dye bowl or applicator bottle. If the dye is separated into powder and liquid, mix the ingredients until you don’t see any powder particles. Make sure every last bit of powder gets stirred into the mixture.
-
7Apply the first color. Use the enclosed applicator brush and dye bowl or applicator bottle. Paint the dye in slow downward strokes on the entire bleached section of your hair to avoid creating a stark line.
-
8Open the second color. Repeat the steps you took with the first color. Use a separate bowl or bottle for this dye mixture. You will also need a separate applicator brush and dye bowl or applicator bottle, if it is not included in the kit.
-
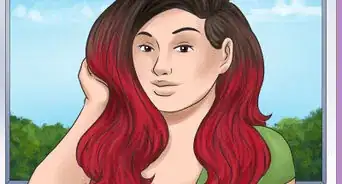
9Apply the second color. Paint the bottom half of the bleached area. In this step, you’ll cover part of the first color. Blend the colors at their meeting point by giving each lock a gentle twist.[4]
-
10Let both colors set in. Follow the instructions on the box. Set a timer for the recommended amount of time. This is usually about an hour.[5]
-
11Rinse with a vinegar mixture. Mix one part apple cider vinegar and three parts water in a spray bottle. Spritz the dyed part of your hair. Make sure the spray covers the entire colored section. This helps the color to last longer.[6]
- Use the rinse every time you wash your hair.
-
12Follow up with conditioner. Apply color-safe conditioner to your hair to lock in the color and to get rid of the vinegar smell. Then, rinse it out thoroughly.


Creating the Dyed Layers Look
-
1Bleach your hair. You may want to bleach your hair if it’s dark and you desire a lighter color. Use an applicator brush and dye bowl or an applicator bottle to apply the bleach. Move in gentle downward strokes.
- If you have blonde or light red hair and are dyeing your hair darker colors, you may skip this step.
- If your hair is dark and you want to dye it brown or burgundy, try doing so without the use of bleach. Use a dye that comes with a developer, and skip the bleach application.
-
2Apply the foil. You’ll need several pieces of foil for this step. Wrap each separated section. Allow the bleach to process for 10-45 minutes, or however long the product instructions recommend. Unfold one piece of oil to check the progress.
- Don’t let the bleach process for a longer period than the product suggests.
-
3Remove the foil. Gently unwrap each piece of foil. Give them a good rinse to remove the bleach. Toss them in the recycling bin.
-
4Wash and dry your hair. Use a hydrating shampoo and conditioner. This will remove the bleach from your hair. Blow dry your hair. Otherwise, it won’t absorb the dye.
- Use a purple shampoo to get rid of any unwanted brassiness or yellowness.
-
5Separate your layers. Use a comb to divide your hair horizontally at the back of your head. Use a comb to create a slight zigzag pattern. This will prevent an odd-looking line of the lower layer from popping through the top.[7]
-
6Divide the upper layer. Comb your hair. Separate it into a right and a left section. Divide it again into top and bottom segment. Clip each part to the top third of your head.
- To get even more natural-looking highlights, tease your hair first. That will prevent any harsh lines ones you apply the dye.[8]
-
7Divide your lower layer. Comb your hair. Separate it into right and left sections. Divide again into top and bottom sections. Make sure your hair clips are a different color for this step so that you don’t confuse your top and bottom layers.
-
8Open the first dye kit. Pour the dye into a dye bowl or applicator bottle. If the dye is separated into powder and liquid, mix the ingredients until you don’t see any powder particles. Make sure every last bit of powder gets stirred into the mixture.
-
9Dye the bottom layers of your hair. Use the applicator brush or bottle. Sweep the dye on individual locks with gentle downward strokes. After you finish each lock, fold it in a piece of foil.
-
10Open the second dye kit. Repeat the steps you took with the first color. Use a separate bowl and brush or bottle for this dye mixture, if it’s not included in the kit.
-
11Let out the clipped hair. Brush or comb out this section. Do this gently, being careful not to puncture the foil.
-
12Dye the top layer. Use your applicator brush or bottle to apply the dye with gentle downward strokes. Fold up each segment into a piece of foil.[9]
-
13Let the dye set in. Follow the instructions on the box. Set a timer for the recommended amount of time. This is usually about an hour.[10]
-
14Remove the foil. Gently unwrap the foil from each section of hair you dyed. Wash the foil to remove the dye. Toss it in the recycling bin.
-
15Rinse with a vinegar mixture. In a pot large enough to fit your head, mix one part apple cider vinegar and three parts water. Dunk your hair in the pot. This step helps the color to last longer.[11]
- Use the rinse every time you wash your hair.
-
16Finish with conditioner. After you’ve done the vinegar rinse, apply some color-safe conditioner and rinse it out. This should help keep the color vibrant for longer and also remove the vinegar smell from your hair.


Expert Q&A
Did you know you can get expert answers for this article?
Unlock expert answers by supporting wikiHow
-
QuestionHow can I get natural-looking highlights?
 Martin NeptonMartin Nepton is a Professional Hair Stylist and Colorist at Bang Bang LA in Los Angeles, California. With over 11 years of experience, Martin specializes in helping clients express their Queer identity through hair. Martin offers personalized haircuts and color and style services with non-gender prices based on hair length. Martin holds a BA from the University of Québec at Montréal and is a Licensed Hair Stylist in California.
Professional Hair StylistTease your hair before you dye it. That way, you'll get a more random application. When you brush it back down, you'll have a smooth transition without any harsh lines.
Support wikiHow by unlocking this expert answer.
Warnings
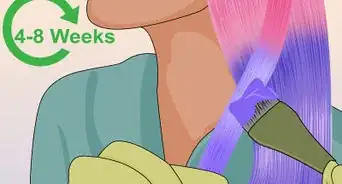
- If you choose pastel colors, you’ll have to avoid regular washings and re-dye every few weeks. Otherwise, your new colors will fade very quickly.⧼thumbs_response⧽
- It’s easier to go darker than lighter. You’re more likely to get the result you want if you’re a natural blonde and you’re dying your hair a darker color.⧼thumbs_response⧽
Things You'll Need
- Two boxes of hair dye, each in a different color
- Hair clips
- Towel
- Hair bleach (optional)
- Gloves
- Dye applicator brushes or bottles, if not included in the dye kits
- Dye bowl (optional)
- Foil
- Apple cider vinegar
- Water
- Spray bottle or large pot
-Hair-at-Home-Step-16-Version-5.webp)

References
- ↑ https://bellatory.com/hair/DIY-Hair-15-Ways-to-Dye-Mermaid-Hair
- ↑ http://www.womansday.com/style/beauty/a1711/wds-guide-to-at-home-hair-dyeing-108643/
- ↑ http://www.prevention.com/beauty/how-make-hair-color-last-longer
- ↑ http://thebeautydepartment.com/2011/07/tipped-out/
- ↑ http://www.womansday.com/style/beauty/a1711/wds-guide-to-at-home-hair-dyeing-108643/
- ↑ http://www.prevention.com/beauty/how-make-hair-color-last-longer
- ↑ https://www.youtube.com/watch?v=FTl3myjMiI0
- ↑ Martin Nepton. Professional Hair Stylist. Expert Interview. 17 November 2020.
- ↑ https://www.youtube.com/watch?v=iWjASl5ByDY
About This Article

To dye your hair two colors, start by separating your hair horizontally at the back of your head in a zigzag pattern. Then, separate the top and bottom sections into 4 parts each, securing them with clips. Next, mix the first dye and apply it with gentle downward strokes, one section at a time. After you finish each section, wrap it in a piece of foil. Once you’ve finished the bottom, repeat the same steps with a different colored dye on the top sections of your hair. Finally, let the dye set before removing the foil and rinsing the dye from your hair. For tips from our Beauty reviewer on how to create an ombre look, read on!