X
This article was co-authored by Ashley Adams and by wikiHow staff writer, Amber Crain. Ashley Adams is a Licensed Cosmetologist and Hair Stylist in Illinois. She completed her Cosmetology education at John Amico School of Hair Design in 2016.
This article has been viewed 115,724 times.
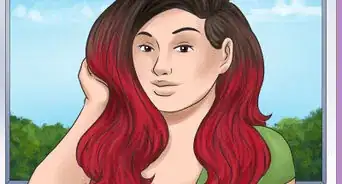
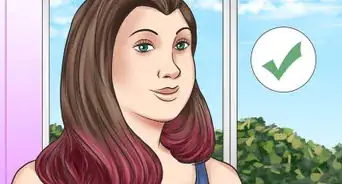
Dip-dyed hair color looks awesome, but using permanent dye is a big commitment! Luckily, there are several techniques you can use to temporarily achieve this look. Hair chalk (great for kids), washable markers, and spray-on hair color are the easiest options and rinse out easily in 1-2 days. You can also use semi-permanent hair dye for longer-lasting and more vibrant results, and your look will last through about 12 shampoos.
Steps
Method 1
Method 1 of 4:
Dip-Dyeing with Hair Chalk
-
1Wash and dry your hair without adding any styling products to it. Shampoo and condition your hair as you normally would, rinse your hair thoroughly, then blow dry it or let it air-dry. Avoid adding any styling products, since you want your hair to be squeaky clean without anything coating the hair shaft.[1]
- Chalk adheres best to “naked” hair. The oils and waxes from styling products will create a barrier between your hair and the chalk, which affects the vibrancy of your results.
- Put on an old T-shirt and cover your work surface with a towel before you start working with the chalk.
-
2Wet the bottom section of hair where you want the color to appear. Use a spray bottle or your fingers to dampen the ends of your hair up to the point where you want the color to start. You can just add color to the tips, wet the bottom half of your hair, or anything in between—it’s totally up to you.[2]
- Wetting the hair first makes the chalk adhere better and look more vibrant.
- If you have light blonde hair, you probably won’t need to wet your hair first – the chalk will show up on your hair easily.
Advertisement -
3Rub your wet hair with chalk using a downward motion. Working with small sections of hair at a time, use a smooth, downward motion to apply the chalk to your hair. Twist the hair as you apply the chalk to ensure all of the hair in that section gets evenly coated.
- You can use one color or try multiple colors for a rainbow look.
-
4Apply the chalk in light layers to build up the color slowly. Being heavy-handed with the chalk may give you uneven results. It also generates more chalk dust, which ends up all over you and the surrounding area! Keep building up the layers until your hair reaches the desired vibrancy.[3]
- Apply chalk to the remaining sections of hair using the same technique.
-
5Mist your hair with hairspray to lock in the color. You can style your hair as you normally would, but keep in mind that you may get some chalk on curling irons and straighteners. Don't worry, the chalk should easily wipe off with water once the iron cools off. Finish up with a light misting of hair spray to set your dip-dyed hair color.[4]
- Shake out your hair before you leave the house so you won’t leave chalk dust trails in your wake!
- Avoid brushing or combing your hair too vigorously, since this will cause the color to fade.
-
6Shampoo your hair to remove the chalk color. This dip-dyed look typically lasts 1 day and will probably fade a little as the day progresses, especially if you’re spending time outside. The chalk should easily wash out of your hair with water and a little shampoo later that evening.


Advertisement
Method 2
Method 2 of 4:
Adding Color with Markers
-
1Select your colors from a set of washable markers. You can use any colors you want, but darker and highly saturated colors will show up the best. This technique works best on blonde hair; markers probably aren’t the best choice if you have darker hair, but give it a try and see what results you get!
- You can use a single marker color for this or dip-dye with multiple marker colors to get a rainbow effect.
- Washable markers are recommended, but you can try highlighters and other markers types if you want to experiment.
-
2Place a lock of hair over a piece of paper or a plastic bag. You will be coloring the hair by rubbing the markers directly onto it, which can get a little messy! Put on an old T-shirt and slip paper or a plastic bag underneath the first section of hair.
- If you have long hair, you can lay the paper on a flat surface with your hair on top of it, or you can just cup the section of hair in your hand with a piece of paper or plastic in between.
-
3Color directly onto your hair with marker ink. Just pretend your hair is a piece of paper and color right onto it! Saturate your hair with the ink, taking care to twist the section of hair around as you apply the marker to coat all sides evenly. Use downward strokes and avoid rubbing too vigorously, since being rough can damage your hair.
- You can add color to just the tips of your hair or start further up, if you prefer.
-
4Use the same technique to dip-dye the remaining sections of hair. Once you reach the desired color, move on to the next section of hair. Let the ink dry completely before you brush through your hair or leave the house to prevent faded color and bleeding.
-
5Shampoo your hair to remove the color. This look usually lasts about a day. The washable markers will wash out of your hair very easily, even without shampoo. Keep this in mind throughout the day—rain and heavy humidity can cause the color to bleed, unfortunately.


Advertisement
Method 3
Method 3 of 4:
Using Spray-on Color
-
1Choose the spray-on color you want for your look. Colored hairspray is one of the easiest ways to get the dip-dyed look! You can choose any color you want and even use multiple colors on your hair, but spraying too much or too many colors may result in a muddied look—try to keep things simple for the best results.
- Pink shows up really well on blonde hair. Blue looks vibrant on red hair but doesn’t show up well on brunettes. Deep purple works great if you have brown or black hair![7]
- If you have light blonde or platinum blonde hair, avoid very dark colors, since these may stain your strands for a week or two.[8]
-
2Start with freshly washed, dried, and detangled hair. Shampoo and condition your hair as you normally would and blow dry or let it air dry completely. Run a wide-toothed comb through your locks to remove any tangles—this will help to ensure the spray color goes on evenly.
- Go ahead and style your hair—adding the spray color will be the final step in your routine. The spray on color will leave your hair feeling a bit stiff so it is important to apply the color after styling your hair.
-
3Protect your clothes and skin, and work in an open area. Put on an old t-shirt and a pair of gloves, and lay down newspaper or plastic to protect the floor and countertops from being stained. Be sure to set up in a well-ventilated area, as well. The smell isn’t terrible and the spray isn’t toxic, but it is pretty strong and you don’t want to breathe it in or use it in a confined space.[9]
- The spray is washable, so it should come out of your clothing. You never know how a fabric might react, though, so wear an old T-shirt to be safe. You can change into your outfit once the spray dries completely.
-
4Separate your hair into sections if it’s very thick. If you have thin hair, you can probably get an even application of color without sectioning your hair. For thicker hair, use clips to pull back the top half of your hair. That way, you can work on the bottom section first, then unclip the top half and add color to the remaining hair.
-
5Hold the can 10–12 inches (25–30 cm) away and saturate the hair with color. You can just color the tips of your hair or start the color higher, if you like. Angle your face away, decide where you want the dip to start, and aim the canister down the hair towards the ends. Work systematically in small sections all the way around your head.
- The more you spray, the darker it will look. You may want to build up the color in layers for the most control.[10]
- Let the spray-on color dry completely before you change clothes or brush your hair. If possible, try to avoid brushing altogether so the color doesn’t come out.
-
6Shampoo the color out at the end of the day. The lighter your hair is and the darker the spray color, the tougher it will be to remove. In most cases, though, it should wash out easily with a single shampoo. However, you may need to shampoo 2-4 times to remove the color completely, especially if you have light blonde hair.[11]


Advertisement
Method 4
Method 4 of 4:
Coloring Your Hair with Semi-Permanent Hair Dye
-
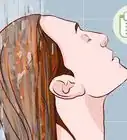
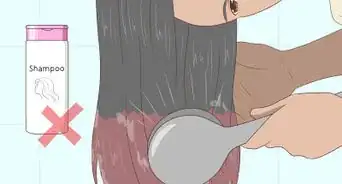
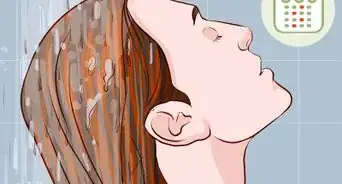
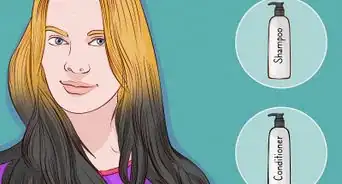
1Start with freshly shampooed hair. Your hair should be clean before applying a semi-permanent dye, so make sure to wash it. Use your normal shampoo to wash your hair and remove any hair product residue, oil, and dirt.
-
2Divide your hair into 2-4 loose ponytails to ensure even application. The thicker your hair is, the more ponytails you should create. Secure each low ponytail loosely with an elastic hair tie. Go ahead and change into an old T-shirt to prevent staining.[12]
-
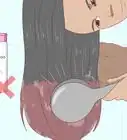
3Saturate the ends of 1 ponytail with the semi-permanent dye. Put on gloves, squeeze the dye into one of your hands, and use your fingers to coat the hair. Be sure to saturate the hair completely and concentrate on the tips first, since you want those to look the most vibrant. From the tips, work up to the point where you want the color to start.[13]
- You usually don’t need to mix semi-permanent hair color – you can apply it straight from the tube or bottle.
- Manic Panic is a very popular brand of semi-permanent dye. If you aren’t sure what to use, look for that.
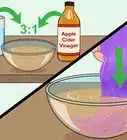
- For runny dye, use an applicator bottle or a bowl and brush to apply the dye to your hair.
-
4Twist the hair several times at the starting point to prevent hard lines. Use a clean, gloved hand to twist the hair at the point where the color starts to create a blended transition. Squeeze and twist the hair repeatedly until there is a smooth, subtle blend from your natural color to the dip-dyed color at the transition point.[14]
- Continue using the same technique to dye the tips of the remaining ponytails.
-
5Wrap the ends of each ponytail with foil and wait 10-45 minutes. Individually wrap each ponytail in a piece of aluminum foil. If you want subtle color, or if you have light blonde hair, letting the color sit for 10-15 minutes should do the trick. If you have darker hair or want a very vibrant look, wait 30-45 minutes before rinsing out the dye mixture.[15]
-
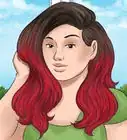
6Rinse out the dye with cool water until the water runs clear. Be sure to get all of the dye out, since leftover dye can stain your clothing and pillowcases. Avoid using hot water and don’t follow up the rinse with shampoo. Then, squeeze the excess water from your hair and style it as you normally would.[16]
- You may want to limit the use of heat styling tools to prevent fading.
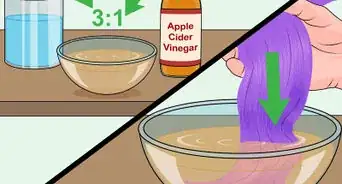
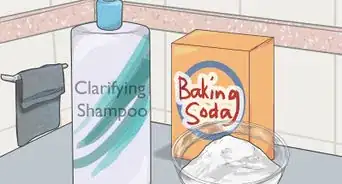
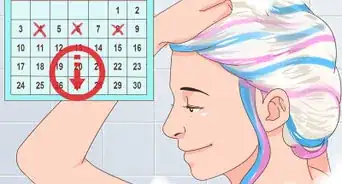
- This look should wash out completely after 4-12 shampoos. Use a clarifying shampoo if you want to speed up the process.


Advertisement
Community Q&A
-
QuestionHow long will it take to wash out?
 Community AnswerIt depends on how light your hair is and how strong the color has set, but it is usually completely washed out after a week of shampoos.
 -
QuestionWill it damage or mess up my hair?Community AnswerNo, using temporary or permanent dye will not damage or mess up your hair. I know from experience.
-
QuestionHow long do I leave the dye in for?
 Community AnswerAs long as you want! The kind of dye used in this tutorial is a spray-on dye, which means it comes right out when you shampoo it. It is meant for Halloween, or when you want your hair to be a different color for the day. If you want it to last longer, try using a semi-permanent dye from the drugstore.
Advertisement
Things You'll Need
- Hair chalk
- Washable markers
- Spray-on hair color
- Semi-permanent hair dye
- Spray bottle
- Hair clips
- Old towels
- Old clothing
- Newspaper or plastic for surfaces
- Aluminum foil
- A pair of gloves
-Hair-at-Home-Step-16-Version-5.webp)

References
- ↑ http://www.thefashionspot.com/beauty/300719-diy-how-to-hair-chalk/
- ↑ http://www.thefashionspot.com/beauty/300719-diy-how-to-hair-chalk/
- ↑ http://www.thefashionspot.com/beauty/300719-diy-how-to-hair-chalk/
- ↑ http://www.thefashionspot.com/beauty/300719-diy-how-to-hair-chalk/
- ↑ https://www.goodhousekeeping.com/beauty/hair/a34903/temporary-hair-color/
- ↑ http://www.thefashionspot.com/beauty/300719-diy-how-to-hair-chalk/
- ↑ https://www.seventeen.com/beauty/hair/advice/a20617/creative-streak-color-spray/
- ↑ https://www.goodhousekeeping.com/beauty/hair/a34903/temporary-hair-color/
- ↑ https://www.seventeen.com/beauty/hair/advice/a20617/creative-streak-color-spray/
- ↑ https://www.seventeen.com/beauty/hair/advice/a20617/creative-streak-color-spray/
- ↑ https://www.seventeen.com/beauty/hair/advice/a20617/creative-streak-color-spray/
- ↑ https://thestylingedit.com/how-to-dip-dye-hair
- ↑ https://thestylingedit.com/how-to-dip-dye-hair
- ↑ https://thestylingedit.com/how-to-dip-dye-hair
- ↑ https://thestylingedit.com/how-to-dip-dye-hair
- ↑ https://thestylingedit.com/how-to-dip-dye-hair
About This Article

Ashley Adams
Professional Hair Stylist
This article was co-authored by Ashley Adams and by wikiHow staff writer, Amber Crain. Ashley Adams is a Licensed Cosmetologist and Hair Stylist in Illinois. She completed her Cosmetology education at John Amico School of Hair Design in 2016. This article has been viewed 115,724 times.
Co-authors: 23
Updated: February 10, 2023
Views: 115,724
Categories: Dyeing Hair Mixed Colors
Advertisement