X
wikiHow is a “wiki,” similar to Wikipedia, which means that many of our articles are co-written by multiple authors. To create this article, volunteer authors worked to edit and improve it over time.
This article has been viewed 147,590 times.
Learn more...
Apple’s Pages program is a word processing application that has similar functions to Microsoft Word. Pages uses both an Inspector toolbar and a Default toolbar to change formatting and layout. By understanding how to use these toolbars, you can not only double space within Pages, but also alter margins, paragraph spacing, and tab stops.
Steps
Method 1
Method 1 of 4:
Adjusting Line Spacing
-
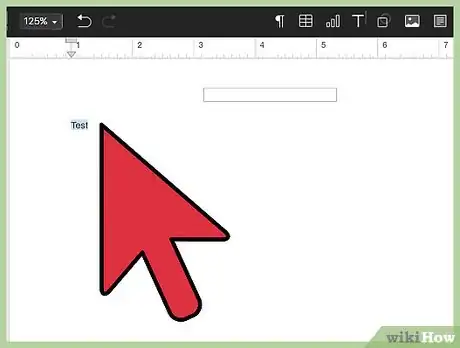
1Choose the paragraph. When you want to change a paragraph’s spacing, left-click within that paragraph. A blinking cursor will be left behind. The blinking cursor will allow the entire paragraph to be changed. The text can also be selected by highlighting. To highlight, left-click and run the cursor over the text you wish to double-space.[1]
- If you need to select several consecutive paragraphs, simply highlight all the paragraphs at a time.[2]
-
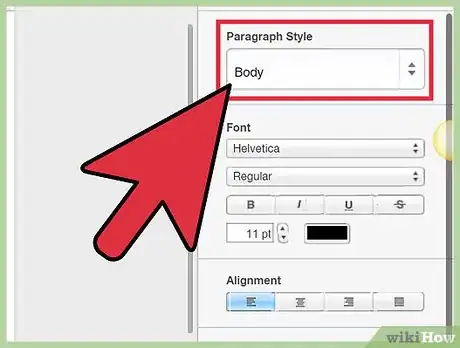
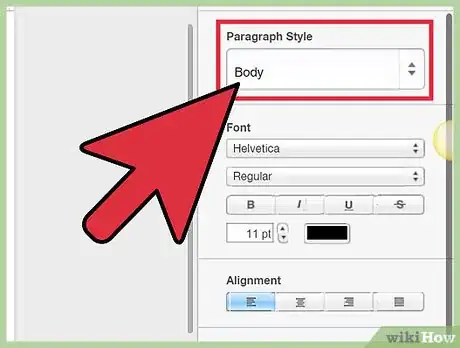
2Click “Style.” Within the text box of pages, you will see “Format Inspector.” From here, you want to click the “Style” button. The “Style” button will be the first header on the left of the “Format Inspector” box.[3]Advertisement
-
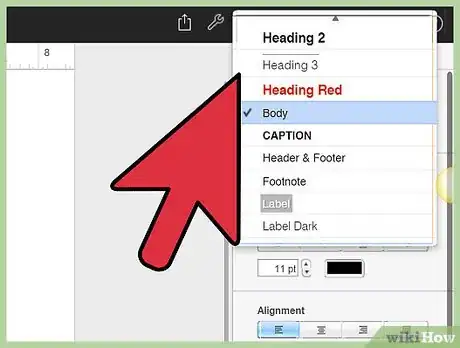
3Click the disclosure triangle. The disclosure triangle is the small, downwards facing arrow head that will display a drop-down menu once clicked. Once the drop-down menu has opened, read over the options carefully to determine which you would like to edit.[4]
- When selecting “Lines,” know that the original, pre-selected space between typed lines is proportional to font size. Select lines when you would like to change the spacing between the lines, while maintaining the relative distance between ascenders and descenders. Ascenders are letters that reach to the top of the line, such as a “t,” and descenders are letters that reach to the bottom of the line, such as a “j”.[5]
- When selecting “At least,” the distance from one line to the next will never go below your chosen value. Increase “At least” when you wish for the space between lines to remained fix, but you want to avoid overlap if the text becomes large.[6]
- The “Exactly” header is the distance between the baselines. Increase or decrease the values within to alter the distance.[7]
- ”Between” is the value set to increase the overall space between the lines. This differs from “Lines,” as “Lines” will increase the overall height of the lines, whereas “Between” will give the options of 1.5 space, 2.0 space, etc. If you wish to give an amount of empty space between your lines, select “Between.”[8]
-
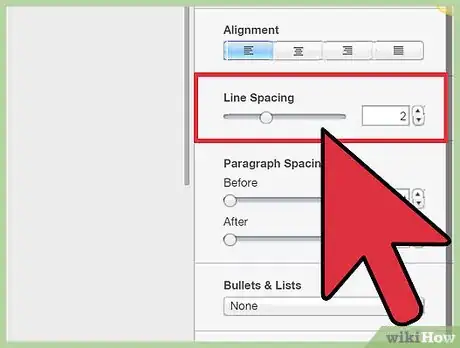
4Add double spacing. To change the spacing between lines, alter the “Between” option. To insert double spacing, you simply need to click the arrows until you increase to “2.0,” or click the box and type in “2.0.”
- Caution is not needed when altering lines. If you wish to see how your document looks with a certain alteration, simply do it. If you are changing the spacing because of curiosity, or you don’t quite understand the process, you can hit “command” and “z” together to undo the change you made.[9]
Advertisement
Method 2
Method 2 of 4:
Setting Paragraph Margins
-
1Choose your paragraphs. If need be, select one or more paragraphs by highlighting the desired text. Click the “Style” button that is located within the “Format Inspector.” The “Format Inspector” button is found at the top right of the page, and is a small, blue paintbrush. Within “Style,” you will find font, alignment and bulleting options.[10]
-
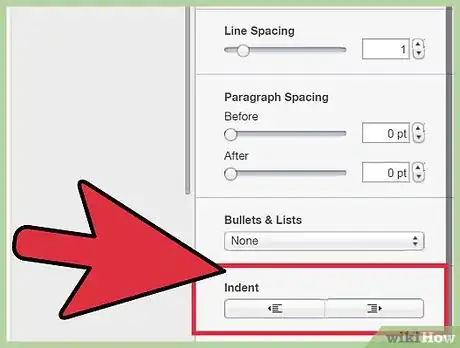
2Choose the desired indent button. The indent buttons look like small, square brackets. In consecutive order they are left, centre, and right.[11] Select whichever indent button you’d like to change the paragraph indent.
- The indent buttons will change the spacing to a default length. By hitting the left choice, all of your paragraph will align the left border. If you choose the right indent, your paragraph will all align at the right border. Choosing the centre option will give both the left and right side of your paper an uneven edge, while funneling your sentences down the middle of the page.[12]
-
3Change the default indent (Optional). To change the default indent space, click over to the “Layout” tab of “Format Inspector.” Near the bottom the options for “First,” “Left,” and “Right” will be displayed. Either click into the box or use the up and down arrows to increase and decrease the spacing.[13]
- The “First” option will set the default indent for the first sentence of each paragraph. Both the “Left” and “Right” options will set the default distance for every sentence past the default.[14]
Advertisement
Method 3
Method 3 of 4:
Setting Tab Stops
-
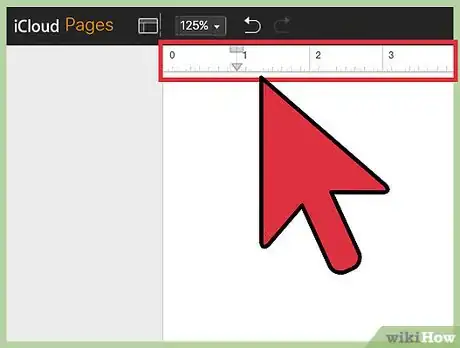
1Select “View” and “Show Ruler” in the toolbar. The “View” button will look like a small square with an extra right angle in the top left corner. It is white and blue, and located within the toolbar. From here, select “Show Ruler”. This will ensure the ruler is displaying within Pages.[15]
-
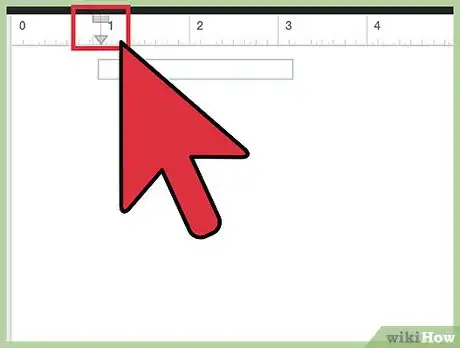
2Click the ruler for a tab stop. At the top of the text page, there is a ruler running horizontally. This ruler is used to set page margins, paragraph indents, and tab stops. If you wish to enter and extra tab stop, click the ruler at the desired location.[16]
- Any pre-existing tab stop icons will be small blue shapes. The left-aligned tab will be a right-facing arrow. The centre-aligned tab will be a diamond shape. The decimal-aligned tab will be a small circle, and the right aligned tab is a left-facing arrow.[17]
-
3Change the alignment. To change the alignment of the current tab stops, double click the tab stop icon. This will bring up one of the tab icons. If the one you wish to change does not show, keep double clicking. Pages will cycle through the tabs and simply stop double clicking when you see the alignment you wish to change.
-
4Drag the icon. After the tab icon you wish to change has come up, you can drag the icon to the left or right of its current position on the ruler. Once content with positioning, simply continue on within Pages.
- To drag, directly click onto the icon and while holding the click, move right or left. You may drag the icon as many times as desired.
- If you wish to remove a tab stop completely, drag the stop directly downwards from the ruler. Drag until the tab stop disappears from the ruler. Once it has disappeared, you can release your click. The tab stop will be removed.[18]
-
5Set default spacing (Optional). In the “Text” panel of the “Format Inspector,” click “Layout” to change the default setting of tab spacing. From “Layout,” use the up and down arrowheads to increase and decrease the default spacing for tabs.[19]
Advertisement
Method 4
Method 4 of 4:
Aligning Text in a Text Box
-
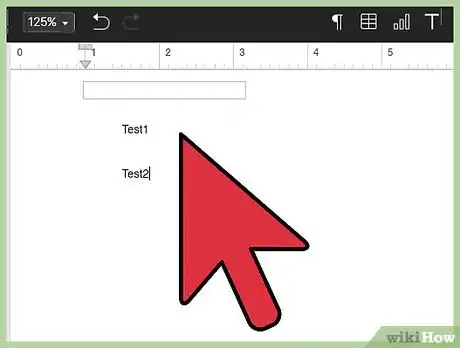
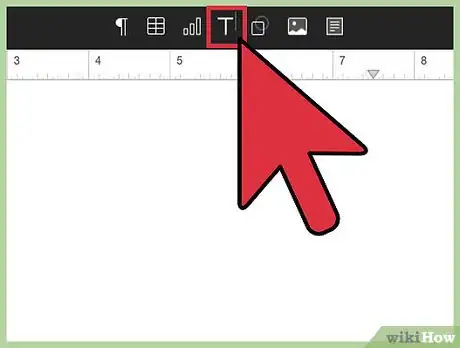
1Insert a text box. To insert a text box, select the “T” icon within the tool box. A text box will appear within your page. From here, you can input the text and change its spacing.[20]
- To move a text box, click the border and drag to the desired location.
- To change the size of a text box, hover over one of the shaped-icons within the border. Your cursor will change in shape and you can click and drag to increase and decrease the size of a text box.
-
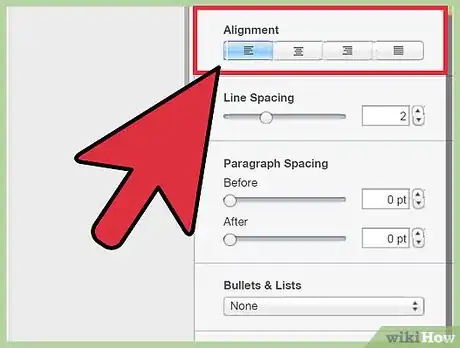
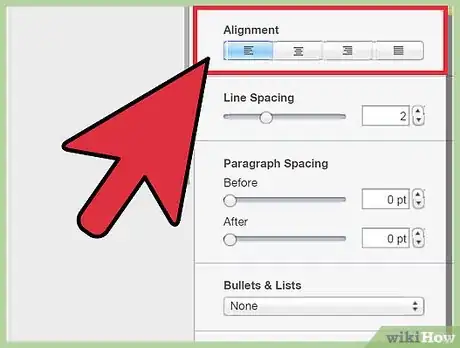
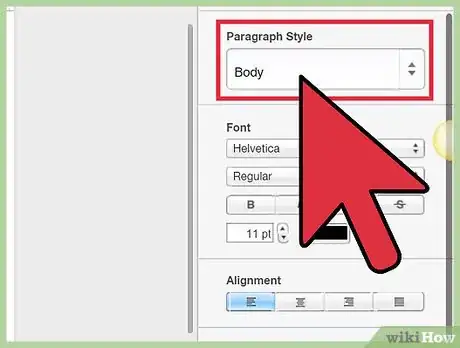
2Select the text and enter “Style.” After you’ve input text into the box, select the text you wish to change by highlighting it. Next, click on the “Format Inspector” button. From here you can click into the “Style” tab. You will see several options for alignment.[21]
-
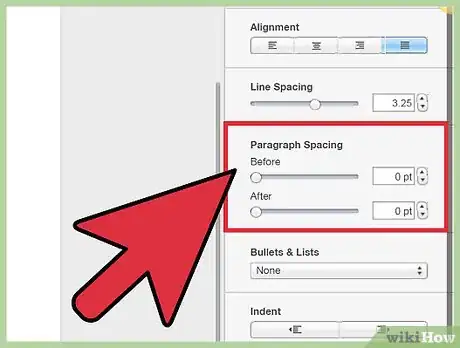
3Click the desired alignment. Once you’ve found the alignment options, you can choose which alignment you need your text to have. Experiment with the options to see what works best for you.
- The first set of options is for aligning all text horizontally. The options, in order, are left-border, centre-aligned, right-border, and both border alignment.
- The second set of alignment options is for moving the text left or right. The first option will align the text to the left border of the text box and the second option will align the text to the right border.
- The third set is used to align the text vertically. In order, these options will align the text at the top of the box, align in the middle, and align at the bottom of the box.
Advertisement
References
- ↑ https://support.apple.com/kb/PH15339?locale=en_US
- ↑ https://support.apple.com/kb/PH15339?locale=en_US
- ↑ https://support.apple.com/kb/PH15339?locale=en_US
- ↑ https://support.apple.com/kb/PH15339?locale=en_US
- ↑ https://support.apple.com/kb/PH15339?locale=en_US
- ↑ https://support.apple.com/kb/PH15339?locale=en_US
- ↑ https://support.apple.com/kb/PH15339?locale=en_US
- ↑ https://support.apple.com/kb/PH15339?locale=en_US
- ↑ https://docs.adobe.com/docs/en/cq/5-6-1/wcm/undo_page_edits.html
- ↑ https://support.apple.com/kb/PH15339?locale=en_US
- ↑ https://support.apple.com/kb/PH15339?locale=en_US
- ↑ https://support.apple.com/kb/PH15339?locale=en_US
- ↑ https://support.apple.com/kb/PH15339?locale=en_US
- ↑ https://support.apple.com/kb/PH15339?locale=en_US
- ↑ https://support.apple.com/kb/PH15339?locale=en_US
- ↑ https://support.apple.com/kb/PH15339?locale=en_US
- ↑ https://support.apple.com/kb/PH15339?locale=en_US
- ↑ https://support.apple.com/kb/PH15339?locale=en_US
- ↑ https://support.apple.com/kb/PH15339?locale=en_US
- ↑ https://discussions.apple.com/thread/3656118?tstart=0
- ↑ https://support.apple.com/kb/PH15339?locale=en_US
About This Article
Advertisement
