This article was written by Luna Rose. Luna Rose is an autistic community member who specializes in writing and autism. She holds a degree in Informatics and has spoken at college events to improve understanding about disabilities. Luna Rose leads wikiHow's Autism Project.
This article has been viewed 50,241 times.
Down Syndrome is a genetic condition that causes developmental disability, along with a unique face and body type. Capturing the facial features of a person with Down Syndrome without turning them into a caricature can be difficult. Here is how to draw an accurate, respectful representation that can make people smile.
This article is written for people who are already familiar with the basics of drawing faces.
Steps
Sketching
-
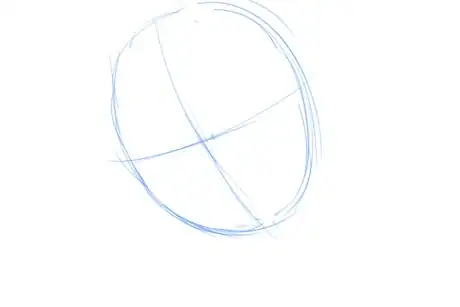
1Draw the person's general face shape, along with guidelines representing the horizontal and vertical center lines. Give the face plenty of roundness—a person with Down Syndrome will not have an angular face.
- People with Down Syndrome tend to be heavyset. Even if this character is a muscular athlete, they will have a very clear softness in their face and body. Make the cheeks full.
- Just like people without Down Syndrome, people with Down Syndrome can have a variety of face shapes. Your character's face shape may be round, oval, heart, et cetera.
-
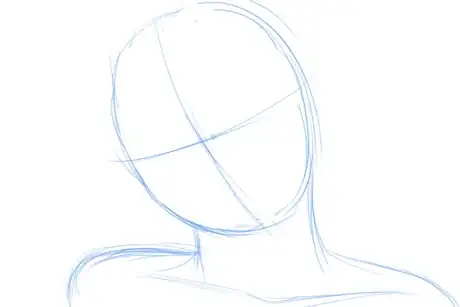
2Sketch the neck and shoulders. Your character should have a thick, short neck. Make the shoulders proportionate based on your character's age and the style of your art. Use the collarbones to help guide you in the pose.Advertisement
-
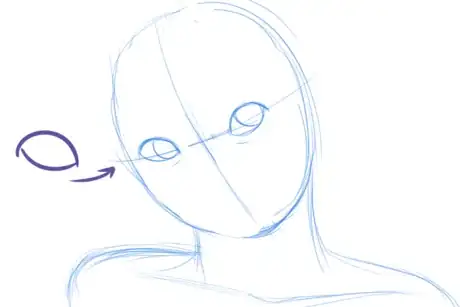
3Draw the eyes. The eyes should be widely-spaced, and positioned lower on the face than average (leaving a big forehead). Note the clear almond shape of the eyelids: a bigger swoop on top, and a smaller one on bottom. Both lids should be angled upwards at the outsides.
- For extra detail, show a hint of puffiness under the lower lid. This is a common feature of people with Down Syndrome.
-
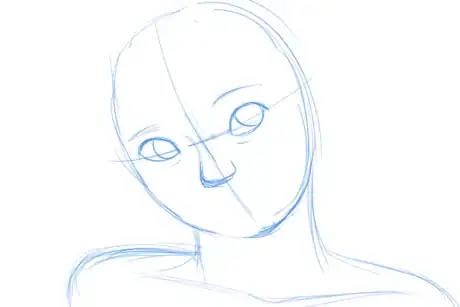
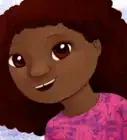
4Sketch the nose and eyebrows. People with Down Syndrome usually have a button nose, wider at the bottom, with a relatively flat nose bridge. Take age into consideration: on a baby or small child, the bridge will be barely visible, while it will be much more defined in adulthood. The girl in the picture is in her mid teens.
- The nose bridge extends to the eye socket. Follow this curve to draw the eyebrows. A few people with Down Syndrome have unibrows.
-
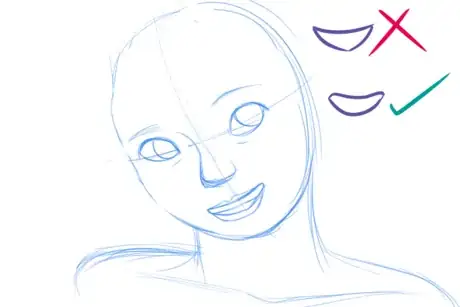
5Draw the mouth. People with Down Syndrome may not have perfect control over their mouth muscles, so go with a more rounded and relaxed shape. Avoid sharp corners.
- Add lips if desired. Make the lips more rounded for a feminine look, and more squarish for a masculine look.
-
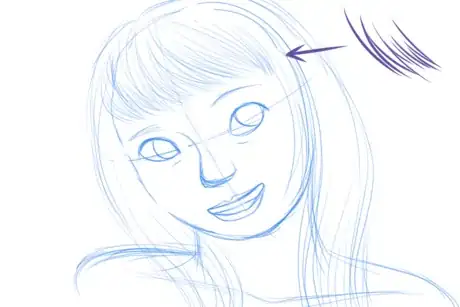
6Sketch the hair. Most people with Down Syndrome have fine hair that is straight or slightly wavy. Use thin, flowing lines that follow the shape of the hair and the contours of the head.
- For bangs, use dense lines, with the most lines at the ends. Give a them a rounded shape.
-
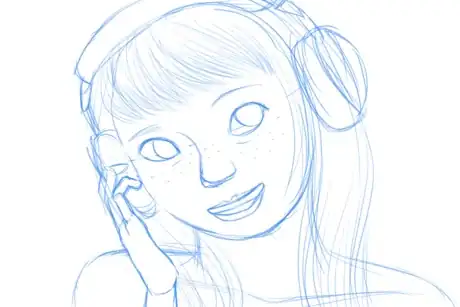
7Add any other details. Consider glasses, freckles, jewelry, and props. (This girl is wearing headphones.) Refine your sketch.
- A good way to check your picture is to view it backwards. Digital artists can flip the sketch in their drawing programs. Traditional artists can hold up their drawing, with the sketch side facing a light or window. They can then see the image reversed through the paper.
Lines and Color
-
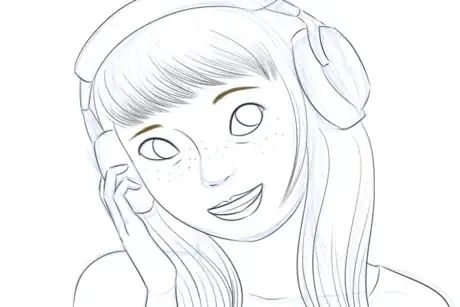
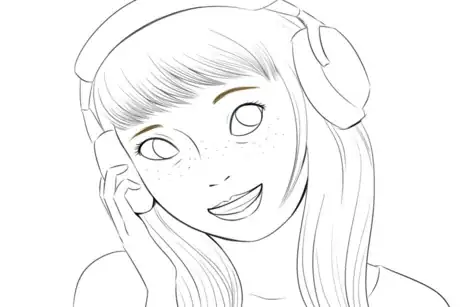
1Lower the opacity of your sketch and line the picture. Use thicker lines for basic shapes and areas you want to call attention to, and thinner lines for smaller details such as hair, eyebrows, freckles, and glasses.
- Keep your lines rounded and organic.
- You may line your drawing entirely in black, or use some other colors as well (e.g. brown for the eyebrows).
-
2Add small black shadows for the darkest parts of the picture. This includes general shadows such as the area under the chin, and places of overlap such as the area around the headphone and the hand. Darken lines you want to emphasize, such as the outline of the face and eyes.
- Darkening the corners of a smile will make it look more cheerful. However, too much of this may start to make the character look like they might not have Down Syndrome.
- Zoom out, or place your picture on the other side of the room, to see how balanced it looks. Refine as desired.
-
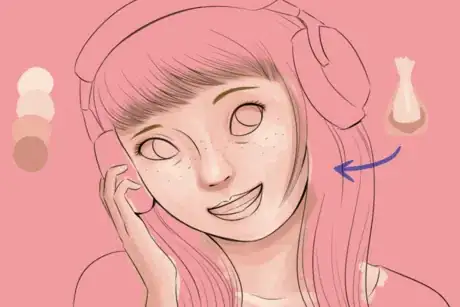
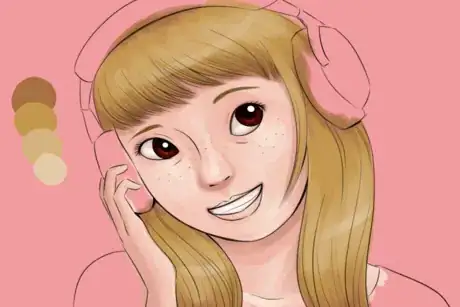
3Fill the background with a color besides white and start shading the face. The nonwhite background color will encourage you to use contrast. Many people with Down Syndrome have a cool complexion, so use cooler and desaturated tones. Take care to keep the cheeks looking full and rounded.
- Many white people with Down Syndrome have extremely fair complexions.
- Think of the nose as an elongated teardrop. The deepest shadow is usually directly below the nose, with some shading on either side and a lighter part on the middle.
-
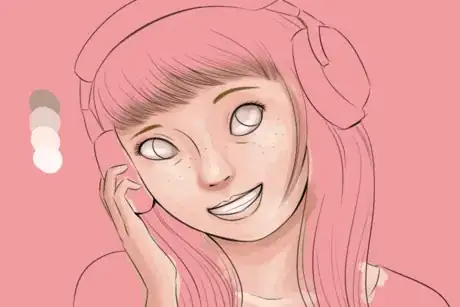
4Shade the teeth and the whites of the eyes. Fill them both with a medium grey-brown color and work your way up to a near white tone. The deeper tones will suggest shadows cast by the eyelids and the corners of the mouth, and it will look more three-dimensional.
- It is normal for work to look creepy at this stage. It will improve once the eyes are finished.
-
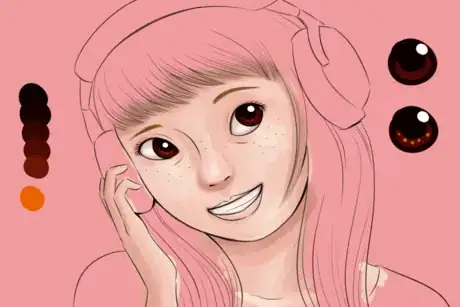
5Color the eyes. Start with your darkest color, working up to the lightest one. Many people with Down Syndrome have Brushfield spots—little whitish dots in the iris, close to the pupil.
- The top eye on the right shows how the eyes were shaded. The bottom eye shows the same eye with Brushfield spots.
-
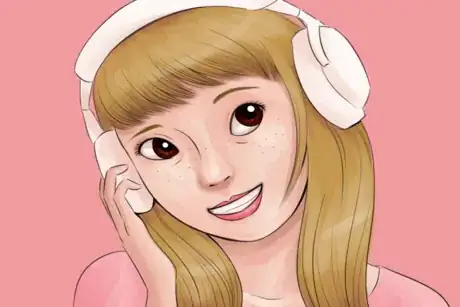
6Shade in the hair. Flick your brush in the same direction that the hair flows. Apply the darkest color to the edges of the hair, and put layers of lighter colors on top. This artist added the lightest color in a stripe on top.
-
7Color in the lips, shirt, and any remaining props. If the character is wearing lipstick or lip gloss, add a highlight or two on the lips as shown above. The shirt does not need to be detailed, as the focus is on the face.
-
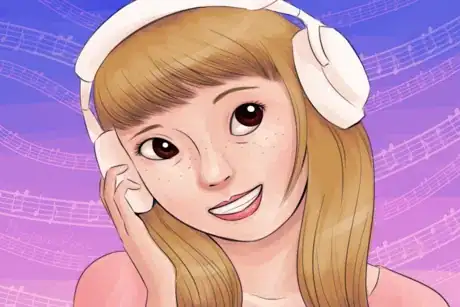
8Color your background as desired and fine-tune your image. Look over the shading and consider tweaking the colors. This artist added a Gradient Map layer at 15% opacity to enhance the color.
- Now is a good time to zoom out or stand back from your artwork again to see how it looks from a distance. You may also notice things needing correction—for example, the mouth was made less pointy.
- Don't forget to sign your work!
Community Q&A
-
QuestionHow do I draw a person?
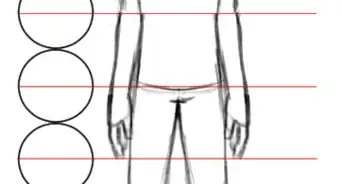
 Community AnswerMake a circle for the head, a square for the body, and lines for the legs and arms. Then, add details and refine your lines so they look more realistic.
 -
QuestionWhat if someone says it's a bad idea to make a character with Down syndrome, and if someone gets mad do I have to remove it?
 AlexisCommunity AnswerNo, everyone is going to have their own opinion on it. While some may say that, as long as it's not meant to be rude or insulting, then you can draw it and you won't have to remove it.






Medical Disclaimer
The content of this article is not intended to be a substitute for professional medical advice, examination, diagnosis, or treatment. You should always contact your doctor or other qualified healthcare professional before starting, changing, or stopping any kind of health treatment.
Read More...