A step-by-step guide to editing Google Docs on multiple devices
X
wikiHow is a “wiki,” similar to Wikipedia, which means that many of our articles are co-written by multiple authors. To create this article, 10 people, some anonymous, worked to edit and improve it over time.
The wikiHow Tech Team also followed the article's instructions and verified that they work.
This article has been viewed 60,438 times.
Learn more...
With Google Docs, you can create online documents (Docs, Sheets, Slides, and Forms), share such documents with colleagues, and collaborate on projects from wherever you are. You can also access these documents and edit them easily from its website and your mobile device.
Steps
Method 1
Method 1 of 2:
Editing Google Doc on the Website
Opening the Document
-
1Log into Google Drive. Google documents are stored on Google Drive, so it’s where you will be able to access them. Open a new web tab or window, visit drive.google.com, and log in using your Google email address and password. Click “Sign in” to proceed.
-
2Select the document to edit. A list of all documents saved on your Google Drive will be displayed in the middle section of the page. Scroll through the list and double-click on the document to open it.
- Alternatively, you can search for the document instead of scrolling through the list. Use the search box found at the top of the page. Type the name of the document and click the blue “Search” button in front of the box. Your document will then be returned. Double-click on it to open it.
- If you want to upload a document not created in Google Doc (for example, a MS Word doc), just upload it to Google Drive. Once uploaded, right-click on the document and open as “Google Document.”
Advertisement -
3Start editing. Place your cursor to the point where you want to make edits, and then make the changes. Proceed to the next section on “Editing the Document” for details on what you can edit in Google Docs. On a Google Doc, you can do a lot of editing, including adding new content, deleting some information, changing font type/size, inserting image, spacing and even adding paragraphs to your document.


Advertisement
Editing the Document
-
1Add and delete content. Position your cursor and type the content you want to add. Any information you type is automatically added to Google Doc.
- To delete content from a Google Doc, position your cursor in front of the content to be deleted then press the Backspace key on keyboard to delete that particular information.
-
2Change the font type and text. Select everything in the Google Doc by pressing CTRL (or CMD in Mac) + A on your keyboard. Alternatively, you can go to the Edit tab on the menu bar at the top and then click “Select all.”
- Changing the font type—Go to the toolbar at the top, and click the font type drop-down menu. A list of various font types will drop down. Click the one you want to use on the document, and the changes will be made to the selected text automatically.
- Changing the font size—While all characters are selected, take your mouse and click the font size drop-down menu at the toolbar. Select the font size you want to use for your text. A font size of at least 12 is recommended for official documents.
-
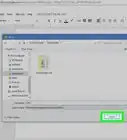
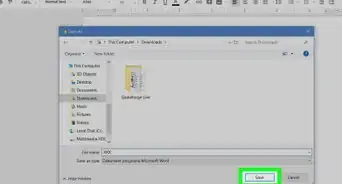
3Insert images. Position your cursor at the point you want to add the image then click the Insert tab at the top. A menu will drop down; select “Image” from the options.
- Use the file explorer that appears to navigate through your folders and locate the image you want to insert. Once you find it, double-click the image file to upload and insert it into the document.
-
4Adjust the spacing. Select all characters on the Google Doc by pressing CTRL (or CMD in Mac) + A on your keyboard. Alternatively, you can go to the Edit tab on the menu bar at the top and then click “Select all.”
- Go to Spacing tab on toolbar. The tab is represented by 5 horizontal lines. Click on it to view options under spacing.
- Specify the spacing you prefer. Spacing can be single, double, 1.5, or you can specify a customized spacing value. Click on your preferred spacing from the list. To customize the spacing, click the “Customize spacing” option at the bottom of the list. A text box will appear. Type the custom spacing value then click “Apply”. A spacing of 1.5 is recommended for official documents.
-
5Make your text bold, underlined, or italicized. Highlight the text you want to emphasize. Click at the beginning of the text, hold and move the mouse to the end of the text you want to select.
- To bold text, hit CTRL (or CMD in Mac) + B on your keyboard. Alternatively, you can click the Bold icon on the editing toolbar, represented by a B.
- To italicize text, hit CTRL (or CMD in Mac) + I on your keyboard. Alternatively, you can click the Italics icon on the editing toolbar, represented by an I
- To underline text, hit CTRL (or CMD in Mac) + U on your keyboard. Alternatively, you can click the Underline icon on the editing toolbar, represented by a U.
-
6Add a link. A link establishes a connection to another web page. To add a link, hit CTRL (or CMD in Mac) + K on your keyboard. Alternatively, click the Insert menu and choose the “Link” option.
- A pop-up box will appear with two text fields. On the first field, type the description of the link, and on the the second field, type the source address, such as “https://www.google.com” Then click “Apply” add the link.
-
7Adjust the paragraph alignment (Left, Center, Right, or Justify). Highlight the paragraph you want to align first.
- To align the paragraph to the left, hit CTRL (or CMD in Mac) + Shift + L. Alternatively, you can click the left alignment icon on the editing toolbar, represented by six horizontal lines. These lines are aligned (uniform) from the left.
- To align a paragraph to the right, hit CTRL (or CMD in Mac) + Shift + R. Alternatively, you can click the right alignment icon on the editing toolbar, represented by six horizontal lines aligned from the right.
- To align a paragraph to the center, hit CTRL (or CMD in Mac) + Shift + E. Alternatively, you can click the center alignment icon on the editing toolbar, represented by six horizontal lines are aligned at the center.
- To justify a paragraph, hit CTRL (or CMD in Mac) + Shift + J. Alternatively, you can click the justify alignment icon on the editing toolbar represented by six horizontal lines. These lines on both the left and right side are uniform.
-
8Adjust the indentation. Highlight the text you want to indent first then hit CTRL (or CMD in Mac) + [ to decrease your indentation, or CTRL (or CMD in Mac) + ] to increase the indentation to the selected text.
- Alternatively, you can use the indentation icons on the editing toolbar, represented by six horizontal lines with an arrow from the left end. The icon for increasing indentation has an arrow head pointing forward and for decreasing indentation has an arrow head pointing backward.
-
9Add bullets. Position your cursor at the start of the text you want to add bullets. Hit CTRL (or CMD in Mac) + Shift + 8. Alternatively, click the bullets icon on the toolbar. This icon is represented with three dots with a line coming out of each one to the right.
-
10Add a numbered list. Position your cursor at the start of the text you want to add numbers to. Hit CTRL (or CMD in Mac) + Shift + 7. Alternatively, click on the numbering icon on the toolbar. This icon is represented with numbers 1, 2, and 3 with lines coming out from each one.


Advertisement
Method 2
Method 2 of 2:
Editing Google Docs on Your Mobile Device
Opening a Document
-
1Launch Google Docs App. Go to the apps menu of your mobile device and tap the Google Docs icon to open the app. If you do not have the app installed on your phone, visit your respective store and download the app for free.
-
2Select the document to edit. When the app is started, it directs you to the screen having all your Google documents. Scroll through the list, and tap the document you want to open. The document will expand and open up.
-
3Tap the “Editing” button at the bottom of the document. This button is represented by a pencil icon. Tap this button to edit the document. When you tap it, the keypad of your mobile device pops up, allowing you to make changes.
-
4Start editing the document. Tap the point where you want to make the changes and edit your document appropriately. There are many editing tools you can use, which have been outlined further in the next section. The changes you make are saved automatically. When done, tap the back button of your device to go back to your Google Docs home screen.


Advertisement
Editing the Document
-
1Add and delete content. To add content to a Google Doc, tap the location you want to edit. Once you tap on the location, your device’s keyboard will appear. Use it to type new text or edit existing text.
- To delete content from a Google Doc, tap the exact location you want to delete, then tap on the backspace key on your phone keypad to delete that particular information.
-
2Change font type and text. Long-press on your screen till options pop up. Tap “Select all” to have the characters of the document selected. Tap the menu tab found at the top right of the screen and is represented by three short lines. You will now be directed to a screen with more options for editing the document.
- Changing the font type—Tap the font option from the list and choose your preferred font type by tapping it. Popular Fonts here include Times New Roman, Arial, Verdana, and Calibri.
- Changing the font size—Tap the size option then select your favorite font size from the options that are listed. Font size of at least 12 is recommended for official documents.
-
3Adjust the spacing. Select all characters on the document then open the Menu tab at the top.
- Go to the “Line spacing” option. To increase spacing, tap the arrow pointing upward, and to reduce, tap the other arrow that is pointing downward.
-
4Add bullets. Position your cursor at the start of the text you want to add bullets by tapping the exact location on the document. Open the Menu tab at the top.
- Tap the bullets icon, represented by three dots with lines coming out of each one, to add bullets to the selected area.
-
5Add a numbered list. Position your cursor at the start of the text you want to add bullets by tapping the exact location on the document. Then open the Menu tab at the top.
- Tap the numbering icon, represented by the numbers 1, 2, and 3 with lines coming out of each, to add numbering to the document.
-
6Make your text bold, underlined, or italicized. Long-press the text you want to change on to highlight it then open the Menu tab at the top.
- To bold text, tap the Bold icon that is represented by a B.
- To italicize text, tap the Italics icon that is represented by an I.
- To underline text, tap the Underline icon that is represented by a U.


Advertisement


About This Article
Advertisement