X
wikiHow is a “wiki,” similar to Wikipedia, which means that many of our articles are co-written by multiple authors. To create this article, 13 people, some anonymous, worked to edit and improve it over time.
The wikiHow Tech Team also followed the article's instructions and verified that they work.
This article has been viewed 238,458 times.
Learn more...
If you’ve got a passion for computer gaming, you probably want to make your games look and perform as good as possible. One of the keys to a powerful gaming computer is the graphics card, and with NVIDIA cards, you can link up two or more of the same card to massively increase your performance. Follow this guide to learn how.
Steps
Part 1
Part 1 of 3:
Installing the Cards
-
1Make sure your operating system supports SLI. Two-card SLI is supported on Windows Vista, 7, 8, 10, and Linux. Three- and four-card SLI is supported in Windows Vista, 7, 8, and 10, but not Linux.
-
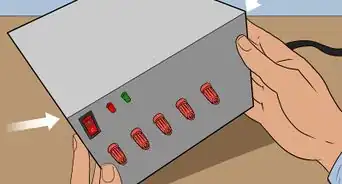
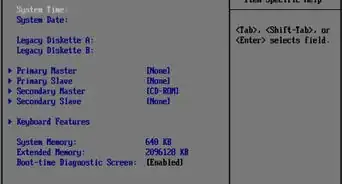
2Check your existing components. SLI requires a motherboard with multiple PCI-Express (PCI-E) slots, as well as a power supply with enough connectors for multiple graphics cards. You will want a power supply that outputs at least 650 watts.
- Certain cards allow up to four simultaneous cards running in SLI. Most cards are made for two-card setups.
- More cards means more power required.
Advertisement -
3Obtain SLI-compatible cards. Almost all recent NVidia cards are capable of being installed in an SLI configuration. You will need at least two cards of the same model and memory to be installed as SLI.
- The cards need to be made by Nvidia but not necessarily the same manufacturer (E.g. Gigabyte or MSI) and be the same model and memory amount.
- The cards do not need to be the same clock speed, though you may see a decrease in performance output if the speeds are not the same.
-
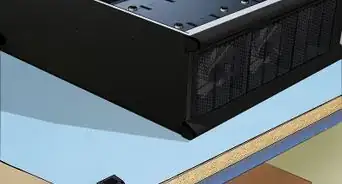
4Install the graphics cards. Install the two cards in the PCI-E slots on your motherboard. The graphics cards are inserted into the slots as normal. Take care not to break any tabs, or insert the cards at odd angles. Once the cards are inserted, secure them to the case with screws.
-
5Install the SLI bridge. All SLI-capable boards should come packaged with an SLI bridge. This connector attaches to the top of the cards, and connects the cards to each other. This allows the cards to talk directly to each other.
- The bridge is not required for SLI to be enabled. If there is no bridge present, the SLI connecting will be made through the PCI slots of the motherboard. This will result in reduced-performance.


Advertisement
Part 2
Part 2 of 3:
Configuring SLI
-
1Turn on your computer. Once you have your graphics cards installed, close up your case and reboot your computer. You shouldn’t need to make any settings changes until after Windows or Linux loads.
-
2Install the drivers. Your operating system should automatically detect your graphics cards and attempt to install drivers for them. This process can take longer than a single graphics card installation because the drivers need to be installed for each card separately.[1]
- If the installation doesn’t start automatically, download the latest drivers from the NVidia website, and run the installation file once the download is complete.
-
3Enable SLI. Once your drivers have finished installing, right-click on your desktop and select NVidia Control Panel. This will open a new window which will allow you to tweak your graphic’s settings. Find the menu option labeled “Configure SLI, Surround, Physx”.
- Select “Maximize 3D performance” and click Apply.
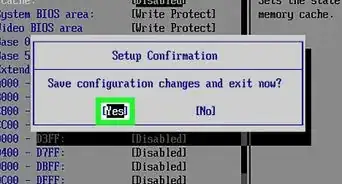
- The screen will flash several times as the SLI configuration is enabled. You will be asked if you want to keep these settings.
- If the option is not there, your system is most likely not recognizing one or more of your cards. Open the Device Manager in the Control Panel and check that all of your drives are visible under the Display Adapters section. If your cards are not showing up, check that they are connected properly, and that the drivers have been installed for all of them.
-
4Turn on SLI. Click the Manage 3D Settings link in the left menu. Under Global Settings, scroll down until you find the “SLI performance mode” entry. Change the settings from “Single GPU” to “Alternate Frame Rendering 2”. This will turn on SLI mode for all of your programs.
- You can make adjustments to individual games by clicking the Program Settings tab and then selecting “SLI performance mode”.


Advertisement
Part 3
Part 3 of 3:
Testing Performance
-
1Enable frames per second. This will vary depending on the game you are running, so you will need to look up the specific instructions for the game you want to test. Frames per second is a baseline test for computing power, and can show you have well everything is being rendered. Most gaming enthusiasts shoot for a solid 60 frames per second with high settings.
-
2Turn on the SLI visual indicator. In the NVidia Control Panel, open the “3D Settings” menu. Enable the “Show SLI Visual Indicators” option. This will create a bar on the left side of your screen.[2]
- Run your game. Once you have a game running, you will see the bar change. A taller bar means that SLI scaling is increasing, meaning that your SLI cards are working well and improving your visuals. If the bar is not very tall, then the SLI configuration is not affecting the display as much.


Advertisement
Community Q&A
-
QuestionI have a GTX 760 VGA. Do I need the same configuration VGA card for SLI configuration, or can I use a different VGA card for that?
 Community AnswerGraphics cards in SLI configuration need to be the same in order for this performance upgrade to work properly.
Advertisement


References
About This Article
Advertisement