This article was co-authored by wikiHow staff writer, Jack Lloyd. Jack Lloyd is a Technology Writer and Editor for wikiHow. He has over two years of experience writing and editing technology-related articles. He is technology enthusiast and an English teacher.
wikiHow marks an article as reader-approved once it receives enough positive feedback. This article received 16 testimonials and 84% of readers who voted found it helpful, earning it our reader-approved status.
This article has been viewed 1,805,069 times.
Learn more...
When working with a Microsoft Excel spreadsheet with lots of data, you'll probably encounter duplicate entries. Microsoft Excel's Conditional Formatting feature shows you exactly where duplicates are, while the Remove Duplicates feature will delete them for you. Viewing and deleting duplicates ensures that your data and presentation are as accurate as possible.
Steps
Using Conditional Formatting
-
1Open your original file. The first thing you'll need to do is select all data you wish to examine for duplicates.
-
2Click the cell in the upper left-hand corner of your data group. This begins the selecting process.Advertisement
-
3Hold down the ⇧ Shift key and click the final cell. Note that the final cell should be in the lower right-hand corner of your data group. This will select all of your data.
- You can do this in any order (e.g., click the lower right-hand box first, then highlight from there).
-
4Click on "Conditional Formatting." It can be found in the "Home" tab/ribbon of the toolbar (in many cases, under the "Styles" section).[1] Clicking it will prompt a drop-down menu.
-
5Select "Highlight Cells Rules," then "Duplicate Values." Make sure your data is still highlighted when you do this. This will open a window with customization options in another drop-down menu.[2]
-
6Select "Duplicate Values" from the drop-down menu.
- If you instead wish to display all unique values, you can select "Unique" instead.
-
7Choose your highlight color. The highlight color will designate duplicates. The default is light red with dark red text.[3]
-
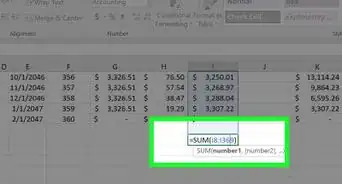
8Click "OK" to view your results.
-
9Select a duplicate's box and press Delete to delete it. You won't want to delete these values if each piece of data represents something (e.g., a survey).
- Once you delete a one-time duplicate, its partner value will lose its highlight.
-
10Click on "Conditional Formatting" again. Whether you deleted your duplicates or not, you should remove the highlight formatting before exiting the document.
-
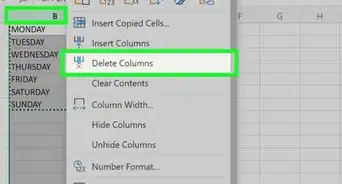
11Select "Clear Rules," then "Clear Rules from Entire Sheet" to clear formatting. This will remove the highlighting around any duplicates you didn't delete.[4]
- If you have multiple sections of your spreadsheet formatted, you can select a specific area and click "Clear Rules from Selected Cells" to remove their highlighting.
-
12Save your document's changes. If you're satisfied with your revisions, you have successfully found and deleted duplicates in Excel!


Using Excel's Remove Duplicates Feature
-
1Open your original file. The first thing you'll need to do is select all data you wish to examine for duplicates.
-
2Click the cell in the upper left-hand corner of your data group. This begins the selecting process.
-
3Hold down the ⇧ Shift key and click the final cell. The final cell is in the lower right-hand corner of your data group. This will select all of your data.
- You can do this in any order (e.g., click the lower right-hand box first, then highlight from there).
-
4Click on the "Data" tab in the top section of the screen.
-
5Find the "Data Tools" section of the toolbar. This section includes tools to manipulate your selected data, including the "Remove Duplicates" feature.
-
6Click "Remove Duplicates." This will bring up a customization window.
-
7Click "Select All." This will verify all of your columns have been selected.[5]
-
8Check any columns you wish to use this tool on. The default setting has all columns checked.
-
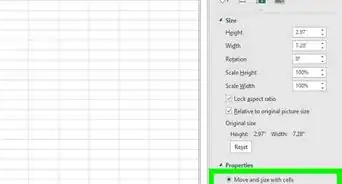
9Click the "My data has headers" option, if applicable. This will prompt the program to label the first entry in each column as a header, leaving them out of the deletion process.
-
10Click "OK" to remove duplicates. When you are satisfied with your options, click "OK". This will automatically remove any duplicate values from your selection.
- If the program tells you that there aren't any duplicates--especially if you know there are--try placing a check next to individual columns in the "Remove Duplicates" window. Scanning each column one at a time will resolve any errors here.
-
11Save your document's changes. If you're satisfied with your revisions, you have successfully deleted duplicates in Excel!


Community Q&A
-
QuestionHow do I get rid of colored highlighted areas in Excel?
 Community AnswerPress Ctrl-H, click Options, and then click the top Format button to search for colored cells (using the Fill tab). Leave the "Replace with" field blank to delete the contents of cells with the format you specified.
 -
QuestionHow can I tell if a motherboard or hard drive is bad in a PC?
 Community AnswerFaulty hard drives will often have data that is said to be corrupted. Motherboards that are faulty result in hardware orientated failures.
 -
QuestionCan this method be used to find duplicates between several different sheets? If not, what method can I use to do that?
 KadrigulerCommunity AnswerThe repeating data with count of repetitions can be found easily with Excel Vba.
wikiHow Video: How to Find Duplicates in Excel
Warnings
- Always save your work when you're done!⧼thumbs_response⧽


References
- ↑ https://support.office.com/en-us/article/Filter-for-unique-values-or-remove-duplicate-values-ccf664b0-81d6-449b-bbe1-8daaec1e83c2
- ↑ https://support.office.com/en-us/article/Filter-for-unique-values-or-remove-duplicate-values-ccf664b0-81d6-449b-bbe1-8daaec1e83c2
- ↑ http://www.accountingweb.com/technology/excel/identifying-duplicate-values-in-an-excel-list
- ↑ http://www.excel-easy.com/data-analysis/conditional-formatting.html#clear-rules
- ↑ http://www.excel-easy.com/examples/remove-duplicates.html
About This Article
To view duplicate cells in your worksheet, start by highlighting the column or row you want to check. Click the Home tab, and then click the Conditional Formatting button in the "Styles" area of the toolbar. Select Highlight Cells Rules on the menu, and then Duplicate Values. Now, choose how you'd like Excel to highlight the duplicates in your data, such as in Light Red Fill with Dark Red Text or with a Red Border. Click OK to see your highlighted duplicates. When you're finished, clear the special formatting by clicking the Conditional Formatting button and selecting Clear Rules and then Clear Rules from Entire Sheet. If you want to delete duplicates without viewing them first, select the cells you want to check, and then click the Data tab at the top. In the "Data Tool" area of the toolbar, click Remove Duplicates. Click the Select All button at the top-left corner of the window to select all columns, or just select the ones you want to check. Check the box to "My data has headers" if your column has a title cell at the top, and then click OK to remove duplicate cells from the selected area.