This article was co-authored by wikiHow staff writer, Nicole Levine, MFA. Nicole Levine is a Technology Writer and Editor for wikiHow. She has more than 20 years of experience creating technical documentation and leading support teams at major web hosting and software companies. Nicole also holds an MFA in Creative Writing from Portland State University and teaches composition, fiction-writing, and zine-making at various institutions.
The wikiHow Tech Team also followed the article's instructions and verified that they work.
This article has been viewed 144,137 times.
Learn more...
If your PC is running low on storage space, you're probably wondering which files are taking up the most room. The Windows File Explorer has a search function that lets you see and sort a list of your largest files. Keep in mind that Windows sometimes creates large files that are required for the system to run properly—don't delete large files unless you know exactly what the file is and what it does. This wikiHow teaches you how to find the largest files on your Windows PC.
Steps
-
1Press ⊞ Win+E. This opens the File Explorer. You can also open File Explorer by right-clicking the Windows Start menu and selecting File Explorer from the menu, or by clicking the folder icon on the taskbar.
-
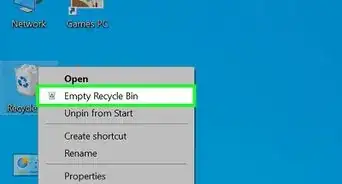
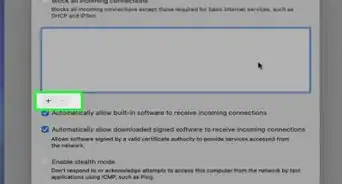
2Set your PC to show hidden files and folders (optional). If you want to accurately search for the largest files on your PC, it can be helpful to include hidden system files in your search. Just keep in mind that you shouldn't delete hidden system files because they are usually required by Windows to operate. If you want to delete large system files, such as old system restore points and old updates, use the Disk Cleanup Tool instead. To show hidden files and folders:
- Click the View tab at the top of File Explorer.
- Click Options in the upper-right corner of the window.
- Click the View tab at the top of the new window.
- Select Show hidden files, folders, and drives and click OK.
Advertisement -
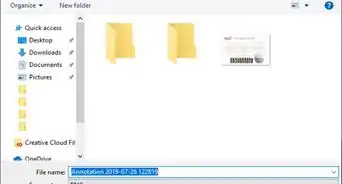
3Click This PC in the left panel of File Explorer. This displays all of the drives connected to your PC in the right panel.
-
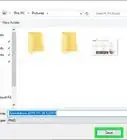
4Type an asterisk (*) into the search bar and press ↵ Enter. The search bar is in the upper-right corner of the File Explorer window. This tells Windows to display every single file and folder on your computer. It also opens the Search tab at the top of the screen.
- It will take a while for all files to appear, but you don't have to wait. Just go to the next step.
-
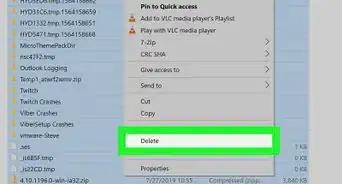
5Click the Size button on the toolbar. It's in the "Refine" section of the toolbar at the top of File Explorer. This opens a menu of different size ranges for files.
- If you don’t see this option, click the Search tab at the top of the window.
-
6Select Gigantic (> 4GB) in the menu. Once you do this, File Explorer will take a few moments to fetch and display all files that are larger than 4GB on your PC.
- If, instead of files, you see "No items match your search," you don't have any files that are larger than 4 GB. Click the Size button in the toolbar again and select Huge (1 – 4 GB).
- You can also specify that you want to see all files larger than a certain size by typing a filter into the search bar. If you wanted to see all files larger than 500 MB, you'd type size: >500MB in the search field and press Enter. Replace 500MB with any file size.
-
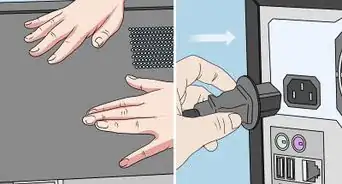
7Click the Details button to switch to Details View. Look for the two small icons at the bottom-right corner of the window—the first of the two icons (it looks like a checklist) is the Details View button. When you click this button, it switches to a view that more clearly displays each file's name, date, type, size, and location.
-
8Click the Size header above the file list to sort by size. It's one of the column headers above the list of files. This makes the biggest files in the selected size range appear at the top of the list. If you click this header again, the order will reverse.
-
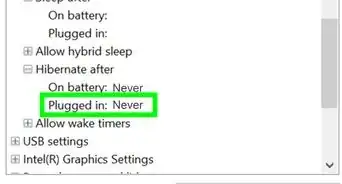
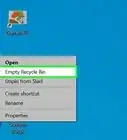
9Re-hide protected system files and folders (if you unhid them earlier). This helps you avoid accidentally deleting a required system file. Here's how to do so after you're finished browsing your files:
- Click the View tab at the top of File Explorer.
- Click Options in the upper-right corner of the window.
- Click the View tab at the top of the new window.
- Check Don't show hidden files, folders, or drives and click OK.


Our Most Loved Articles & Quizzes


-Step-17.webp)

About This Article

1. Open File Explorer.
2. Click This PC.
3. Type an asterisk into the Search bar and press Enter.
4. Click the Size button on the toolbar.
5. Select a size range to view.
6. Click the Details button to view details.
7. Click the Size column header to organize in size order.


-Step-17.webp)